
Chapter 2: Initial Setup File Maintenance
Option 5Customer Types
Use this function to enter and edit Customer Types records. Customer Types provides you with another way to subdivide your customers. Many reports in Accounts Receivable are sorted by Customer Type.
When you use this function, a record of all entries will be printed. For additions, all new field contents are printed; for deletions, the deleted record’s contents are shown; for changes, both old field contents and new field contents are shown; and in all cases, the user ID, date, and time are printed.
The screen shown below presents information about Customer Types.
This file allows you to subdivide your customers by type.
Initial Setup Customer Types screen
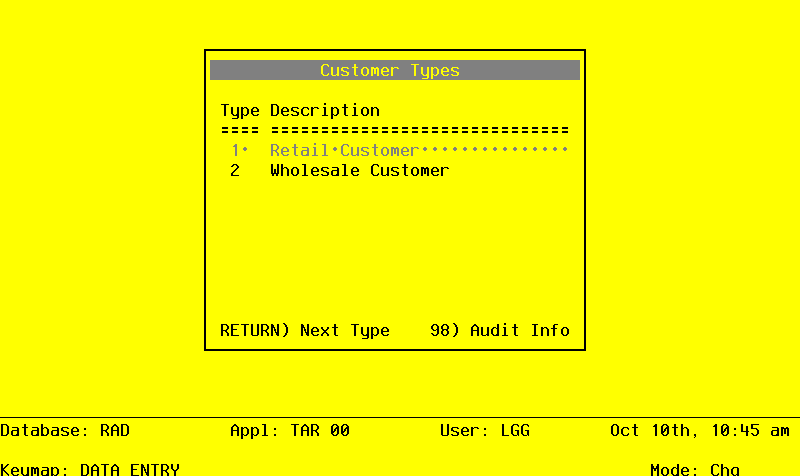
When the key value for a particular record is requested, you can review all the records in the file by selecting the Scan option. The records will be presented on an “Access” screen, and you will be allowed to scan the available data until you find the record you want. Then, position the cursor by that record and press ENTER; the record will be displayed for editing.
Note that the Audit Info option is available at the bottom of this screen. When this option is invoked, the Audit Information overlay appears and displays the date the record was created and who created it, as well as the date the record was last modified and who modified it. Press the END key or the RETURN key to clear the overlay from your screen. The information displayed in the Audit Information overlay is system-supplied and non-modifiable.
Data items for the preceding screen are described below:
- Customer Type
Positive number, up to 2 digits
By using PFI you may use this as an ‘access key’ for selecting records.
Supply a unique code to identify this customer type.
- Description
Alphanumeric, up to 30 characters Required
Describe this customer type. This description is printed on various reports throughout Accounts Receivable.
The entered data is validated. During validation, including access to other fields, conditions may be found which cause messages to be displayed. Errors (E), Warnings (W), and messages (M) that may result are shown below:
Press ENTER to save the information on this screen.
Select Next Record to go to the next Customer Types record.
At this screen, the use of the MODE keys - ADD, DEL, CHG, or INQ - pertain to those records in the Customer Types file.