
Chapter 4: Using APPX Files with Excel
Using APPX Files with Excel
The client PC is now ready to access APPX® Databases from Microsoft® Excel via Microsoft® Query. A few basic steps will be covered here but your favorite reference source for Excel should be consulted for more detailed instructions on using Microsoft® Query.
Note: Microsoft® Query may not have been installed on the client PC if Excel was installed using the “typical” installation option. If not, it must be installed from the Excel installation CD.
To access an APPX® database from Excel you must first design a query. A query is used to access specific fields from a specific APPX® file and import them into the worksheet in a detailed or summarized format. Once a query is defined, it is always available to run. Unlimited queries can be defined and saved for repeated use. Defining a query is simple:
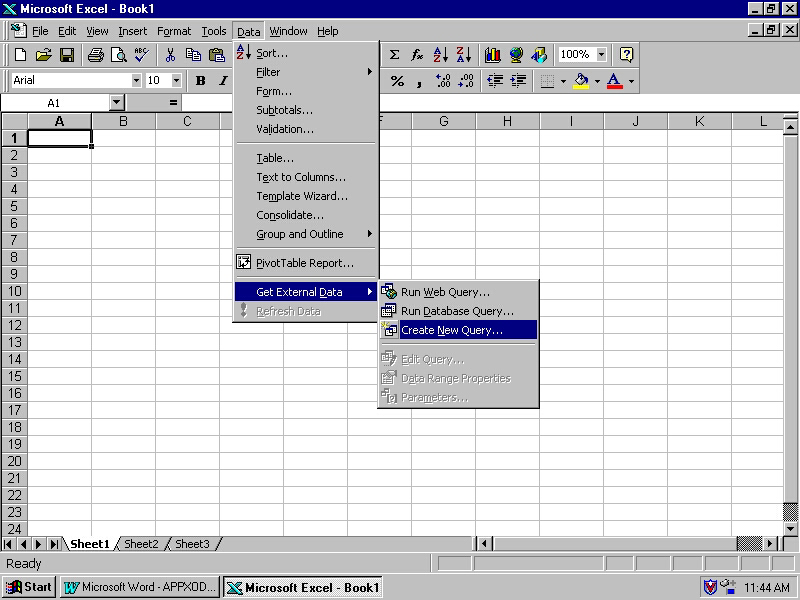
- From Excel’s toolbar, select
Data, Get External Data, then Create New Query(as shown in Figure 6).
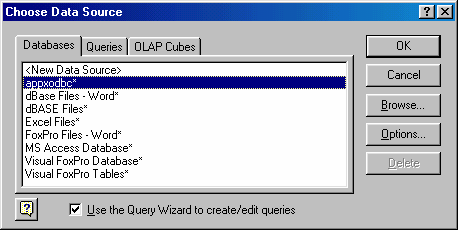
- When creating a new query, Excel requires that you choose the database to from which the data will be retrieved. Under the
Databasestab of theChoose Data Sourcepop-up window, selectappxodbcfor the Database Driver (see Figure 7), and click Ok.
- Next, you will be presented with a login dialog box that will connect you with the APPX® database (see Figure 8).
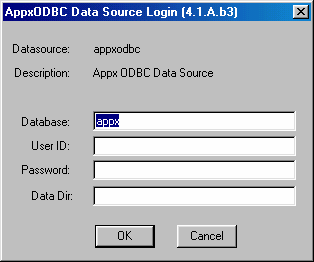
- Do not change the ‘Database’ setting. Enter your normal user id and password, and click Ok. Do not put anything in the Data Dir field. When appxodbc connects to the database, you will see the list of files available for use in Excel (see Figure 9). It is normal to see each file listed twice.
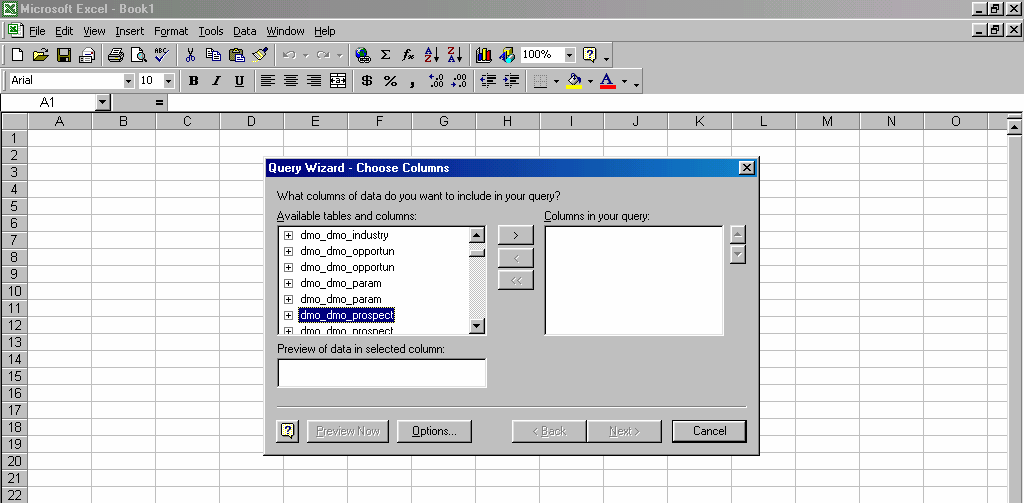
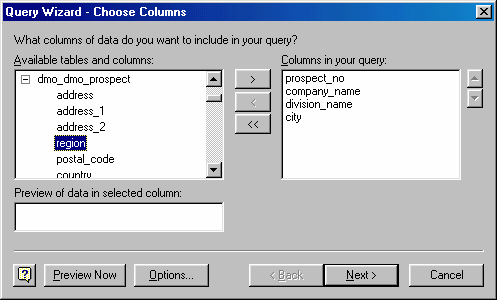
- From Query Wizard – Choose Columns, select the APPX® file name, then the fields you want to import (see Figure 10). Click
Next.
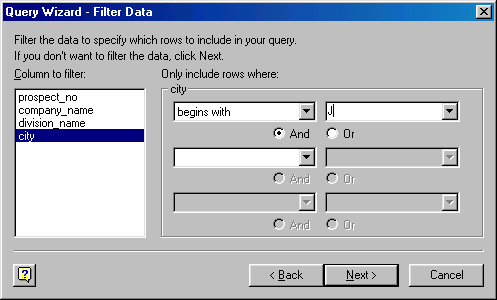
- From Query Wizard – Filter Data, indicate any record selection criteria to be used in importing records (see Figure 11). Click
Next.
- From Query Wizard – Sort Order, indicate how the imported records are to be sorted. Click
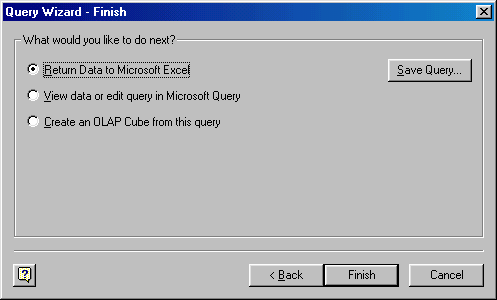
Finish. - The ‘Query Wizard – Finish’ dialog box appears (see Figure 12). You can either return the results directly to your worksheet, or save the query for re use, or both. If you decide to return the results to your worksheet, note that the time it takes for the selection process to complete varies based on the size of the APPX® file.
- To retrieve a previously saved query, from the taskbar, select
Data, Get External Data, thenRun Database Query. - Select the query to run.
- Select where the imported data should be placed (Existing Worksheet, New Worksheet, or Pivot Table Report) then click
OK. - The selected data is imported into your Excel Worksheet. While viewing the data, you can select
Datafrom the taskbar, thenRefresh Datato refresh the view and see any records that have been added or modified by APPX® users since the query results were first displayed.
Note: Once a query has been defined, it can be run at any time by selecting Data,Get External Data then Run Database Query from the Excel taskbar.
Note: Several other file importation options exist including the use of SQL commands to further refine the query. Refer to your preferred reference manual or on-line help (check the topic import) for both Excel and Microsoft® Query.