Defining Your Databases, Departments, Workgroups, Roles & Users
The first step in setting up RBS is to define your company's structure.Overview:
The first step required when implementing a security management scheme is to define the five-level Security Hierarchy for Database, Department, Workgroup, Role, and User. This is done by running the 'Security Hierarchy Maintenance' process on the 'Security' tab of the RBS menu. A configuration setting controls whether or not users can belong to more than one Role at a time. You may wish to set that (without activating RBS) before defining your hierarchy. See Setting RBS Configuration. After defining the hierarchy, you may want to print it via Security Hierarchy List/Export on the 'Reports' tab of the RBS menu. You can copy the Hierarchy, so if you have a multiple databases, it is not necessary to define each database individually. Define the first hierarchy, then use the Copy Security program on the 'Utilities' tab of the RBS menu to set up your other databases. There are also utilities to export and import the hierarchy, which can be used to transfer the hierarchy to another machine. Here is an example of how a simple Security Hierarchy might look.-
Database : ACME Insurance, Inc. (APPX Database AAA)
-
Department: Sales
-
Workgroup: New Sales
-
Role: Manager
-
User: John Rogers (APPX User JR)
-
-
Role: Inside Rep
-
User: William Smith (APPX User WS)
-
User: Samuel Adams (APPX User SA)
-
-
-
Workgroup: Administration
-
Role: Manager
-
User: Mary Jones (APPX User MJ)
-
-
Roles: Clerical (APPX User BS)
-
User: Brenda Starr
-
-
-
-
Department: Claims
-
Workgroup: Administration
-
Role: Manager
-
User: Bruce Williams
-
-
Role: Clerical
-
User: Wanda Scott
-
-
-
-
Description:
When you run 'Security Hierarchy Maintenance' you will see the following screen: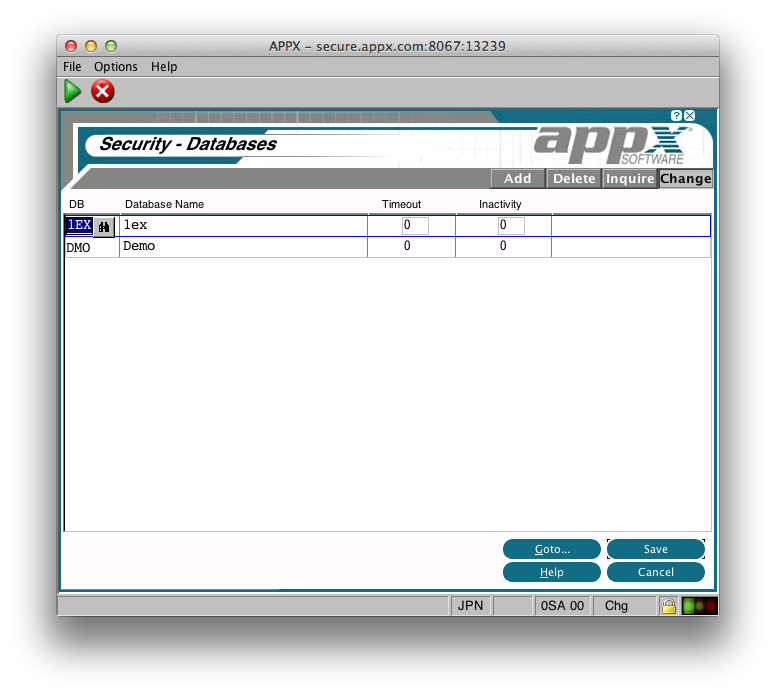 The Database Id must refer to a Database you have defined in Appx System Administration. You can also set the Timeout and Inactivity settings here. When you press Enter, you will be taken to the 'Department' level:
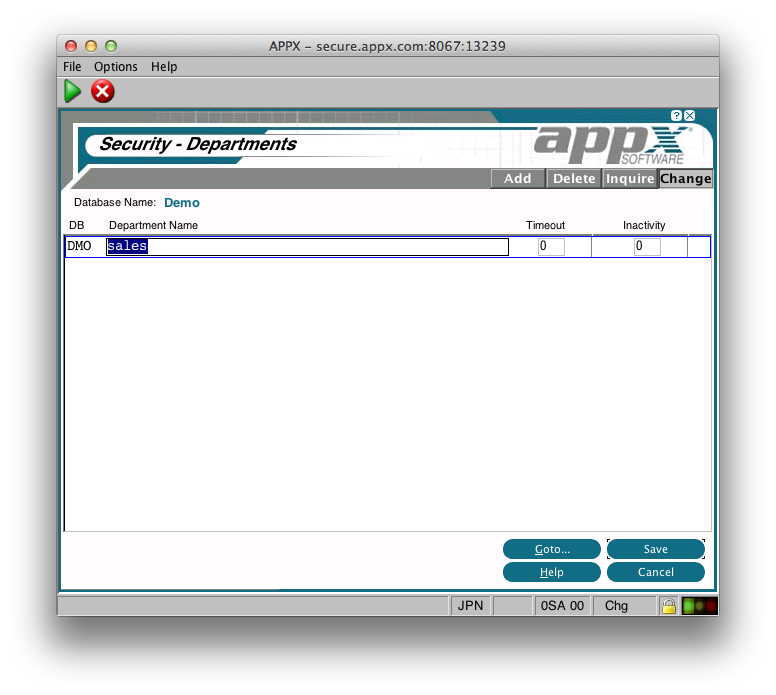 Here you define the Departments within the selected Database. Department names must be unique within the Database. A Timeout and Inactivity setting can also be specified at this level. When you press Enter, you will be taken to 'Workgroups' for the Department:
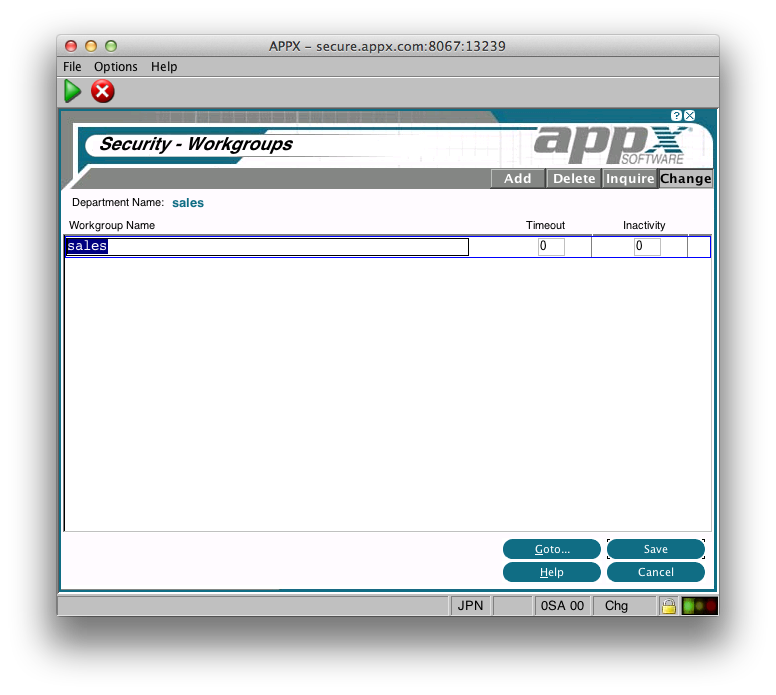 As with Departments, you can specify the Timeout and Inactivity settings. Workgroup names must be unique within the Department. When you press Enter, you will be taken to the 'Roles' for the Workgroup:
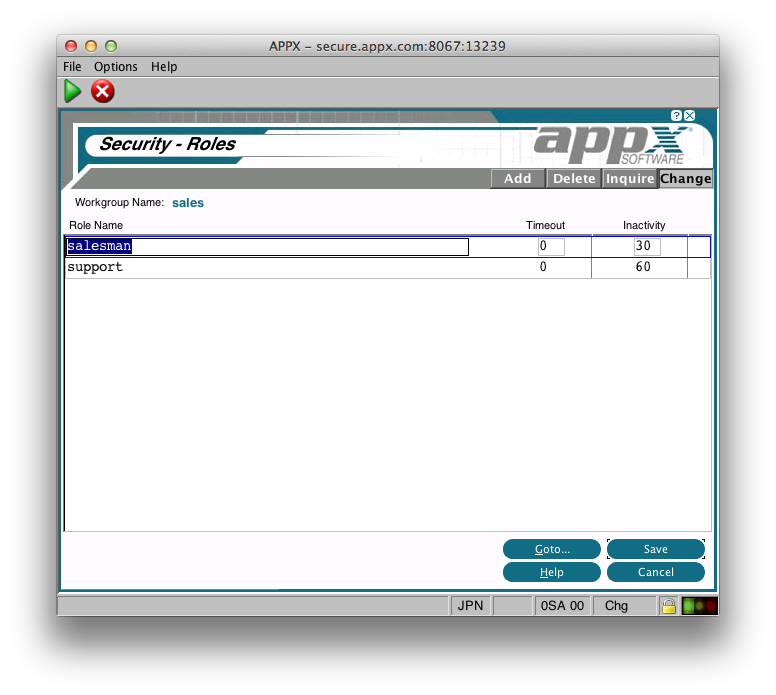 Again, we have options for the Timeout and Inactivity settings. Roles must be unique within a Workgroup. When you press Enter, you will be taken to 'Users':
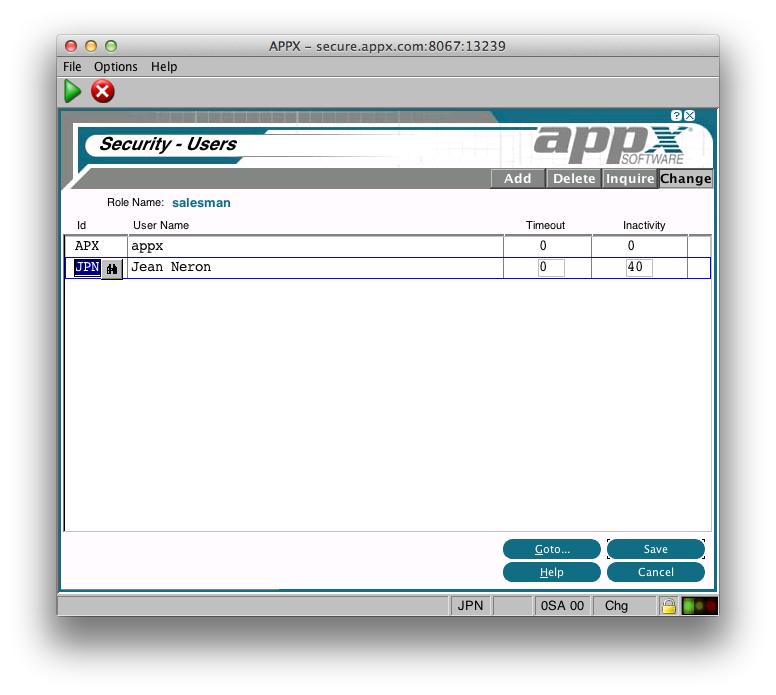 This is the lowest level in the hierarchy and the timeout/inactivity settings here will take priority over higher levels. The user must be defined in Appx System Administration.
Comments:
Read what other users have said about this page or add your own comments.-- JeanNeron - 2012-10-31
Ideas, requests, problems regarding TWiki? Send feedback

