Difference: APPXADCMacInstallation (1 vs. 2)
Revision 22009-11-19 - JeanNeron
| Line: 1 to 1 | ||||||||
|---|---|---|---|---|---|---|---|---|
APPX Desktop Client Installation - Mac OS/XRequirements | ||||||||
| Changed: | ||||||||
| < < | IMPORTANT: The APPX Desktop Client for OS/X requires Java SE 6. This is included in the Snow Leopard release of OS/X, but not in earlier versions. There are third party versions of this for earlier versions of OS/X, but only for the Intel based Macs. If you are running a PowerPC based Mac, you will not be able to use Release 5 of the APPX Desktop Client. | |||||||
| > > | IMPORTANT: Mac Desktops will require Java SE 6. This is included in OS/X 10.6 (Snow Leopard) and higher. Older Intel based Macs might be able to use a third party Java runtime but this has not been tested. PowerPC based Macs will not be able to run the APPX Desktop Client at all, since Apple does not provide Java SE 6 for this platform. | |||||||
| If you have upgraded your Intel based Mac from an earlier version of OS/X, you must make sure the Java SE 6 is the preferred runtime for Java based applications. This setting can be found in the Java Preferences application (under Applications/Utilities): | ||||||||
| Line: 29 to 29 | ||||||||
 | ||||||||
| Changed: | ||||||||
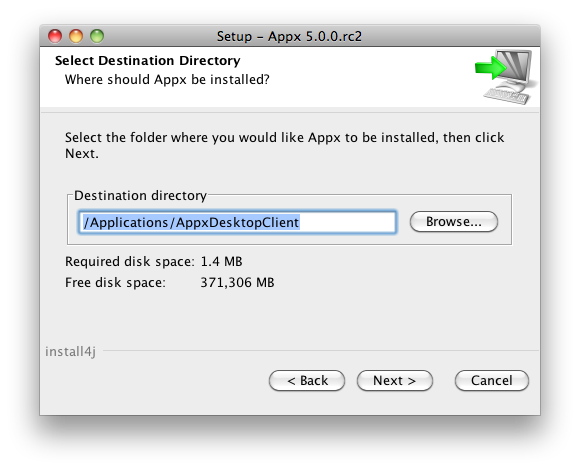
| < < | Specify the Destination Directory into which APPX is to be installed. As a matter of convention, the APPX Desktop Client is usually installed into /Applications/AppxDesktopClient but may be installed into the directory of your choice. | |||||||
| > > | Specify the Destination Directory into which the client is to be installed. As a matter of convention, the APPX Desktop Client is usually installed into /Applications/AppxDesktopClient but may be installed into the directory of your choice. | |||||||
 | ||||||||
| Changed: | ||||||||
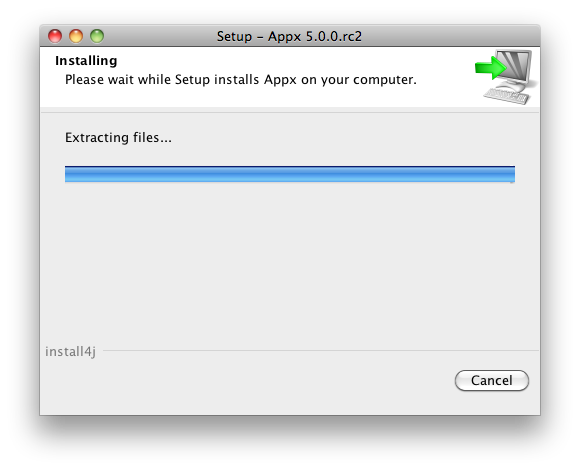
| < < | APPX will then be installed into the specified destination directory. | |||||||
| > > | The client will then be installed into the specified destination directory. | |||||||
| Changed: | ||||||||
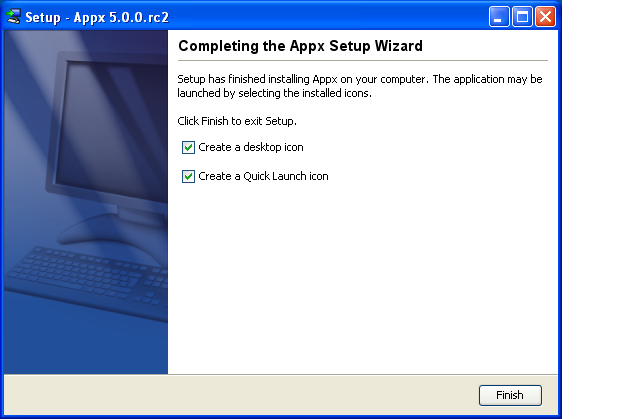
| < < |  Finally, you may specify whether or not you want the APPX Setup Wizard to create a shortcut on your desktop and/or a quick launch icon on the taskbar. After specifying the appropriate options, click on the "Finish" button to end the APPX Setup Wizard. APPX will then automatically run to allow you to complete the configuration and installation of APPX. | |||||||
| > > | Finally, you may specify whether or not you want the APPX Setup Wizard to create a shortcut on your desktop. After specifying the appropriate option, click on the "Finish" button to end the setup wizard. You can then connect to an APPX server by double clicking the desktop shortcut, or running the APPX Desktop Client from the Applications folder. | |||||||
| Changed: | ||||||||
| < < | 
Run APPX to Complete the Installation | |||||||
| > > | 
Additional Information | |||||||
| Changed: | ||||||||
| < < | The first time that APPX is run after the APPX Setup Wizard completes, you will need to complete the initial configuration of APPX. | |||||||
| > > | When you click the APPX Desktop Client icon, OS/X will either start the program (if it is not running), or take you to the running program (if it is already running). Sometimes you might prefer to open additional sessions to your APPX server. In that case, create an Apple Script with the following lines:
on run
do shell script "open -n /Applications/AppxDesktopClient/AppxDesktopClient.app --args -host=webclass -user=yyyyy -password=xxxxxx -port=8060"
end run
Save this as an Application on your desktop, and every time you double click it, it will create a new session. Also notice you can pass arguments to the ADC by appending them after the '--args' parameter.
To change the default icon to the Appx logo (or any other graphic), follow this procedure:
| |||||||
Comments:Read what other users have said about this page or add your own comments. | ||||||||
| Line: 56 to 72 | ||||||||
| ||||||||
| Added: | ||||||||
| > > |
| |||||||
Revision 12009-11-19 - JeanNeron
| Line: 1 to 1 | |||||||||||||||
|---|---|---|---|---|---|---|---|---|---|---|---|---|---|---|---|
| Added: | |||||||||||||||
| > > |
APPX Desktop Client Installation - Mac OS/XRequirementsIMPORTANT: The APPX Desktop Client for OS/X requires Java SE 6. This is included in the Snow Leopard release of OS/X, but not in earlier versions. There are third party versions of this for earlier versions of OS/X, but only for the Intel based Macs. If you are running a PowerPC based Mac, you will not be able to use Release 5 of the APPX Desktop Client. If you have upgraded your Intel based Mac from an earlier version of OS/X, you must make sure the Java SE 6 is the preferred runtime for Java based applications. This setting can be found in the Java Preferences application (under Applications/Utilities):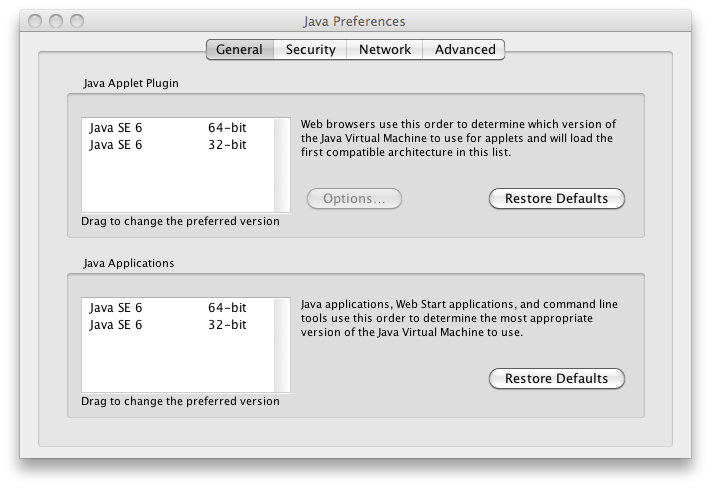 Make sure that Java JE 6 is the preferred tool for Java Applets and Java Applications. It doesn't matter if you choose the 32 or 64 bit version.
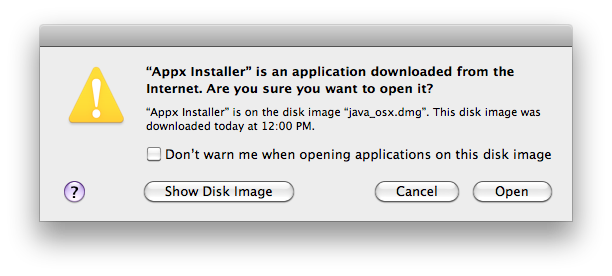
InstallationFirst, log on to your Mac desktop system using a user name that has administrative privileges. Then, download the Macintosh installer from the APPX web site. This will be downloaded as a disk image file (.dmg) and will be automatically mounted on your desktop. If necessary, double click the java_osx disk image to open it. The APPX Desktop Client installer will be displayed in the Finder: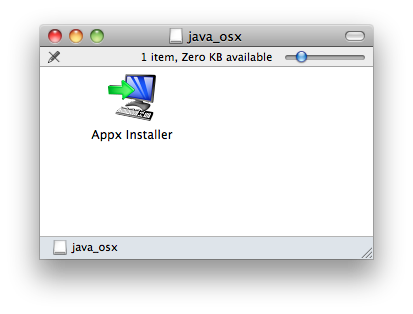 Double click the Appx Installer to start the installation. If presented with a warning, click the 'Open' button.
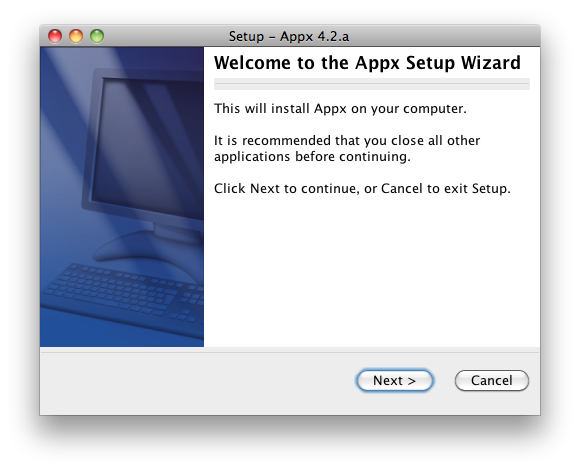
 After a few moments, the APPX Setup Wizard will display the Welcome screen. Click on the "Next" button to continue.
Specify the Destination Directory into which APPX is to be installed. As a matter of convention, the APPX Desktop Client is usually installed into /Applications/AppxDesktopClient but may be installed into the directory of your choice.
APPX will then be installed into the specified destination directory.
After a few moments, the APPX Setup Wizard will display the Welcome screen. Click on the "Next" button to continue.
Specify the Destination Directory into which APPX is to be installed. As a matter of convention, the APPX Desktop Client is usually installed into /Applications/AppxDesktopClient but may be installed into the directory of your choice.
APPX will then be installed into the specified destination directory.
Finally, you may specify whether or not you want the APPX Setup Wizard to create a shortcut on your desktop and/or a quick launch icon on the taskbar. After specifying the appropriate options, click on the "Finish" button to end the APPX Setup Wizard. APPX will then automatically run to allow you to complete the configuration and installation of APPX.
Run APPX to Complete the InstallationThe first time that APPX is run after the APPX Setup Wizard completes, you will need to complete the initial configuration of APPX.Comments:Read what other users have said about this page or add your own comments.-- JeanNeron - 2009-11-19
| ||||||||||||||
View topic | History: r11 < r10 < r9 < r8 | More topic actions...
Ideas, requests, problems regarding TWiki? Send feedback