Difference: APPX500WindowsNewInstallation (5 vs. 6)
Revision 62014-12-05 - JeanNeron
| Line: 1 to 1 | ||||||||
|---|---|---|---|---|---|---|---|---|
| ||||||||
| Changed: | ||||||||
| < < | APPX 5 - Windows - New Installation | |||||||
| > > | APPX 5.x - Windows - New Installation | |||||||
|
| ||||||||
| Line: 26 to 26 | ||||||||
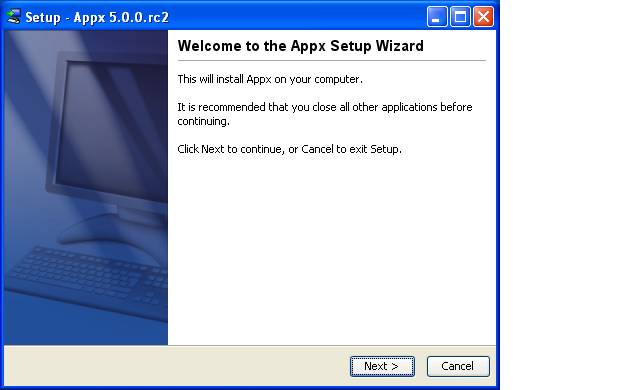
| After a few moments, the APPX Setup Wizard should display the Welcome screen. Click on the "Next" button to continue. If you are presented with a Security Warning dialog, click on the "Run" button to continue with the installation. | ||||||||
| Changed: | ||||||||
| < < |  | |||||||
| > > | | |||||||
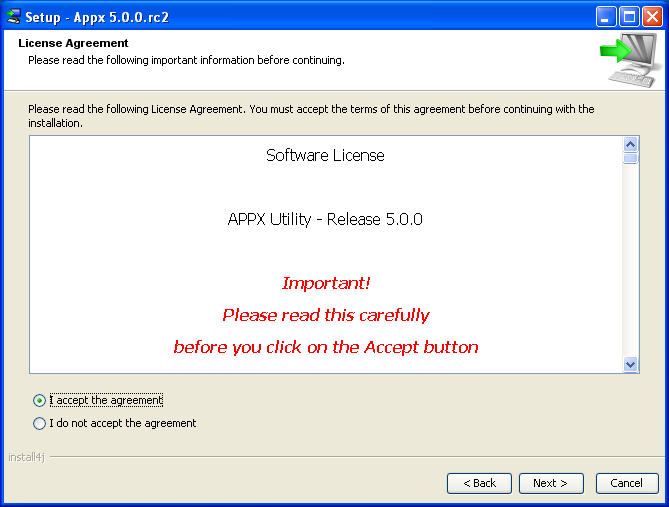
| Read and accept the license agreement. | ||||||||
| Changed: | ||||||||
| < < |  | |||||||
| > > | | |||||||
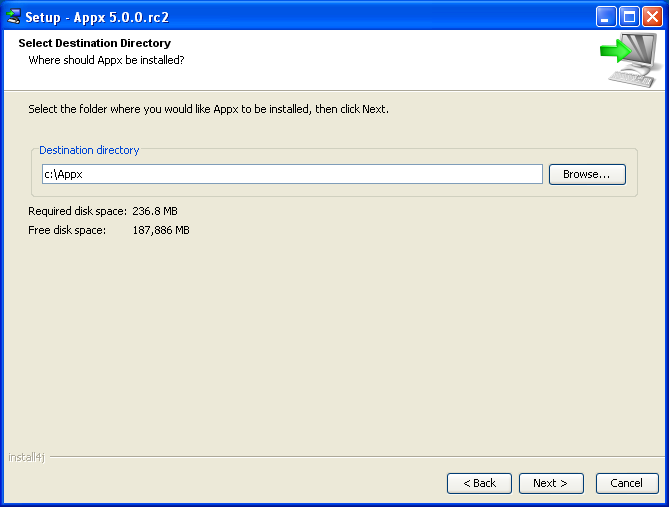
| Specify the Destination Directory into which APPX is to be installed. As a matter of convention, APPX is usually installed into C:\appx but may be installed into the drive and directory of your choice, but do not choose a directory with spaces in the name. | ||||||||
| Changed: | ||||||||
| < < |  | |||||||
| > > | | |||||||
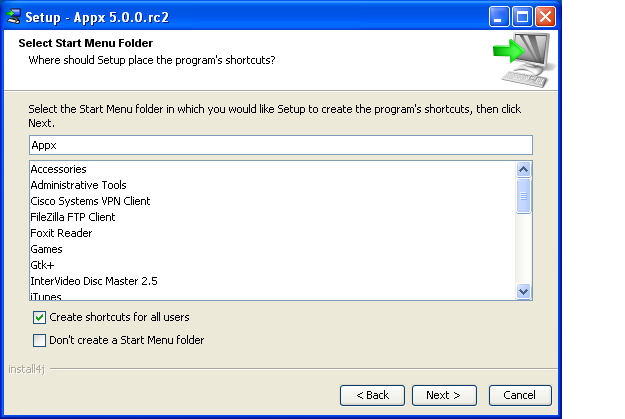
| You will be warned if the destination directory already exists. Otherwise, the APPX Setup Wizard will create it. The APPX Setup Wizard can optionally create a Start Menu. You must specify the appropriate options. If you don't know what to specify on this screen, simply accept the recommended options by clicking on the "Next" button to proceed with the installation. | ||||||||
| Changed: | ||||||||
| < < |  | |||||||
| > > | | |||||||
|
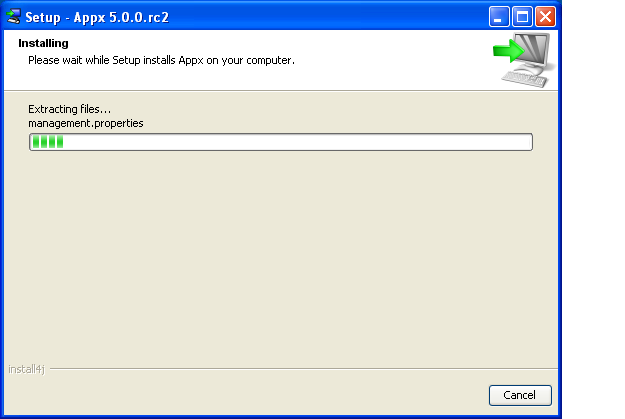
APPX will then be installed into the specified destination directory. | ||||||||
| Changed: | ||||||||
| < < |  | |||||||
| > > | | |||||||
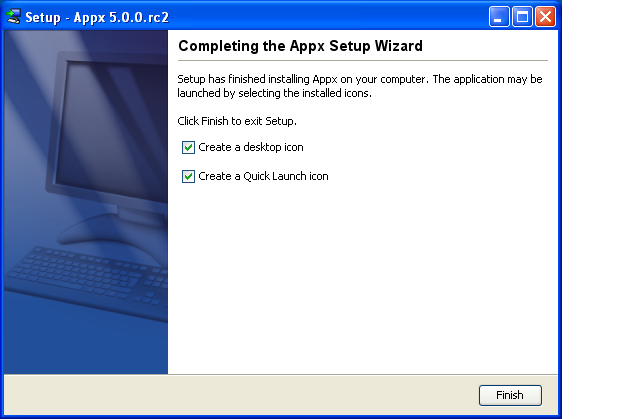
| Finally, you may specify whether or not you want the APPX Setup Wizard to create a shortcut on your desktop and/or a quick launch icon on the taskbar. After specifying the appropriate options, click on the "Finish" button to end the APPX Setup Wizard. | ||||||||
| Changed: | ||||||||
| < < |  | |||||||
| > > | | |||||||
Character Mode Installation | ||||||||
| Line: 94 to 94 | ||||||||
| [C:\APPX] | ||||||||
| Deleted: | ||||||||
| < < | ||||||||
| Create a desktop icon? Yes [y, Enter], No [n] | ||||||||
| Deleted: | ||||||||
| < < | ||||||||
| Create a Quick Launch icon? Yes [y, Enter], No [n] | ||||||||
| Line: 110 to 106 | ||||||||
|
| ||||||||
| Changed: | ||||||||
| < < | After all the files have been installed, you will have to run an APPX session to complete the installation of the APPX environment. | |||||||
| > > | After all the files have been installed, you will have to run an APPX session to APPX500NewInstallConfigAPPX of the APPX environment. | |||||||
| If you are running in character mode (i.e., Windows Core Server), you will have to manually start the APPX Login Manager Service before you can complete the installation. Enter the following command (make sure you adjust the path names as required): | ||||||||
| Line: 122 to 118 | ||||||||
C:\appx50\services> | ||||||||
| Changed: | ||||||||
| < < | This will start a Login Manager service on port 8060. Install the APPX Desktop Client on another workstation, and use the Remote tab to log on to this server, then complete the installation by following the instructions here | |||||||
| > > | This will start a Login Manager service on port 8060. Install the APPX Desktop Client on another workstation, and use the Remote tab to log on to this server, then complete the installation by following the instructions APPX500NewInstallConfigAPPX | |||||||
Note that as part of completeing the installation, you will be asked to install the Login Manager again. You can use the same port number again, it will not affect the installation process.
Comments: | ||||||||
View topic | History: r8 < r7 < r6 < r5 | More topic actions...
Ideas, requests, problems regarding TWiki? Send feedback