Difference: APPX500WindowsNewInstallation (1 vs. 8)
Revision 82016-02-25 - JeanNeron
| Line: 1 to 1 | ||||||||
|---|---|---|---|---|---|---|---|---|
APPX 5.x - Windows - New Installation | ||||||||
| Line: 106 to 106 | ||||||||
|
| ||||||||
| Changed: | ||||||||
| < < | After all the files have been installed, you will have to run an APPX session to APPX500NewInstallConfigAPPX of the APPX environment. | |||||||
| > > | After all the files have been installed, you will have to run an APPX session to complete the configuration of the APPX environment. | |||||||
| If you are running in character mode (i.e., Windows Core Server), you will have to manually start the APPX Login Manager Service before you can complete the installation. Enter the following command (make sure you adjust the path names as required): | ||||||||
| Line: 118 to 118 | ||||||||
C:\appx50\services> | ||||||||
| Changed: | ||||||||
| < < | This will start a Login Manager service on port 8060. Install the APPX Desktop Client on another workstation, and use the Remote tab to log on to this server, then complete the installation by following the instructions APPX500NewInstallConfigAPPX | |||||||
| > > | This will start a Login Manager service on port 8060. Install the APPX Desktop Client on another workstation, and use the Remote tab to log on to this server, then complete the installation by completing the configuration. | |||||||
| Changed: | ||||||||
| < < | Note that as part of completeing the installation, you will be asked to install the Login Manager again. You can use the same port number again, it will not affect the installation process. | |||||||
| > > | Note that as part of completing the installation, you will be asked to install the Login Manager again. You can use the same port number again, it will not affect the installation process. | |||||||
Comments:Read what other users have said about this page or add your own comments. | ||||||||
Revision 72016-02-25 - JeanNeron
| Line: 1 to 1 | ||||||||
|---|---|---|---|---|---|---|---|---|
APPX 5.x - Windows - New Installation | ||||||||
| Line: 106 to 106 | ||||||||
|
| ||||||||
| Changed: | ||||||||
| < < | After all the files have been installed, you will have to run an APPX session to APPX500NewInstallConfigAPPX of the APPX environment. | |||||||
| > > | After all the files have been installed, you will have to run an APPX session to APPX500NewInstallConfigAPPX of the APPX environment. | |||||||
| If you are running in character mode (i.e., Windows Core Server), you will have to manually start the APPX Login Manager Service before you can complete the installation. Enter the following command (make sure you adjust the path names as required): | ||||||||
Revision 62014-12-05 - JeanNeron
| Line: 1 to 1 | ||||||||
|---|---|---|---|---|---|---|---|---|
| ||||||||
| Changed: | ||||||||
| < < | APPX 5 - Windows - New Installation | |||||||
| > > | APPX 5.x - Windows - New Installation | |||||||
|
| ||||||||
| Line: 26 to 26 | ||||||||
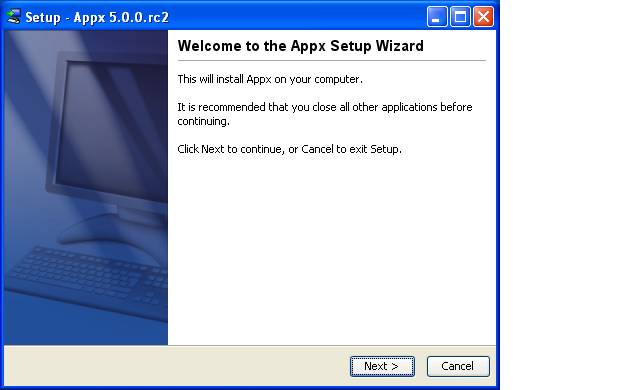
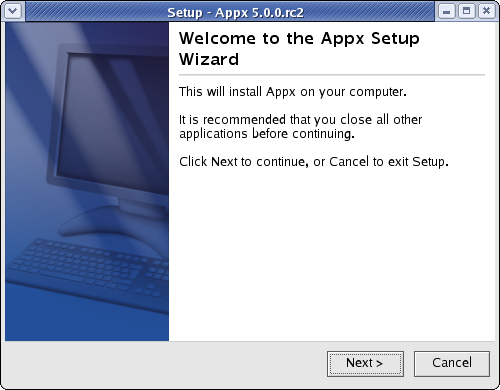
| After a few moments, the APPX Setup Wizard should display the Welcome screen. Click on the "Next" button to continue. If you are presented with a Security Warning dialog, click on the "Run" button to continue with the installation. | ||||||||
| Changed: | ||||||||
| < < |  | |||||||
| > > | | |||||||
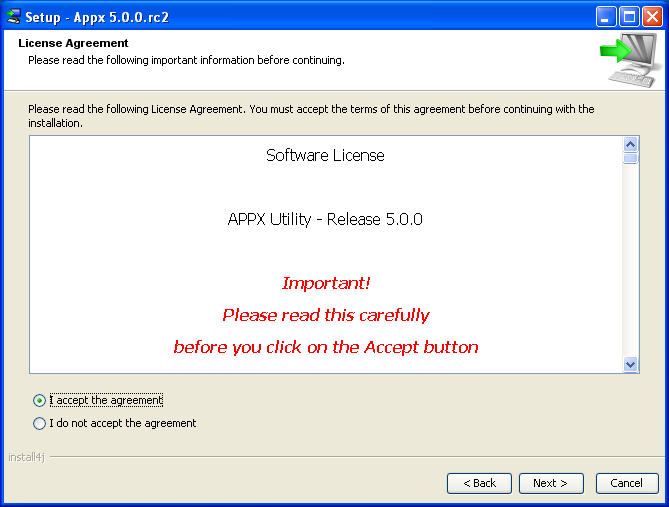
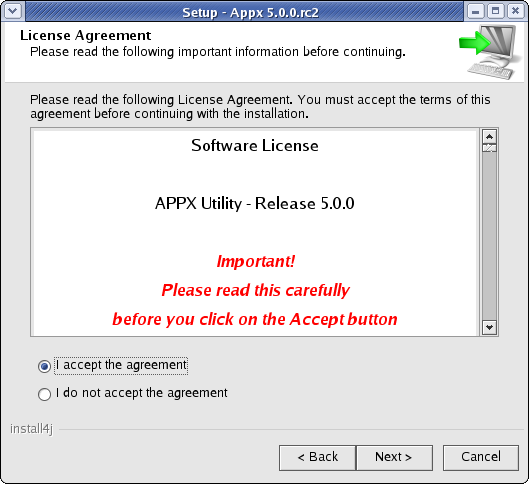
| Read and accept the license agreement. | ||||||||
| Changed: | ||||||||
| < < |  | |||||||
| > > | | |||||||
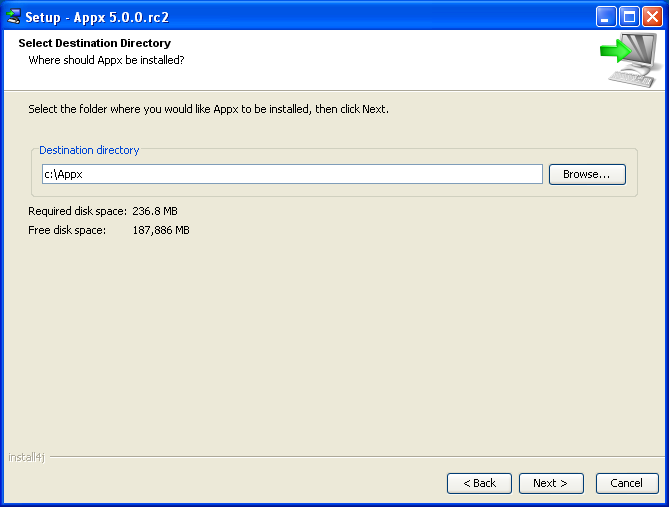
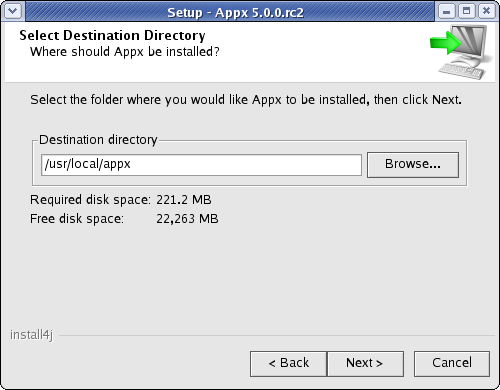
| Specify the Destination Directory into which APPX is to be installed. As a matter of convention, APPX is usually installed into C:\appx but may be installed into the drive and directory of your choice, but do not choose a directory with spaces in the name. | ||||||||
| Changed: | ||||||||
| < < |  | |||||||
| > > | | |||||||
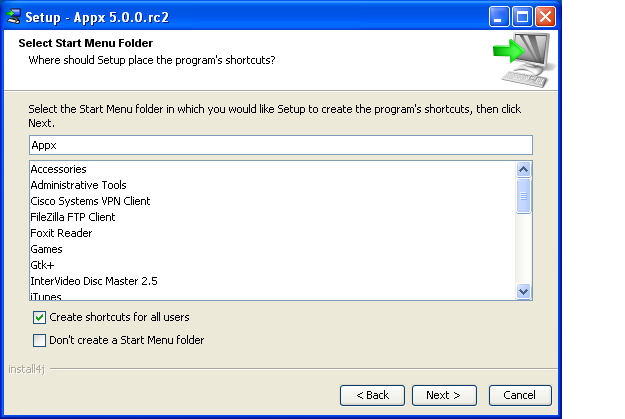
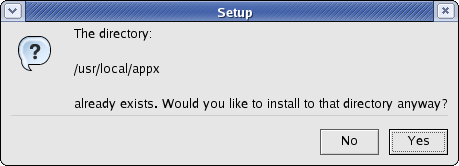
| You will be warned if the destination directory already exists. Otherwise, the APPX Setup Wizard will create it. The APPX Setup Wizard can optionally create a Start Menu. You must specify the appropriate options. If you don't know what to specify on this screen, simply accept the recommended options by clicking on the "Next" button to proceed with the installation. | ||||||||
| Changed: | ||||||||
| < < |  | |||||||
| > > | | |||||||
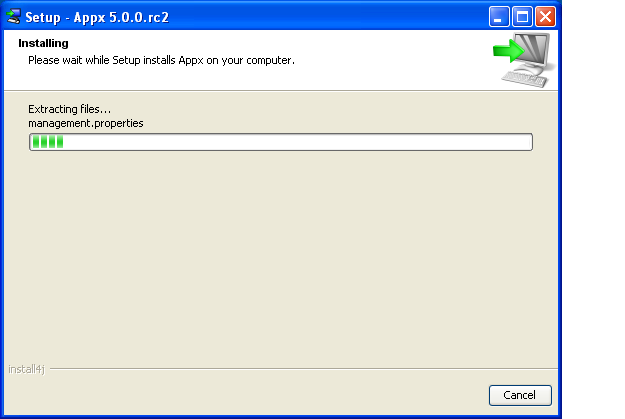
|
APPX will then be installed into the specified destination directory. | ||||||||
| Changed: | ||||||||
| < < |  | |||||||
| > > | | |||||||
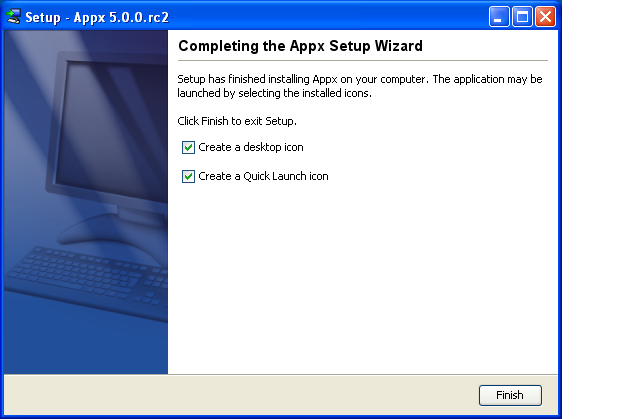
| Finally, you may specify whether or not you want the APPX Setup Wizard to create a shortcut on your desktop and/or a quick launch icon on the taskbar. After specifying the appropriate options, click on the "Finish" button to end the APPX Setup Wizard. | ||||||||
| Changed: | ||||||||
| < < |  | |||||||
| > > | | |||||||
Character Mode Installation | ||||||||
| Line: 94 to 94 | ||||||||
| [C:\APPX] | ||||||||
| Deleted: | ||||||||
| < < | ||||||||
| Create a desktop icon? Yes [y, Enter], No [n] | ||||||||
| Deleted: | ||||||||
| < < | ||||||||
| Create a Quick Launch icon? Yes [y, Enter], No [n] | ||||||||
| Line: 110 to 106 | ||||||||
|
| ||||||||
| Changed: | ||||||||
| < < | After all the files have been installed, you will have to run an APPX session to complete the installation of the APPX environment. | |||||||
| > > | After all the files have been installed, you will have to run an APPX session to APPX500NewInstallConfigAPPX of the APPX environment. | |||||||
| If you are running in character mode (i.e., Windows Core Server), you will have to manually start the APPX Login Manager Service before you can complete the installation. Enter the following command (make sure you adjust the path names as required): | ||||||||
| Line: 122 to 118 | ||||||||
C:\appx50\services> | ||||||||
| Changed: | ||||||||
| < < | This will start a Login Manager service on port 8060. Install the APPX Desktop Client on another workstation, and use the Remote tab to log on to this server, then complete the installation by following the instructions here | |||||||
| > > | This will start a Login Manager service on port 8060. Install the APPX Desktop Client on another workstation, and use the Remote tab to log on to this server, then complete the installation by following the instructions APPX500NewInstallConfigAPPX | |||||||
Note that as part of completeing the installation, you will be asked to install the Login Manager again. You can use the same port number again, it will not affect the installation process.
Comments: | ||||||||
Revision 52011-01-04 - GaryRogers
| Line: 1 to 1 | ||||||||
|---|---|---|---|---|---|---|---|---|
APPX 5 - Windows - New Installation | ||||||||
| Line: 22 to 22 | ||||||||
| Log in to your system as an administrative user. | ||||||||
| Changed: | ||||||||
| < < | Download and run the APPX GUI installer (setup.exe) from the APPX web site or the APPX ftp server. | |||||||
| > > | Download and run the APPX GUI installer (appxsetup-windows.exe) from the APPX web site or the APPX ftp server. | |||||||
| After a few moments, the APPX Setup Wizard should display the Welcome screen. Click on the "Next" button to continue. If you are presented with a Security Warning dialog, click on the "Run" button to continue with the installation. | ||||||||
| Line: 50 to 50 | ||||||||
|
| ||||||||
| Deleted: | ||||||||
| < < | When you click on the Finish button, an APPX session will be launched to run APPX to complete the installation of the APPX environment. | |||||||
Character Mode Installation | ||||||||
Revision 42009-11-17 - JeanNeron
| Line: 1 to 1 | ||||||||
|---|---|---|---|---|---|---|---|---|
APPX 5 - Windows - New Installation | ||||||||
| Line: 122 to 122 | ||||||||
|
Appx8060 Started Appx8060 will start automatically each time you boot your system | ||||||||
| Changed: | ||||||||
| < < | C:\appx50\services> | |||||||
| > > | C:\appx50\services> | |||||||
| This will start a Login Manager service on port 8060. Install the APPX Desktop Client on another workstation, and use the Remote tab to log on to this server, then complete the installation by following the instructions here | ||||||||
| Added: | ||||||||
| > > | Note that as part of completeing the installation, you will be asked to install the Login Manager again. You can use the same port number again, it will not affect the installation process. | |||||||
Comments:Read what other users have said about this page or add your own comments. | ||||||||
Revision 32009-11-17 - JeanNeron
| Line: 1 to 1 | ||||||||
|---|---|---|---|---|---|---|---|---|
APPX 5 - Windows - New Installation | ||||||||
| Line: 57 to 57 | ||||||||
|
If you are running Windows Core Server, you can run the Appx installer in character mode by appending "-c" to the command line. After a few moments, the Appx Setup Wizard should display the Welcome message. Press Enter to continue the installation. | ||||||||
| Changed: | ||||||||
| < < | C:\Appx>setup.exe -c Unpacking JRE ... Preparing JRE ... Starting Installer ... This will install Appx on your computer. OK [o, Enter], Cancel [c] | |||||||
| > > | C:\Appx>setup.exe -c
Unpacking JRE ... Preparing JRE ... Starting Installer ... This will install Appx on your computer. OK [o, Enter], Cancel [c] | |||||||
|
| ||||||||
| Line: 81 to 82 | ||||||||
| After the agreement has been displayed, enter 1 to accept the license agreement, or 2 to cancel the installation. | ||||||||
| Changed: | ||||||||
| < < | For inquires regarding this agreement, please contact: APPX Software, Inc., 11363 San Jose Blvd., Suite 301, Jacksonville, Florida 32223, USA | |||||||
| > > | . . . For inquires regarding this agreement, please contact: APPX Software, Inc., 11363 San Jose Blvd., Suite 301, Jacksonville, Florida 32223, USA | |||||||
| I accept the agreement | ||||||||
| Line: 113 to 114 | ||||||||
| After all the files have been installed, you will have to run an APPX session to complete the installation of the APPX environment. | ||||||||
| Added: | ||||||||
| > > | If you are running in character mode (i.e., Windows Core Server), you will have to manually start the APPX Login Manager Service before you can complete the installation. Enter the following command (make sure you adjust the path names as required):
C:\appx>cd services C:\appx\services>appxLoginMgr.exe -install -name=Appx8060 -port=8060 -engine=c:\appx\appx.exe APPXPATH=c:\appx\data APPXKEYMAP=Windows Appx8060 Created Appx8060 Configured Appx8060 Started Appx8060 will start automatically each time you boot your system C:\appx50\services> This will start a Login Manager service on port 8060. Install the APPX Desktop Client on another workstation, and use the Remote tab to log on to this server, then complete the installation by following the instructions here | |||||||
Comments:Read what other users have said about this page or add your own comments. | ||||||||
Revision 22009-11-12 - JeanNeron
| Line: 1 to 1 | ||||||||
|---|---|---|---|---|---|---|---|---|
APPX 5 - Windows - New Installation | ||||||||
| Line: 24 to 24 | ||||||||
| Download and run the APPX GUI installer (setup.exe) from the APPX web site or the APPX ftp server. | ||||||||
| Changed: | ||||||||
| < < | After a few moments, the APPX Setup Wizard should display the Welcome screen. Click on the "Next" button to continue. | |||||||
| > > | After a few moments, the APPX Setup Wizard should display the Welcome screen. Click on the "Next" button to continue. If you are presented with a Security Warning dialog, click on the "Run" button to continue with the installation. | |||||||
| Changed: | ||||||||
| < < |  | |||||||
| > > | | |||||||
| Read and accept the license agreement. | ||||||||
| Changed: | ||||||||
| < < |  | |||||||
| > > | | |||||||
| Specify the Destination Directory into which APPX is to be installed. As a matter of convention, APPX is usually installed into C:\appx but may be installed into the drive and directory of your choice, but do not choose a directory with spaces in the name. | ||||||||
| Changed: | ||||||||
| < < |  | |||||||
| > > | | |||||||
| You will be warned if the destination directory already exists. Otherwise, the APPX Setup Wizard will create it. | ||||||||
| Changed: | ||||||||
| < < |  | |||||||
| > > | The APPX Setup Wizard can optionally create a Start Menu. You must specify the appropriate options. If you don't know what to specify on this screen, simply accept the recommended options by clicking on the "Next" button to proceed with the installation. | |||||||
| Changed: | ||||||||
| < < | APPX will then be installed into the specified destination directory. | |||||||
| > > | | |||||||
| Changed: | ||||||||
| < < |  | |||||||
| > > | APPX will then be installed into the specified destination directory. | |||||||
| Changed: | ||||||||
| < < | When the APPX Setup Wizard displays the final screen, click on the Finish button to end the APPX Setup Wizard and to automatically run APPX to complete the configuration and installation of APPX. | |||||||
| > > | | |||||||
| Changed: | ||||||||
| < < | 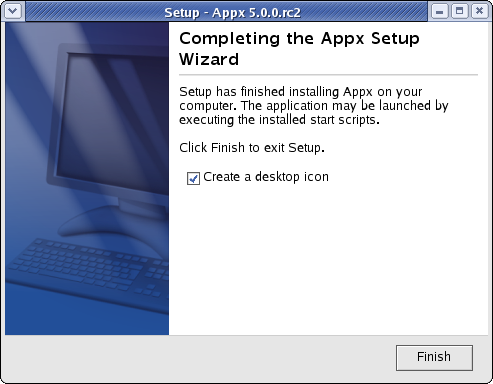 | |||||||
| > > | Finally, you may specify whether or not you want the APPX Setup Wizard to create a shortcut on your desktop and/or a quick launch icon on the taskbar. After specifying the appropriate options, click on the "Finish" button to end the APPX Setup Wizard.
| |||||||
| When you click on the Finish button, an APPX session will be launched to run APPX to complete the installation of the APPX environment. | ||||||||
| Line: 67 to 69 | ||||||||
| APPX Utility - Release 5.0.0 | ||||||||
| Changed: | ||||||||
| < < | _ Important! _ | |||||||
| > > | _ Important! _ | |||||||
| Please read this carefully before you click on the Accept button. | ||||||||
Revision 12009-11-12 - JeanNeron
| Line: 1 to 1 | ||||||||
|---|---|---|---|---|---|---|---|---|
| Added: | ||||||||
| > > |
APPX 5 - Windows - New InstallationOverviewTwo different methods are provided to install APPX on Windows. There is a GUI installer and a Console Mode (character mode) installer. Most sites will use the GUI Installer, the character mode installer is intended for sites using Windows Core Server (Windows without a GUI). The same installer is used for both methods. The installer will automatically detect if it is being run as a command or from a GUI Desktop, although in some cases you may have to add "-c" to the command line to force the character installer. Regardless of which installation method is used, the result is the same. A typical APPX installation on a system where APPX has not been previously installed performs the following steps:
GUI Installation on WindowsLog in to your system as an administrative user. Download and run the APPX GUI installer (setup.exe) from the APPX web site or the APPX ftp server. After a few moments, the APPX Setup Wizard should display the Welcome screen. Click on the "Next" button to continue.
Read and accept the license agreement.
Specify the Destination Directory into which APPX is to be installed. As a matter of convention, APPX is usually installed into C:\appx but may be installed into the drive and directory of your choice, but do not choose a directory with spaces in the name.
You will be warned if the destination directory already exists. Otherwise, the APPX Setup Wizard will create it.
APPX will then be installed into the specified destination directory.
When the APPX Setup Wizard displays the final screen, click on the Finish button to end the APPX Setup Wizard and to automatically run APPX to complete the configuration and installation of APPX.
When you click on the Finish button, an APPX session will be launched to run APPX to complete the installation of the APPX environment.
Character Mode InstallationIf you are running Windows Core Server, you can run the Appx installer in character mode by appending "-c" to the command line. After a few moments, the Appx Setup Wizard should display the Welcome message. Press Enter to continue the installation.
C:\Appx>setup.exe -c Unpacking JRE ... Preparing JRE ... Starting Installer ... This will install Appx on your computer. OK [o, Enter], Cancel [c]
Next, read and accept the License agreement. Press Enter as each page is displayed. Please read the following License Agreement. You must accept the terms of this agreement before continuing with the installation. Software License APPX Utility - Release 5.0.0 _ Important! _ Please read this carefully before you click on the Accept button. Definitions: "Software License Agreement (SLA)" shall mean this Software License document and the associated *License Key document collectively. [Enter] After the agreement has been displayed, enter 1 to accept the license agreement, or 2 to cancel the installation. For inquires regarding this agreement, please contact: APPX Software, Inc., 11363 San Jose Blvd., Suite 301, Jacksonville, Florida 32223, USA I accept the agreement Yes [1], No [2] Choose the directory where APPX should be installed and the other installation options. Where should Appx be installed? [C:\APPX] Create a desktop icon? Yes [y, Enter], No [n] Create a Quick Launch icon? Yes [y, Enter], No [n] After all the files have been installed, you will have to run an APPX session to complete the installation of the APPX environment. Comments:Read what other users have said about this page or add your own comments.-- SteveFrizzell - 23 Oct 2008 | |||||||
View topic | History: r8 < r7 < r6 < r5 | More topic actions...
Ideas, requests, problems regarding TWiki? Send feedback