APPX 6.1.0 - New Installation - Configure APPX
Overview
The first time that APPX is run after the installation wizard completes, you will need to complete the initial configuration of APPX:- Configure and start the APPX Login Manager service
- Configure and start the APPX Audit Manager service
- Add APPX System Administrators to the APPX user file
- Install the license key
Configure the APPX Login Manager Service and the the APPX Audit Manager Service
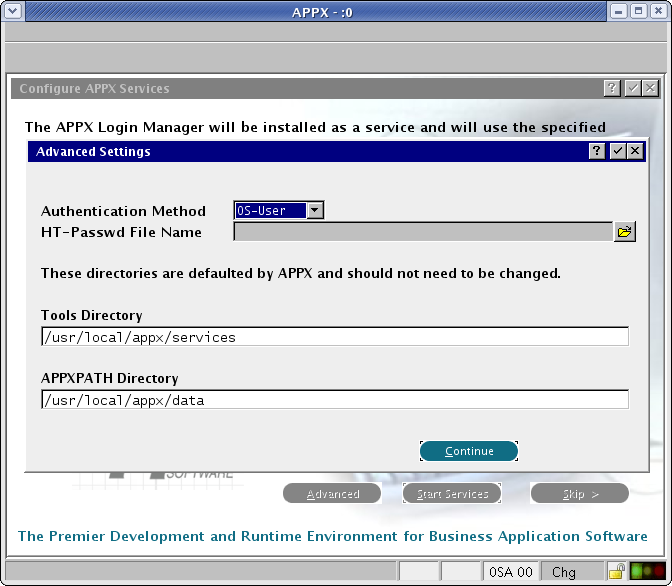
If you want to allow remote clients to connect to your APPX installation, you should configure the APPX Login Manager Service by entering a Login Manager Port number. The Login Manager Port number is used by the various types of APPX clients that connect to APPX from a remote location. If you do not want to allow remote connections, blank out the Login Manager Port number. If you intend to enable the file I/O audit logging feature of APPX, you should configure the APPX Audit Manager Service by entering a Audit Manager Port number. The Audit Manager Port number is used by APPX to log file I/O audit information. If you are not going to use this feature of APPX, blank out the Audit Manager Port number. You may change these port numbers to be any other TCP/IP port numbers that are not already being used by your system but, as a matter of convention, you may want to use the numbers that are already filled in on this screen. After you have entered the appropriate port numbers, click on the "Start Services" button to create the services and start them. If you do not want to configure either of the services, click on the Skip button. You can always configure the services at a later time. You can click on the Advanced button to review and edit additional options relating to configuring the APPX Login Manager Service.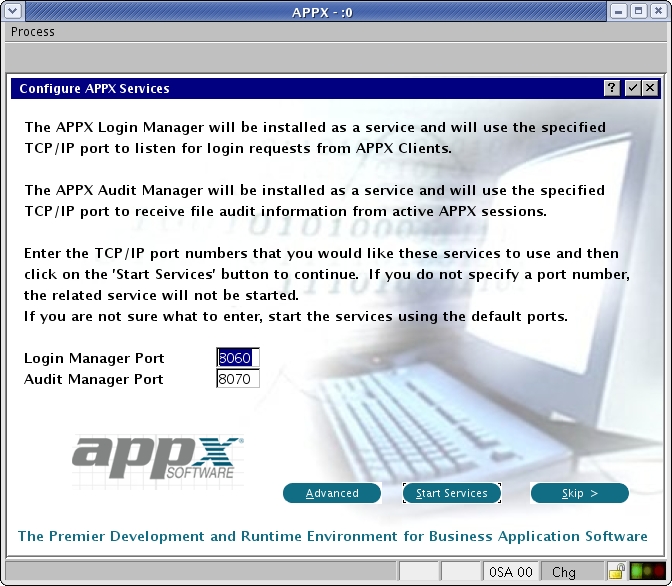 The Advanced Settings screen allows you to specify the Authentication Method that is to be used by the APPX Login Manager service. If you choose HT authentication, you will also need to provide the full pathname of the HT password file.
You must also specify a name for the tools directory where the APPX Login Manager and the APPX Audit Manager commands are installed. Unless you have moved them to a different directory, you should accept the default directory.
You must also specify a name for the "APPXPATH" directory. Unless instructed to change it by an APPX tech support technician, you should accept the default APPXPATH directory.
Add APPX System Administrators to the APPX User File
You may identify which users are to be APPX System Administrators. These are the only users who will be allowed to initially run APPX. One user ("appx") has already been added to the APPX User file as an APPX System Administrator. You may optionally identify additional users who are to be APPX System Administrators. If you are to be an APPX System Administrator, you should add a User record for your User ID. After adding User records for your APPX System Administrators, you may proceed by clicking on the Next button. Note that if you chose 'Appx-user' as your authentication method, you will have to enter a password for each user.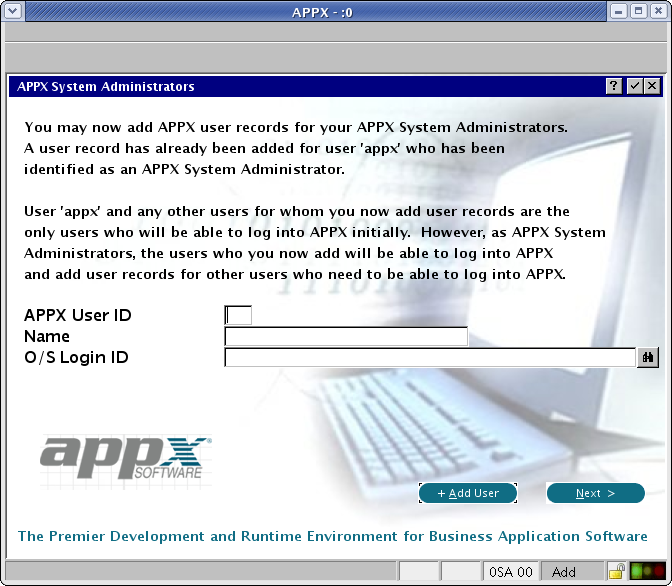
Install Your APPX License Key
Next, you must install your APPX license key. The license key is usually provided as an attachment to an e-mail. If you have access to the License Key file, you may import the License Key. Otherwise, you will need to manually enter the License Key information.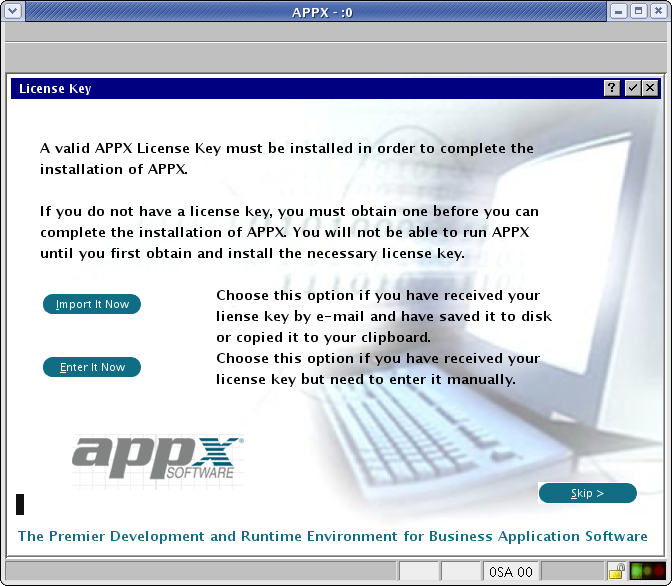
Import License Key
Automatically Import License Key
If you select the "Import It Now" option and if you have saved the License Key file in the /tmp directory on the Linux system where APPX is being installed with the specific name of "appx-registration.txt", you will not be prompted for the pathname to the License Key file. The License Key will automatically be detected and installed.Import From Clipboard
You can also copy the registration to the clipboard, and APPX will recognize it. It will be automatically uploaded to a temporary location (varies by platform), and you can import it from there: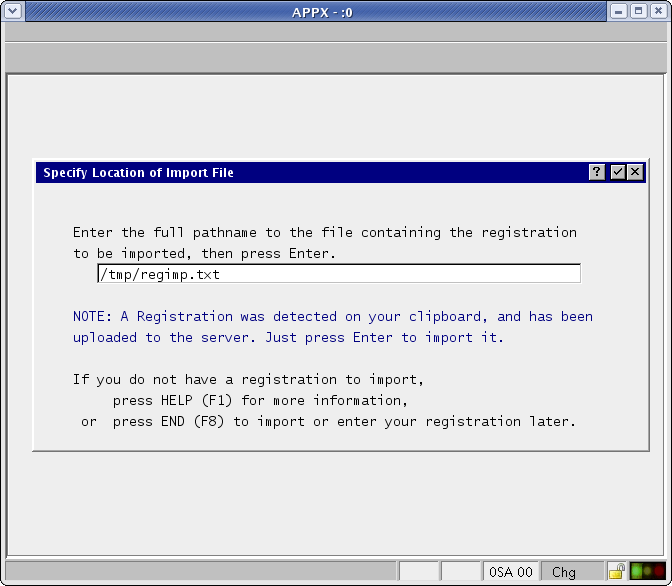
Import From Named File
Alternatively, you can upload the file to a location of your choosing and import it from there: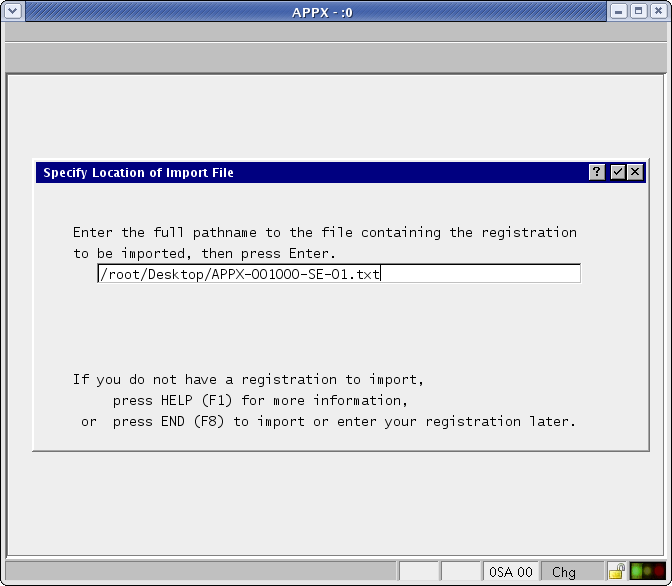
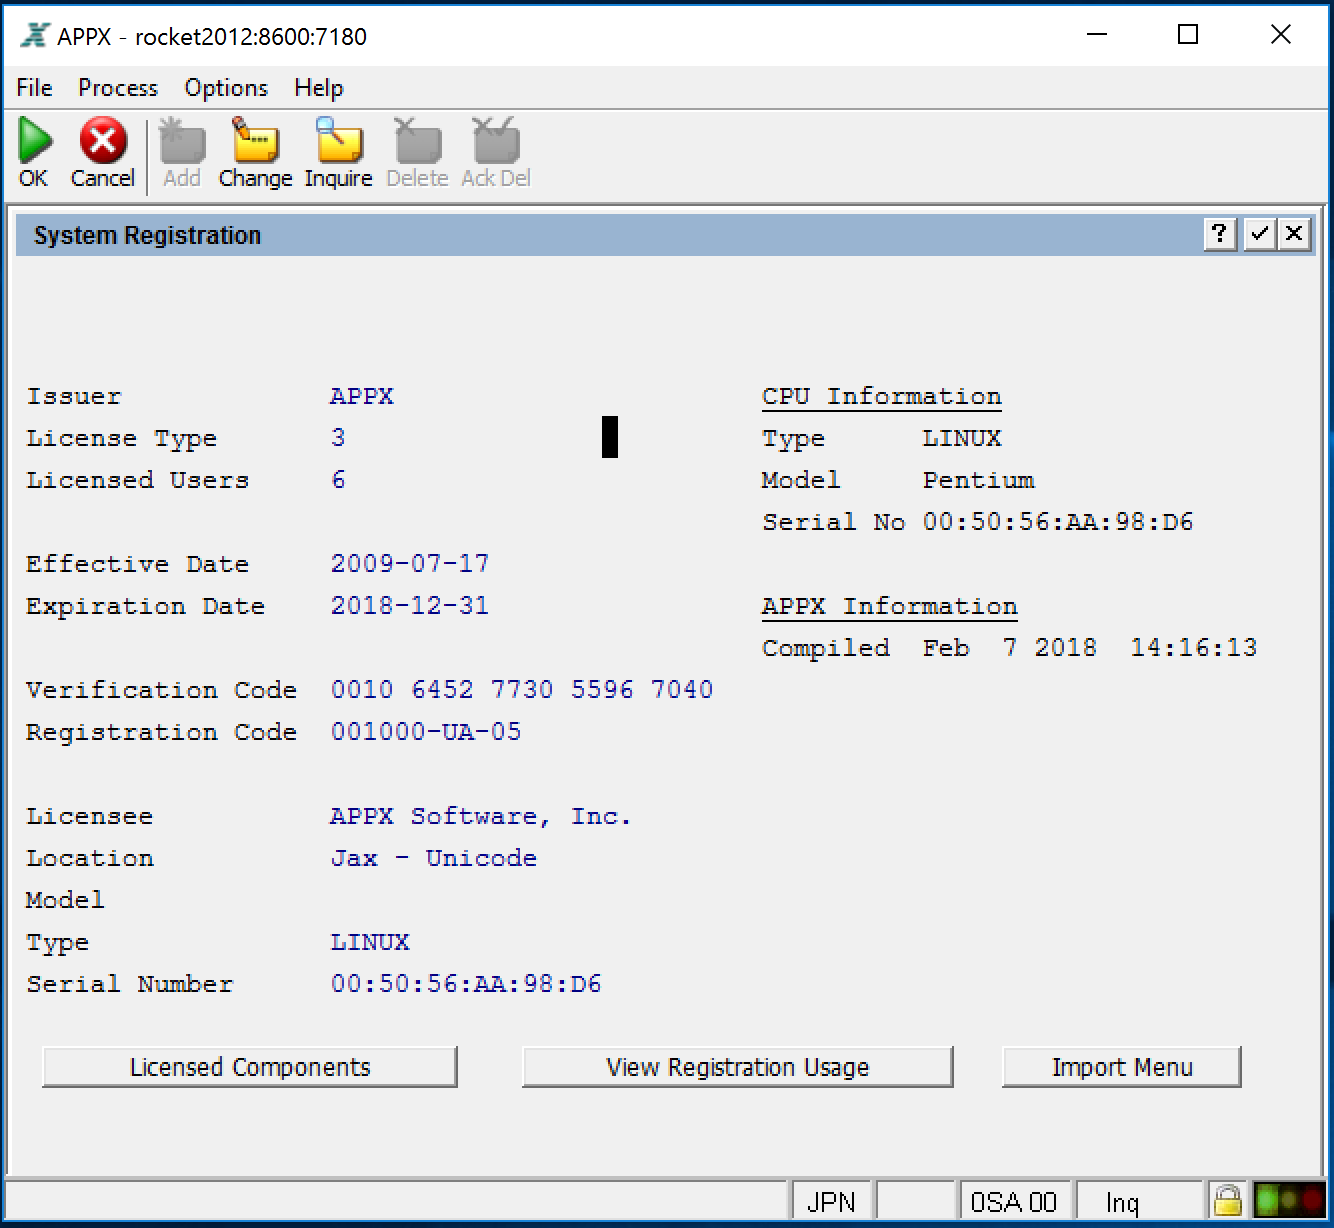 After entering the main registration, you will have to enter the information for the Licensed Components.
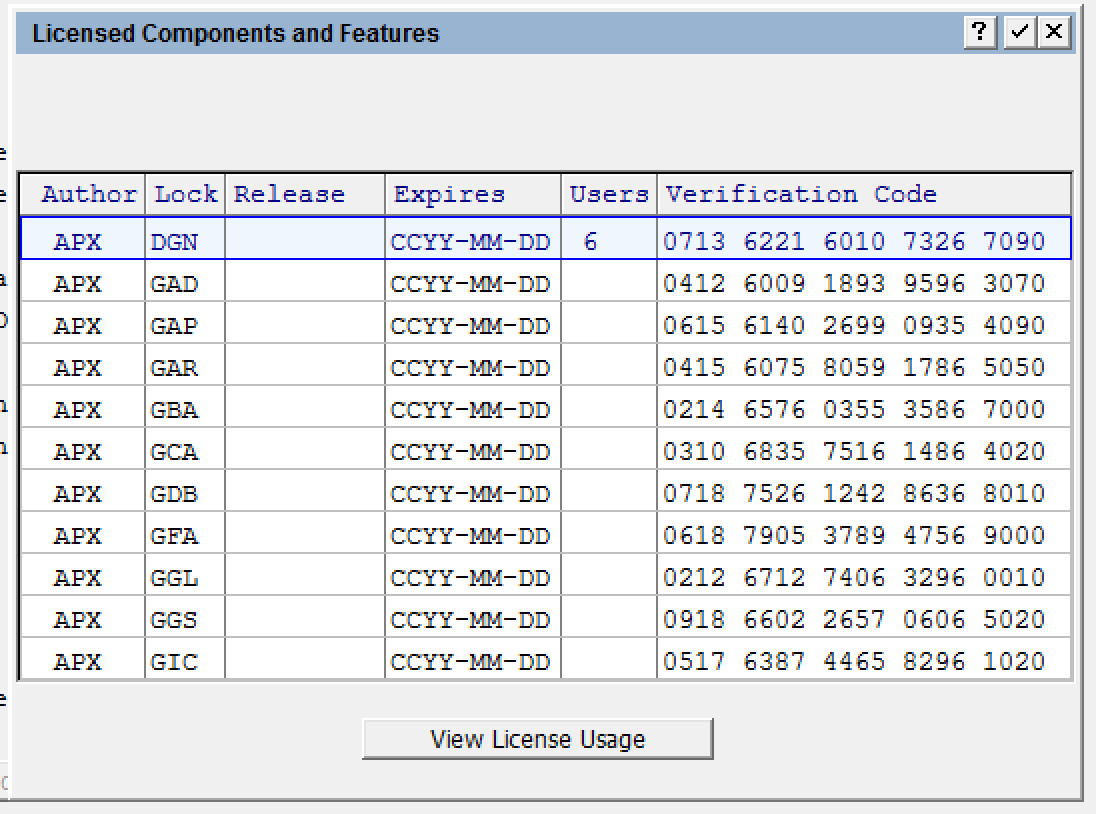
Installation Completed
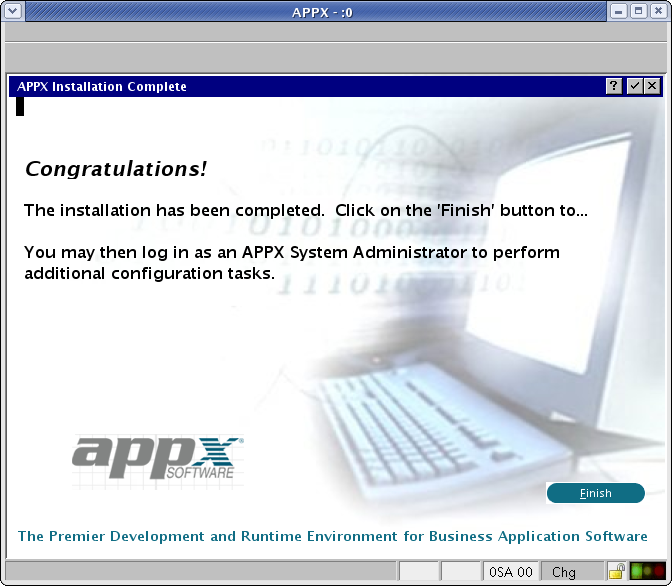
Final Tasks
- Install a PDF reader on your server. For printing PDF documents on printers defined on a Windows server, we recommend using 'Foxit' from http://www.foxitsoftware.com/pdf/reader/ This product is most compatible with the method APPX uses for printing PDF documents. For Linux/Unix installations, we recommend Adobe's Acrobat reader, version 9 or higher.
- Return to the installation page and install the Desktop clients or the HTML client.
- If you are using the Desktop client you should install a PDF reader on each workstation. The recommendations are the same, Foxit for Windows workstations, Adobe Acrobat for Linux. Macintosh desktops include the Preview application, so no additional software is necessary, although you can install Adobe Acrobat if you prefer.
Comments:
Read what other users have said about this page or add your own comments.--
Ideas, requests, problems regarding TWiki? Send feedback

