APPX Linux/Unix - APPX 5 Upgrade Instructions
Esta pagina tiene contenidos que usted necesita para hacer un upgrade de APPX 4.2.a para una instalacion de Linux/Unix APPX 5.Overview
Cuidado - Estas instrucciones son especificar para un actualizacion de APPX 4.2.a a APPX 5. Si usted esta hacendo un actualizacion de versiones mas viejas de APPX, esas instruciones quizas no se aplican. Usted necesita hace primero un actualizacion a APPX 4.2.a y despues un actualizacion a APPX 5. Para hacer un actualizacion de una instalacion existente de APPX Linux/Unix de APPX 4.2.a para APPX 5, usted necesita completar los seguintes pasos: 1.Obtener una nueva version del registro de Release 5.0 de su distribuidor o revendedor 2.Completar las tareas preliminares 3.Converter sus archivos de System Administration 4.Instalar APPX Utility actualizacion 5.Instalar la nueva licencia de APPX 5.0.0 6.Configurar el nuevo APPX Login Manager 7.Tareas finales
Preliminary Tasks
- Ask all users to log off
- Verify the integrity of all files in your system and correct any errrors.
- System Administration Files
- Design Files
- Data Files
- Backup your system
Convert Your System Administration Files
El primer paso para hacer un actualizacion es hacer un actualizacion de su instalacion de APPX 4.2.a a APPX 5 es convertir los archivos de System Administration para el nuevo formato de APPX 5. Los archivos de system Administration de APPX 4.2.a no son compatibles con APPX 5 y deben ser convertidos para el formato de APPX 5.Install the actualizacion Application
GUI Installation
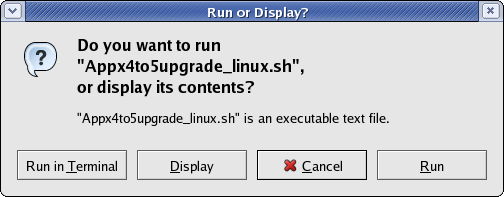
Hay que logar en su sistema de Linux como "root" user. Hay que hacer un Download del instalador de la aplicacion de actualizacion de APPX 4.2.a a APPX 5 (APPX4to5actualizacion_linux.sh pas los computadores rodando en Linux con Intel, o Appx4to5actualizacion_risc.tar.gz para los computadores con RISC) del sitio de APPX o via el APPX ftp server y guardar en su Desktop o alguna carpeta. Hay que cambiar las permissiones en el archivo instalador (APPX4to5actualizacion_linux.sh) para tener permissiones de execute.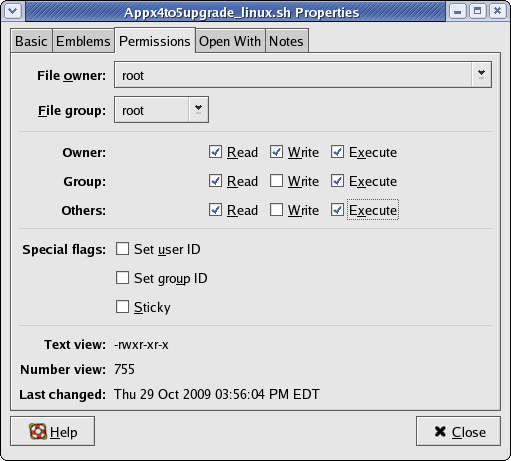 Hay que rodar el archivo de instalador (APPX4to5actualizacion_linux.sh). Si usted mira a una pantalla de "Run or Display?" semejante a la pantalla abajo, seleccione el boton "Run".
 Despues de unos momentos, la aplicacion de Setup Wizard de APPX 4.2 a 5.0 va tener una pantalla de Welcome. Seleccione el boton "Next" para continuar.
 Hay que leer las instrucciones de instalacion y seleccionar el boton "Next" para continuar.
 Especifique el directorio del destino no cual usted va instalar su utilidad. El directorio que usted especifica tiene que ser el mismo donde APPX 4.2.a fue instalado en su sistema. Como una manera de convencion, eso directorio es normalmente "/usr/local/appx/".
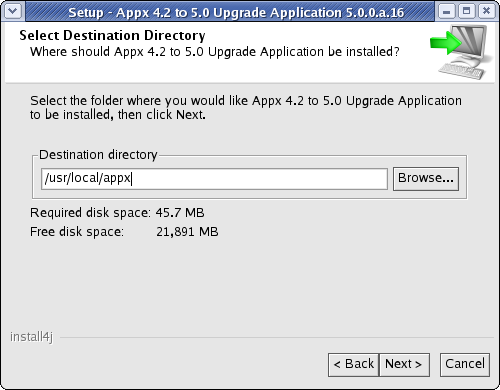 La aplicacion APPX actualizacion (5SA Version 00) va ser instalada en el local especificado en su directorio destinado.
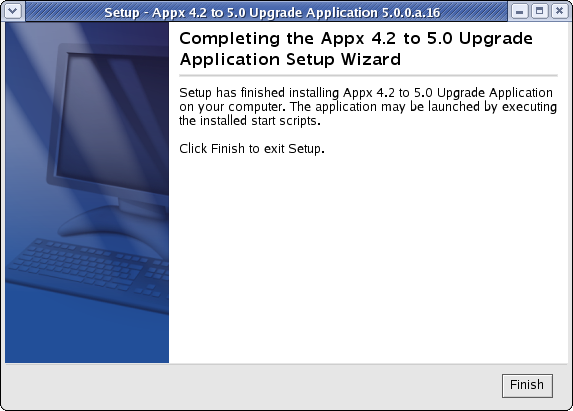
 Cuando el wizard exhibe la pantalla final, seleccione el boton Finish para encerrar la instalacion.
Character Mode Installation
Si usted no tiene aceso al GUI usted puede usar el instaler en modo de caractere usando "-c" en la linea de comando. Despues de unos momentos, el Appx Setup Wizard va mostrar una pantalla Welcome. Seleccione Enter para continuar la instalacion.
# ./Appx4to5actualizacion_linux.sh -cUnpacking JRE ...
Preparing JRE ...
Starting Installer ...
This will install Appx 4.2 to 5.0 actualizacion Application on your computer.
OK [o, Enter], Cancel [c]
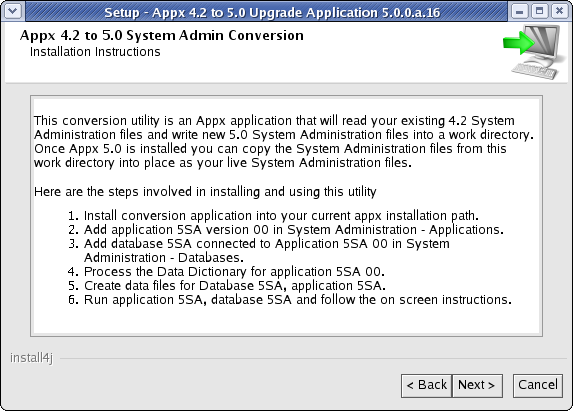
Despues, las instruciones de instalacion y conversion se van exhibir. Seleccione Enter cuanod estea listo para continuar. Installation Instructions This conversion utility is an Appx application that will read your
existing 4.2 System Administration files and write new 5.0 System
Administration files into a work directory. Once Appx 5.0 is installed
you can copy the System Administration files from this work directory
into place as your live System Administration files.
Here are the steps involved in installing and using this utility
1. Install conversion application into your current appx installation path.
2. Add application 5SA version 00 in System Administration - Applications.
3. Add database 5SA connected to Application 5SA 00 in System Administration - Databases.
4. Process the Data Dictionary for application 5SA 00.
5. Create data files for Database 5SA, application 5SA.
6. Run application 5SA, database 5SA and follow the on screen instructions.
Seleccione el local de la instalacion. Where should Appx 4.2 to 5.0 actualizacion Application be installed?
[/usr/local/appx/]
Los archivos se van copiar a su hard disk. Cuando esto estea acabado, usted va estar listo para continuar con 'Configure the actualizacion Application'
Configure the actualizacion Application
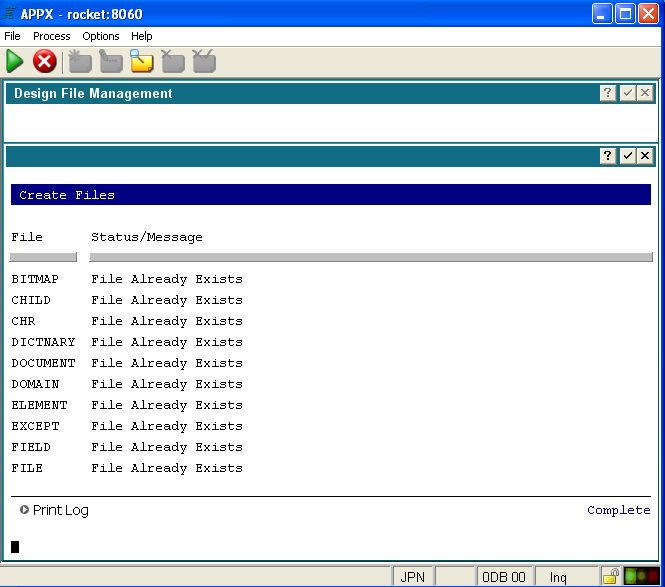
Despues de instalar la aplicacion de actualizacion, usted necesita rodar APPX como un administrador de sistema de APPX y configurar la aplicacion de actualizacion. Hay que agregar la aplicacion actualizacion (5SA 00) a los archivos de aplicaciones.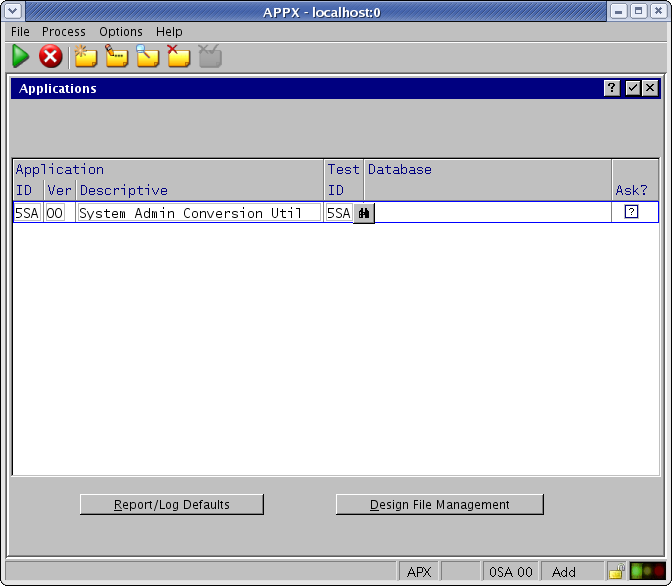 Hay que crear Design Files para Application 5SA. APPX va exhibir "File Already Exists" para cada archivo. Si no, la aplicacion no fue instalada en el local correcto. Hay que repetir los pasos arriba, especificando el local correcto.
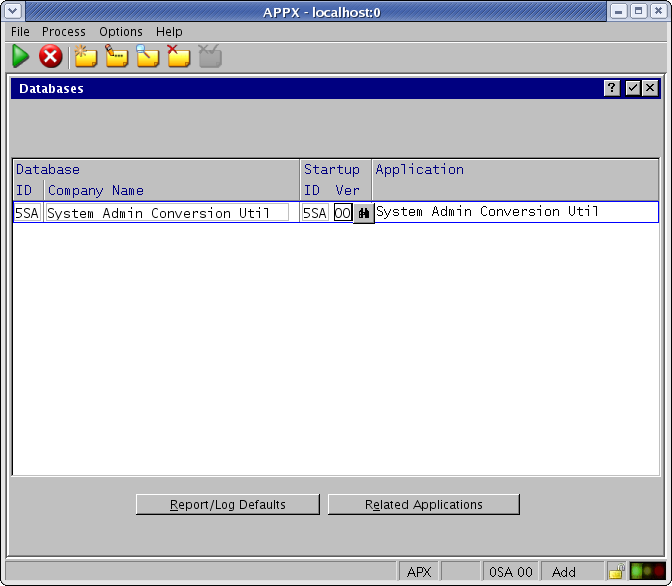
 Hay que agregar el database (5SA) para actualizacion Application en el archivo Databases.
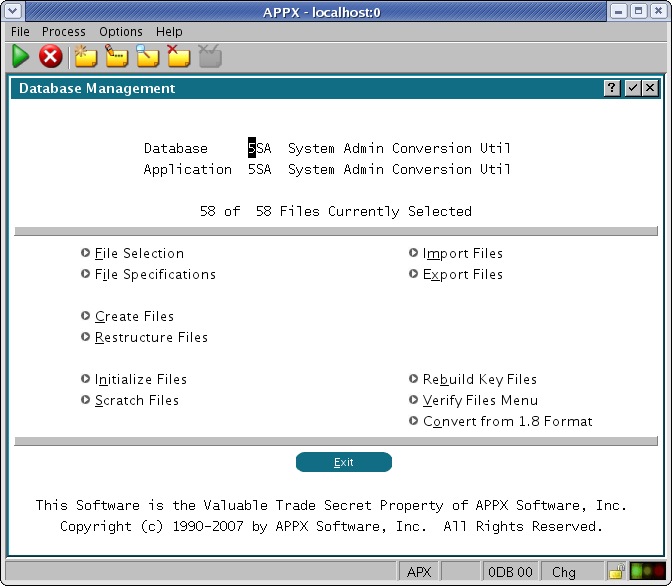
 Hay que rodar Database Management para un actualizacion Application y Database.
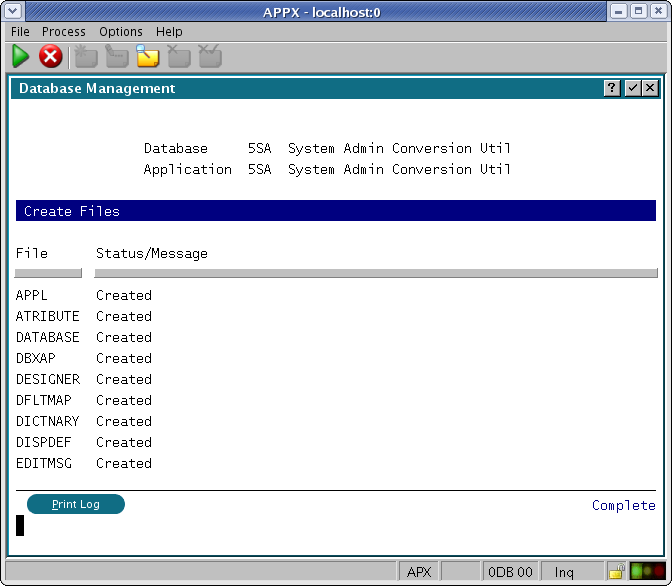
 Rodar Create Files.
Run the actualizacion Application
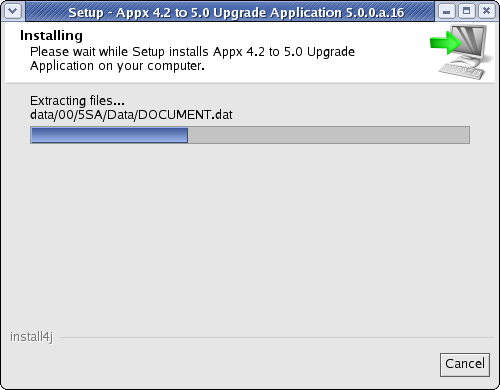
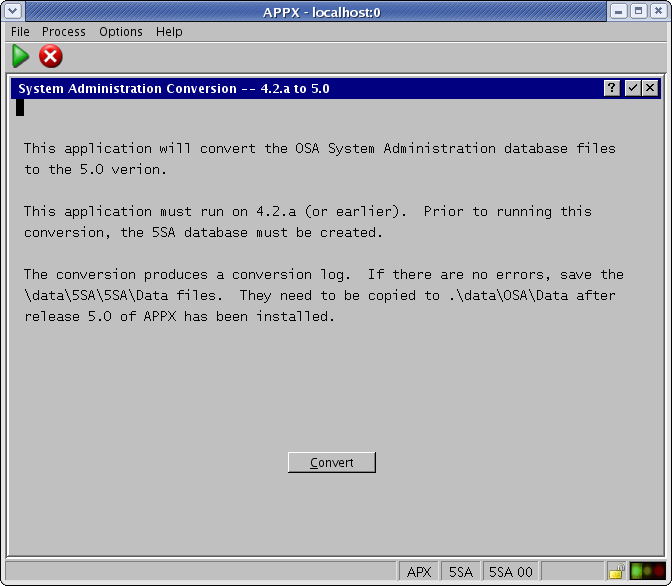
Despues de configurar actualizacion Application, usted necesita rodar la actualizacion Utility para converter sus archivos de System Administration. Seleccione el boton "Convert" para converter la utilidad de conversion.
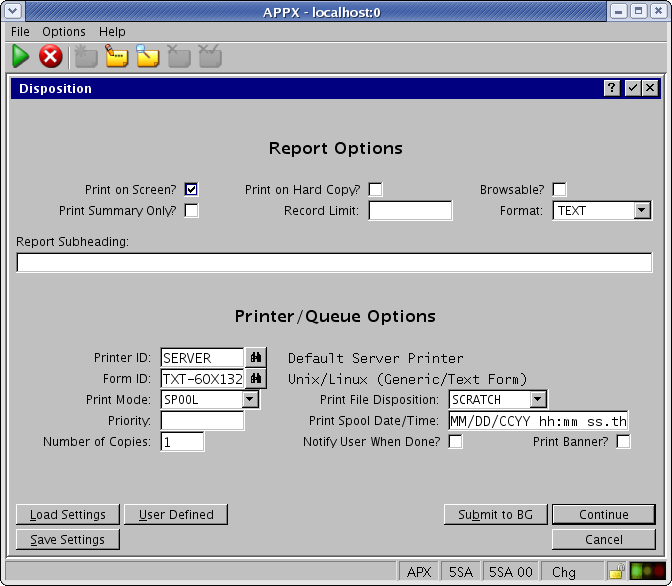
 La utilidad de conversion va crear un log. Especifique las disposiciones apropriadas y opciones para imprimir el log de conversion
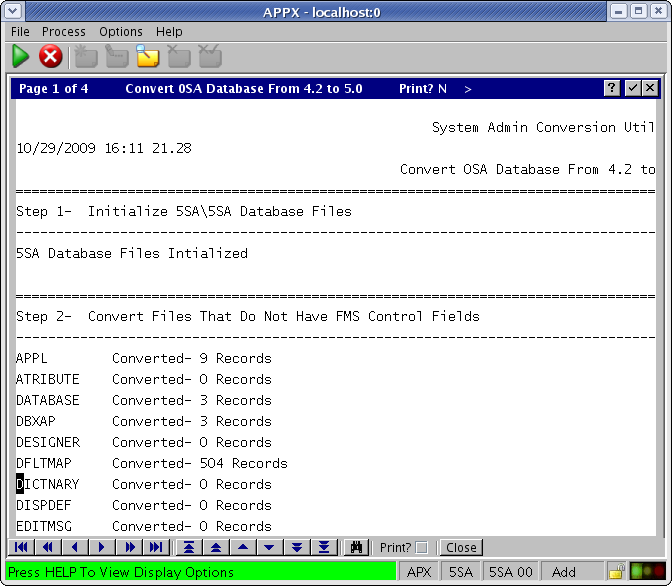
 El log de conversion va informar si hay algun problema que fue encontrado durante la conversion.
Install the actualizaciond System Administration Files
Usted esta casi listo para instalar Release 5 en cima de su instalacion existente. Antes de instalar APPX , usted necesita:- Terminar (kill) el APPX Connection Manager (appxd)
- Terminar (kill) las sessiones de APPX que estan todavia activas (si todos los usuarios estan logged off no vamos tener ninguna session)
- Terminar (kill) la session de APPX License Server
Install APPX 5.0.0
Ahora hay que seguir los seguintes pasos para instalar APPX 5.0.0:Overview
Two different methods are provided to install APPX on Linux/Unix. There is a GUI installer and a Console Mode (character mode) installer. The same installer is used for both methods. The installer will automatically detect if it is being run as a command or from a GUI Desktop, although in some cases you may have to add "-c" to the command line to force the character installer. Regardless of which installation method is used, the result is the same. A typical APPX installation on a system where APPX has not been previously installed performs the following steps:- Creates an O/S user named "appx" and a group named "appxgrp".
- Creates the destination directory and installs APPX into it.
- Sets the appropriate permissions
- Runs APPX to allow you to complete the configuration
- Add APPX System Administrators to the APPX user file
- Configure and start the APPX Login Manager service
- Configure and start the APPX Audit Manager service
- Install the license key
GUI Installation on Linux/Unix
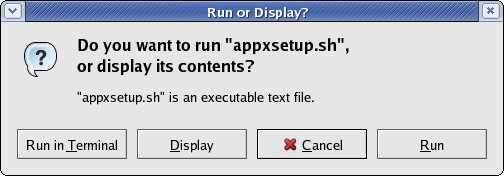
Log in to your system as the "root" user. Download the APPX/Linux GUI installer (appxsetup.sh) from the APPX web site or the APPX ftp server and save it to your Desktop or to any other suitable folder. The following instructions will refer to the appxsetup.sh file, which is the name of the Linux installer. The installers for other operating systems have similar names, ie, appxsetup-aix.sh for AIX, appxsetup-sun.sh for Solaris, and so on. if you are downloading directly from the ftp site, make sure you choose the correct installer for your O/S, and substitute your installer's name in the following instructions. Change the permissions on the downloaded installer file to have Execute permissions.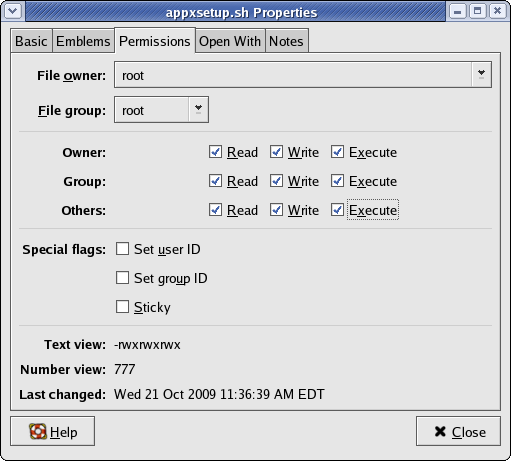 Run the installer file (appxsetup.sh). If you are presented with a "Run or Display?" screen similar to the one below, click on the "Run" button.
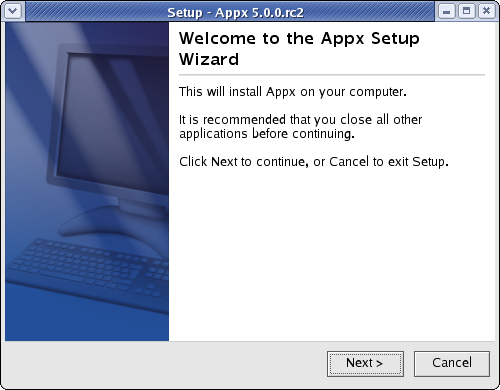
 After a few moments, the APPX Setup Wizard should display the Welcome screen. Click on the "Next" button to continue.
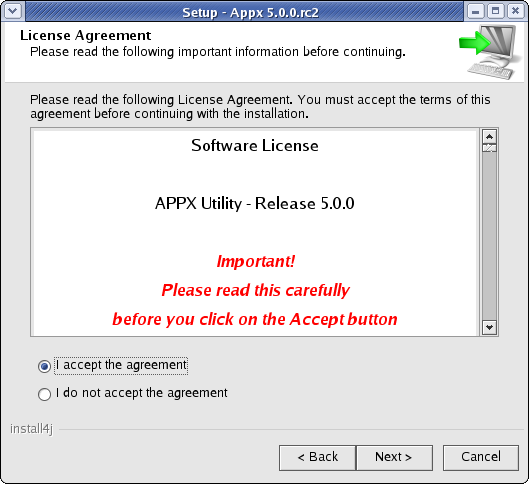
 Read and accept the license agreement.
 Specify the Destination Directory into which APPX is to be installed. As a matter of convention, APPX is usually installed into /usr/local/appx but may be installed into the directory of your choice.
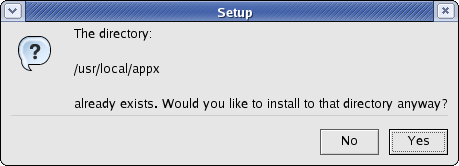
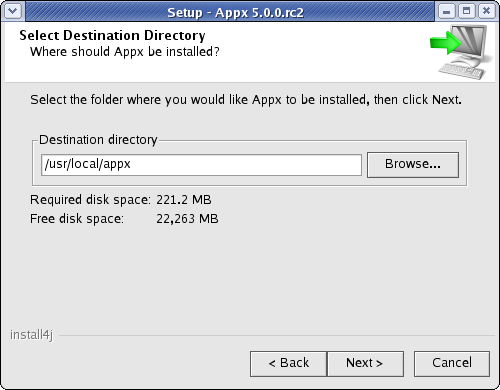 You will be warned if the destination directory already exists. Otherwise, the APPX Setup Wizard will create it.
 APPX will then be installed into the specified destination directory.
 When the APPX Setup Wizard displays the final screen, click on the Finish button to end the APPX Setup Wizard and to automatically run APPX to complete the configuration and installation of APPX.
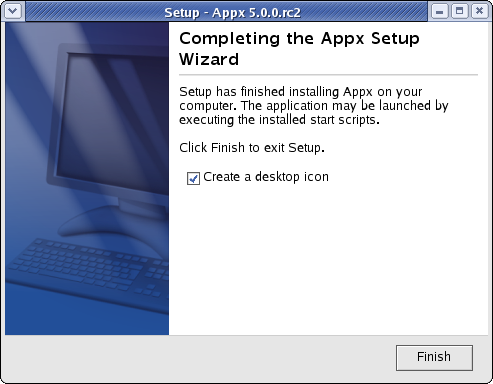 When you click on the Finish button, an APPX session will be automatically launched to APPX500NewInstallConfigAPPX of the APPX environment.
Finally, if you intend to log into APPX as user "appx", then you must add a password for the "appx" o/s user that was created by the installer (use the "passwd appx" command).
After completing the above steps, you should be able to login to APPX as user "appx" from a remote desktop using the ADC.
When you click on the Finish button, an APPX session will be automatically launched to APPX500NewInstallConfigAPPX of the APPX environment.
Finally, if you intend to log into APPX as user "appx", then you must add a password for the "appx" o/s user that was created by the installer (use the "passwd appx" command).
After completing the above steps, you should be able to login to APPX as user "appx" from a remote desktop using the ADC.
Character Mode Installation
If you don't have access to a GUI, you can run the Appx installer in character mode by appending "-c" to the command line. After a few moments, the Appx Setup Wizard should display the Welcome message. Press Enter to continue the installation.
On some systems the Java based installer may fail to run with a notice as shown below even though you are supplying the -c argument. In this case, make sure you have dejavu-sans-font package installed, and also that you have a non headless version of a JRE available to the installer. You can do that with the following yum command on RHEL8.
yum install dejavu-sans-fonts java-1.8.0-openjdk
Could not display the GUI. This application needs access to an X Server.
*******************************************************************
You can also run this application in console mode without
access to an X server by passing the argument -c
*******************************************************************
[root@rhel8 Downloads]#
# ./appxsetup.sh -c
Unpacking JRE ...
Preparing JRE ...
Starting Installer ...
This will install Appx on your computer.
OK [o, Enter], Cancel [c]
Next, read and accept the License agreement. Press Enter as each page is displayed. Please read the following License Agreement. You must accept the terms of this agreement before continuing with the installation. Software License APPX Utility - Release 5.0.0 _ Important! _ Please read this carefully before you click on the Accept button. Definitions: "Software License Agreement (SLA)" shall mean this Software License document and the associated *License Key document collectively. [Enter] After the agreement has been displayed, enter 1 to accept the license agreement, or 2 to cancel the installation. .
.
.
For inquires regarding this agreement, please contact: APPX Software, Inc., 11363 San Jose Blvd., Suite 301, Jacksonville, Florida 32223, USA I accept the agreement Yes [1], No [2]
Choose the directory where APPX should be installed and the other installation options. Where should Appx be installed? [/appx50] Create a desktop icon? Yes [y, Enter], No [n] Create a Quick Launch icon? Yes [y, Enter], No [n]
Install a new APPX 5.0.0 License Key
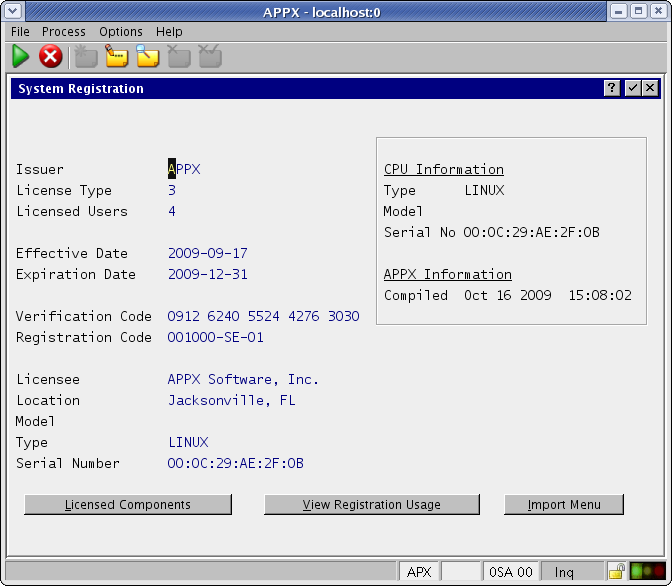
Hay que logar en su sistema de Linux como un usuario que es un APPX System Administrator. Despues empezar un session local APPX rodando el client-local.sh. Usted va mirar una pantalla con System Registration. Note que el campo Effective Date esta blanco. Con APPX 5.0.0, todas las licencias van tener Effective Date. Usted necesita instalar y hace un updade de la llave de licencia antes de rodar APPX 5.0.0 o mas alto. Note que en APPX 5 y mas alto usted puede copiar su registro en su clipboard, y APPX va detectar cuando usted selecciona "Typical Import" del "Import Menu" abajo. Despues de instalar la nueva llave de 5.0.0, su pantalla de System Registration va tener un Effective Date.
Configure the new APPX Login Manager
APPX 5.0.0 tiene un nuevo servicio de APPX Login Manager. Eso servicio substituye Connection Manager (appxd) que fue incluyedo en las versiones viejas APPX antes de APPX 5.0.0. La version vieja de Connection Manager no va funcionar en APPX 5.0.0 y no debe ser usada. Usted necesita remover appxd y start-appxd.sh del directorio de herramientas porque ellos no son mas necesarios. Usted tambien necesita remover cualquier comando que puede ser usado para rodar appxd durante el proceso de boot. Para configurar y empezar un nuevo servicio de APPX Login Manager, hay que logar en root user y ejecutar un comando similar a eso: /usr/local/appx/services/appxLoginMgr -install -name=appxLogin8060 -port=8060
Warning - the engine that you named has the setuid bit enabled,
you may not want that bit set for the authentication
method that you have chosen (OS-User)
To turn off the setuid bit, chmod u-s ../appx
Configuration written to: appxLogin8060.ini
Environment written to: appxLogin8060.env
Service script written to: /etc/init.d/appxLogin8060
Configuration complete
Registering service
Starting appxLogin8060: [ OK ]
Warning - the engine that you named has the setuid bit enabled,
you may not want that bit set for the authentication
method that you have chosen (OS-User)
To turn off the setuid bit, chmod u-s ../appx
up and running (process 31754 servicing port 8060)
Installation Complete_
Despues de ejecutar eso comando, usuarios van poder usar APPX 5.0.0 Desktop Client para logar en el porto 8060. Para informacion adicional en los servicios de APPX Login, por favor mire en complete documentation.
Final Tasks
- Crear nuevos archivos de System Administration ("System Administration/File Management/System Admin Files" del menu pull down).
- actualizacion los archivos de Design Files
- Remover los archivos de Structure para cada aplicacion
- Rodar Create Files para cada aplicacion
- Rodar 'Sync Widget Elements' para cada aplicacion. Eso es opcional, APPX va forzar eso cuando usted roda por la primera vez despues de instalar Release 5.0
- Rodar 'Load Initial Audit History' para cada aplicacion. Eso es opcional, APPX va crear eso automaticamente una historia cuando usted hace cambios en la aplicacion. Por ejemplo, la primera vez que usted va a INPUTs, APPX va mirar en la historia y ver que no hay nada y entonces va crear asi que lea los procesos de input. Si usted roda o no eso, APPX va empezar a mantener una historia de audit detallada de los cambios en la aplicacion de eso punto en diante. Entonces, usted necesita saber is va rodar eso o no. Si la informacion de audit ya existe cuando usted esta hacendo eso, va duplicar los datos.
- Instalar el nuevo APPX Desktop Client para todos sus usuarios
- Configurar las nuevas características si deseado
Comments:
Read what other users have said about this page or add your own comments.Did an AIX actualizacion, ran into the following: - when using the character installer, the permissions were not set. Had to manually change ownership & set sticky bit. - using 'ssh -X user@host' and then trying to run either client-local or client.sh did not work. The ADC would hang at 'Negotiating GUI something or other' - When trying to create new Sys Admin files, got error about Invalid Prototype Record Length on SYSDFLT. Scratched all Ems/Dbgs for the 0-apps and problem went away. -- JeanNeron - 2010-01-27
-- SteveFrizzell - 2 Nov 2009
Topic revision: r4 - 2010-03-09 - RayPelegrino

Ideas, requests, problems regarding TWiki? Send feedback