Mapping Files & Fields
This page describes how to map incoming data to Appx files/Fields.Overview:
In order to map the incoming data to Appx files and fields, you need a sample of the import file to work with. This should be uploaded using 'Define File/Field Map from Source File'. Once your map is defined and saved, you can maintain it afterwards by using 'Define File/Field Map'.Usage
Start by running 'Define File/Field Map from Source File', you should see the following display: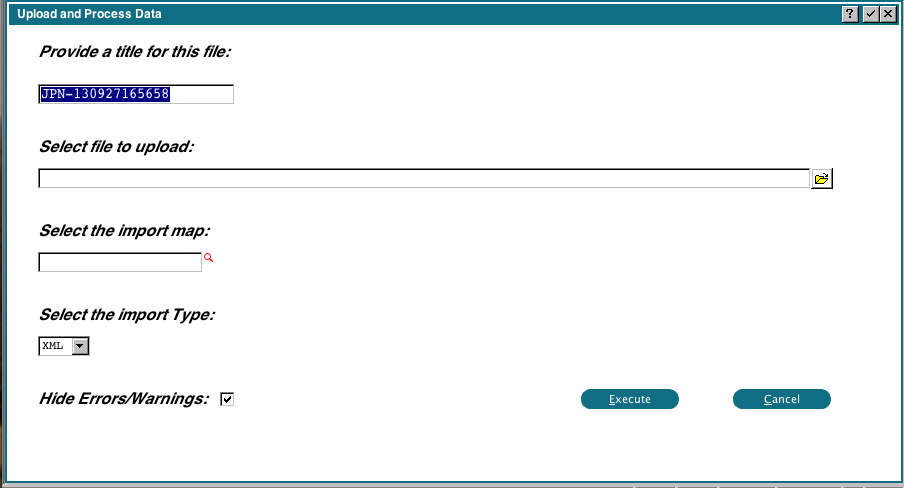 The title will default to your user initials, plus the current date/time. You can change this if you wish. You can drag and drop the PROSPECT.XML file from your desktop, or use the file chooser. Leave the import map blank. Currently 0DX only supports XML, you cannot change that. The 'Hide Errors/Warnings' flag normally suppresses any problems with the source file. If you are having problems importing a file, you can uncheck this flag to see if there are any formatting problems with the incoming data.
Once you click 'Execute' the tags and data will be extracted from the PROSPECT.XML file, and you will be able to refer to them as you create your mapping. When this is complete, you will see the following display:
The title will default to your user initials, plus the current date/time. You can change this if you wish. You can drag and drop the PROSPECT.XML file from your desktop, or use the file chooser. Leave the import map blank. Currently 0DX only supports XML, you cannot change that. The 'Hide Errors/Warnings' flag normally suppresses any problems with the source file. If you are having problems importing a file, you can uncheck this flag to see if there are any formatting problems with the incoming data.
Once you click 'Execute' the tags and data will be extracted from the PROSPECT.XML file, and you will be able to refer to them as you create your mapping. When this is complete, you will see the following display:
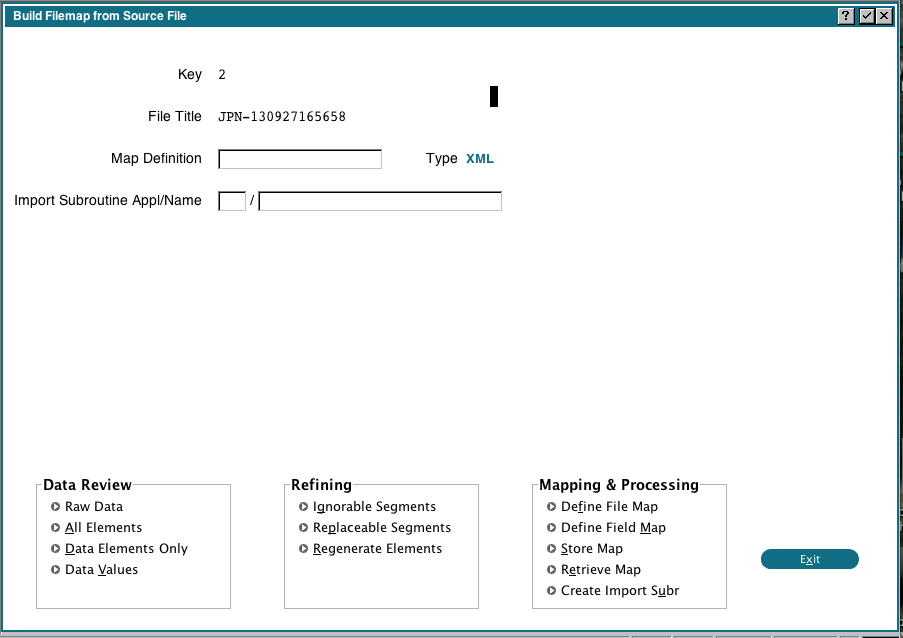 At this point, all the elements and data have been extracted and are stored in some internal files in the 0DX application. We can use those to help us map the files and fields.
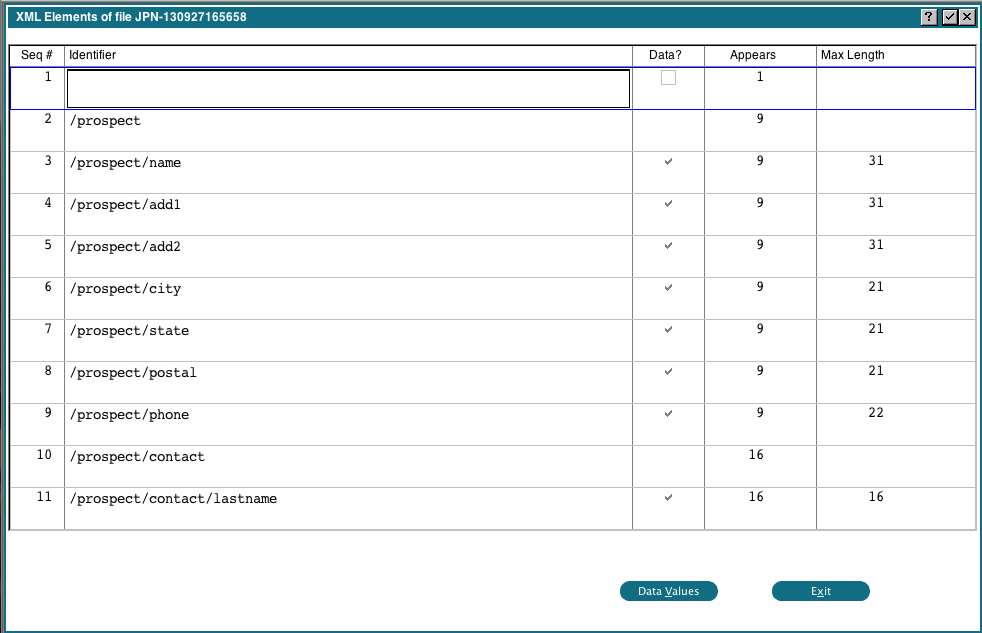
Let's start by examining the elements and data, click the 'All Elements' button under 'Data Review'. You should see the following display:
At this point, all the elements and data have been extracted and are stored in some internal files in the 0DX application. We can use those to help us map the files and fields.
Let's start by examining the elements and data, click the 'All Elements' button under 'Data Review'. You should see the following display:
 This shows us the identifiers found, whether they contain data or not, how many times each one appears and the maximum length of the data for that identifier. We can click the 'Data Values' button and we will see the actual data associated with that identifier. Notice that 'ProspectData' is the top level identifier and is prefixed on all identifiers. We can use a feature of the mapping routine to simplify our identifier strings by removing it. Click 'Exit' to return to the previous display, then click 'Ignorable Segments' under 'Refining'. You will get the following popup:
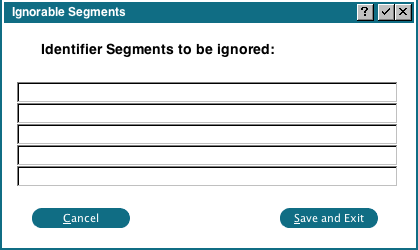 Enter 'ProspectData' in the first field, then click 'Save and Exit'. Under 'Refining', click 'Regenerate Elements'. Appx will then reprocess the file, applying the new rule. When this is done, click 'All Elements' under 'Data Review'. You should now see:
 Notice that the leading 'ProspectData' has been removed from all identifiers. Click 'Exit' to return to the previous display.
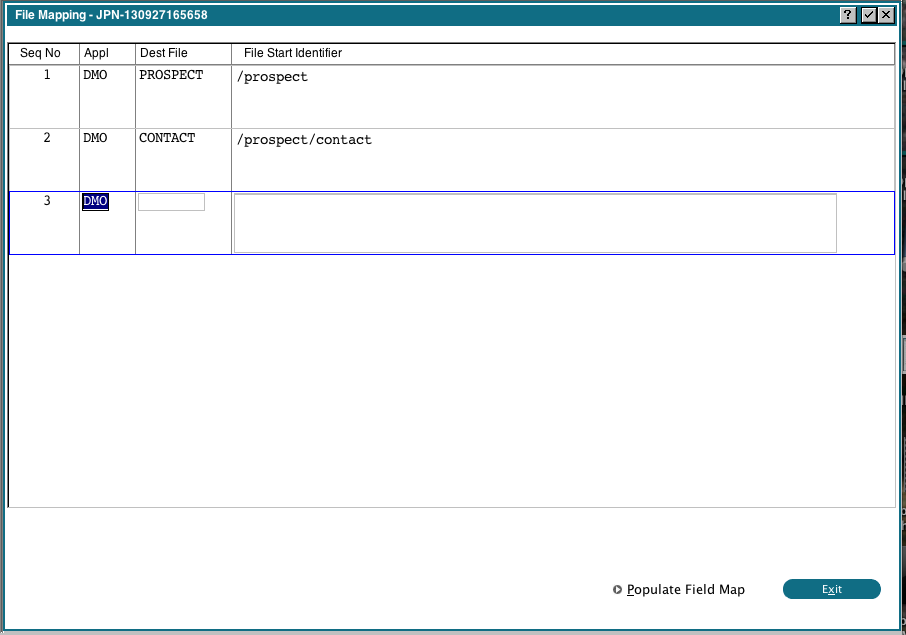
We can now begin mapping the files and fields. Click the 'Define File Map' button under 'Mapping & Processing'. You should see the following display:
Notice that the leading 'ProspectData' has been removed from all identifiers. Click 'Exit' to return to the previous display.
We can now begin mapping the files and fields. Click the 'Define File Map' button under 'Mapping & Processing'. You should see the following display:
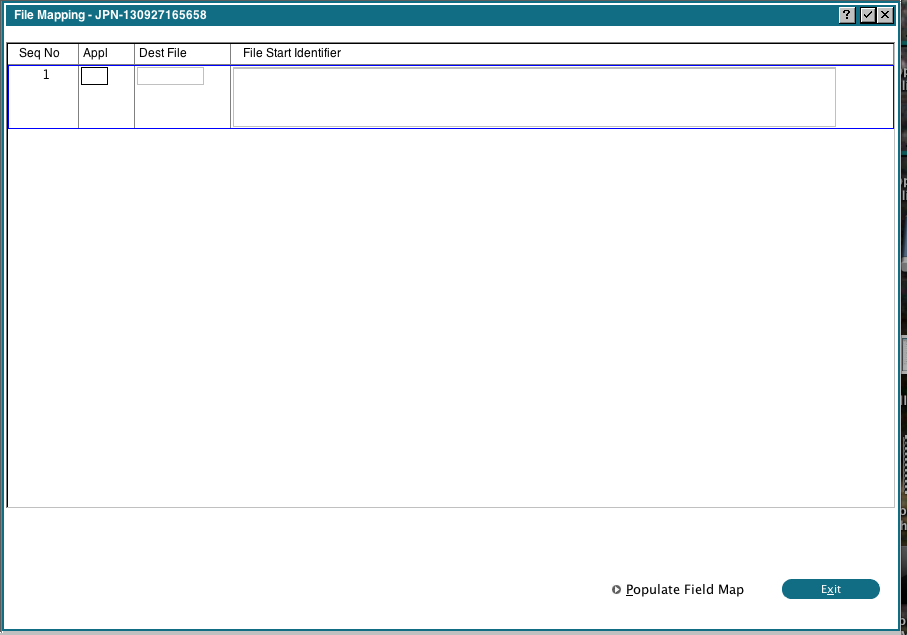 This is where we tell 0DX which identifier indicates the beginning of a new record. We have 2 records in our XML file, Prospects and Contacts. For the first line, enter Application DMO, Dest File PROSPECT and then use the Scan key in the File Start Identifier field to select '/prospect' from the list. Before pressing Enter, click the 'Populate Field Map' button. This will populate the field mapping with all the fields in the PROSPECT file. Repeat this process for the DMO CONTACT file, choosing '/prospect/contact' for the identifier. When you're done, the display should look like:
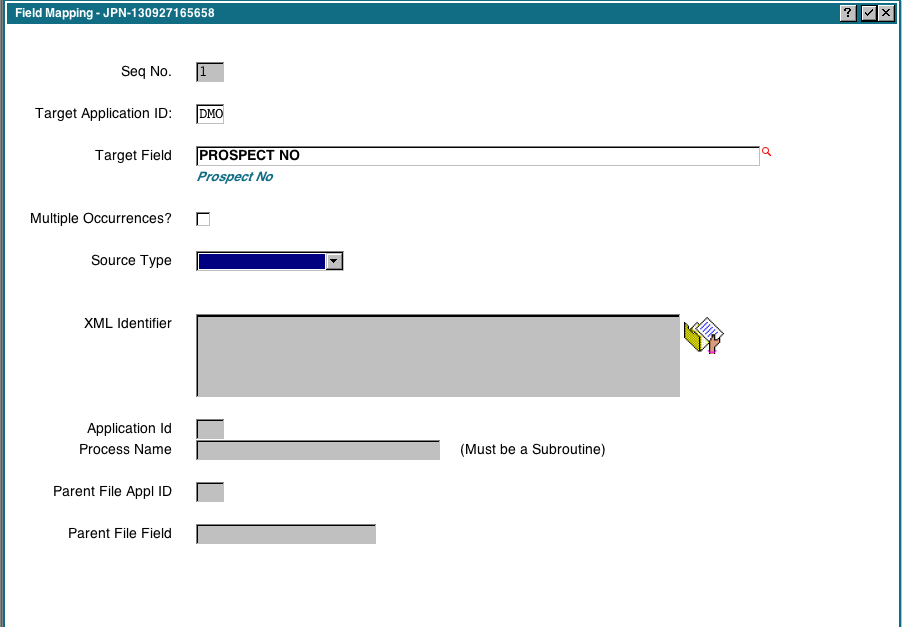
 Now we are ready to map our fields. Click 'Exit' to return to the previous display, then click 'Field Map'. You should see the following display:
Comments:
Read what other users have said about this page or add your own comments.-- JeanNeron - 2013-09-27

Ideas, requests, problems regarding TWiki? Send feedback