Difference: MedicaidPaymentReconciliationManual (10 vs. 11)
Revision 112010-03-22 - JeffPrentice
| Line: 1 to 1 | ||||||||
|---|---|---|---|---|---|---|---|---|
Appx Medicaid ReconciliationOverview | ||||||||
| Line: 36 to 36 | ||||||||
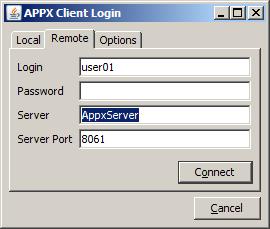
| Appx is a computer programming tool for developing business application software. The MPR system is written using the Appx programming tool. You must start Appx then run the MPR system. The MPR system is compatible with most versions of Appx. As such, the version of Appx you have may depend on when Appx and the MPR system was installed. The MPR system is designed to work with an electronic version of the bill that each county may download. As such, the version of MPR you are using must always be up to date to process the current version of the download file. To start Appx double click on the Appx icon on your desktop. This icon may be named Medicaid Reconciliation, or MPR, or Appx. The Appx Desktop Client software starts and displays a window which will allow you to log in to Appx. You must be a valid user defined in Appx to log in to Appx. | ||||||||
| Added: | ||||||||
| > > | Figure: Appx Client Login Screen | |||||||
 | ||||||||
| Added: | ||||||||
| > > | ||||||||
| On the Remote tab you must enter your Desktop user id in the Login field, your desktop Password, the name of the Appx server, and the port. The software remembers your user id, server name, and port, but you must enter your password every time you attempt to log in to Appx. All of these fields are required. Click Connect after entering all the login information and Appx will start. When Appx starts one of the following screens will appear depending on the version of Appx you are using. | ||||||||
| Added: | ||||||||
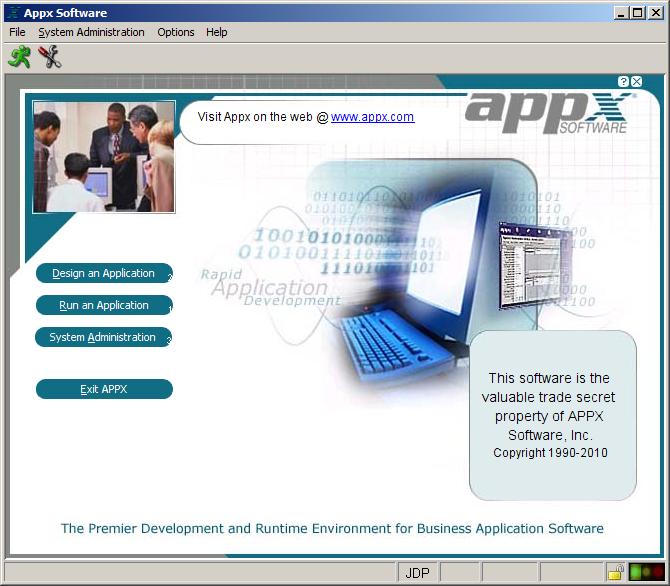
| > > | Figure: Appx Menu, Version 4.2 and Above | |||||||
 | ||||||||
| Added: | ||||||||
| > > | ||||||||
| Changed: | ||||||||
| < < | Appx main menu for version 4.2 and above. | |||||||
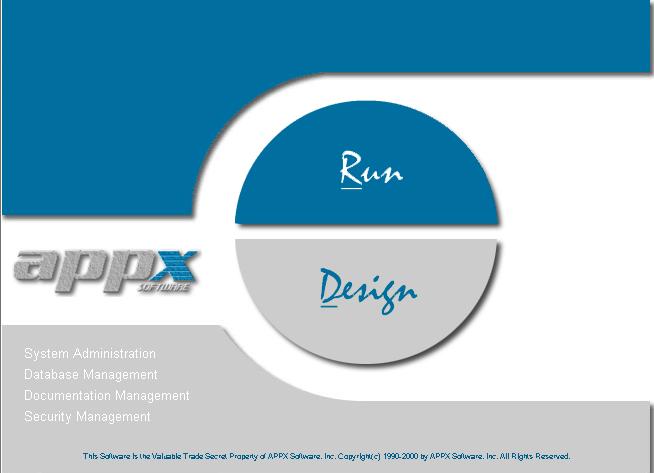
| > > | Figure: Appx Menu, Version 4.1.a and Below | |||||||
 | ||||||||
| Added: | ||||||||
| > > | ||||||||
| Changed: | ||||||||
| < < | Appx main menu for version 4.1.a and below. From this menu you can start the MPR system, maintain or modify the Appx environment, or modify the MPR programs. There may be times you want to maintain or modify the system however someone from Appx will be helping you with that. To start the MPR system for reconciliation click on either Run or Run an Application and enter the three character “Database ID” for your county. Each county has a different Database ID. You can click on the binoculars and search the list to find the Database for the MPR system. | |||||||
| > > | From this menu you can start the MPR system, maintain or modify the Appx environment, or modify the MPR programs. There may be times you want to maintain or modify the system however someone from Appx will be helping you with that. To start the MPR system for reconciliation click on either Run or Run an Application, depending on the Appx Menu shown, and enter the three character “Database ID” for your county. Each county has a different Database ID. You can click on the binoculars and search the list to find the Database for the MPR system.
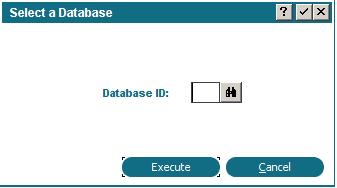
Figure: Select Database ID Screen | |||||||
 | ||||||||
| Added: | ||||||||
| > > | ||||||||
| After entering or selecting the Database ID press enter or click Execute and the MPR system will start and the MPR Medicaid Payment Reconciliation Administration Menu will appear. This menu will be referred to as the main menu from this point forward. | ||||||||
| Line: 76 to 72 | ||||||||
| There are several options available on main menu. These options are grouped by functionality. | ||||||||
| Added: | ||||||||
| > > | Figure: MPR Medicaid Payment Reconciliation Administration Menu (Main Menu) | |||||||
 | ||||||||
| Added: | ||||||||
| > > | ||||||||
File Maintenance FunctionsFile Maintenance functions allow you to customize and configure your application. | ||||||||
| Line: 97 to 97 | ||||||||
Enter the initials and full name of the people in your county that mainain the MPR system. The user’s ID is automatically added to audit information within the system.
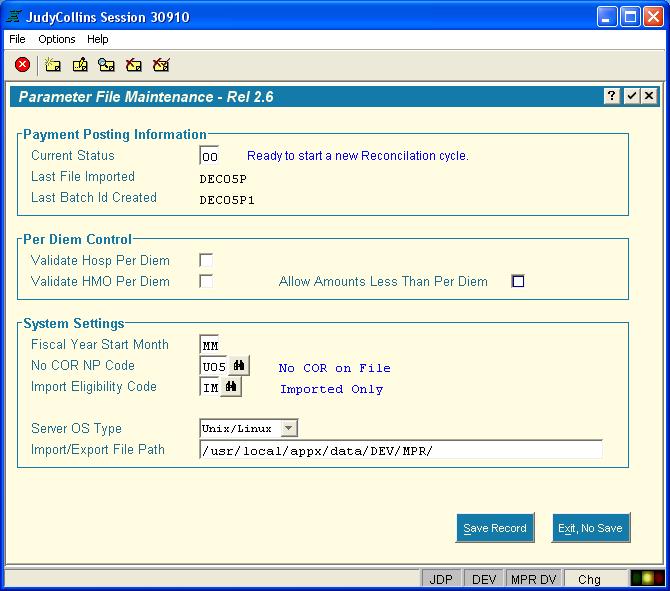
Parameter File Maintenance | ||||||||
| Added: | ||||||||
| > > | Figure: Parameter File Maintenance Screen | |||||||
 | ||||||||
| Added: | ||||||||
| > > | ||||||||
| This input process is used to maintain your MPR system settings. Caution should be taken before changing any settings on this screen. | ||||||||
| Line: 134 to 137 | ||||||||
| The large button, Medicaid Payment Processing Menu, will invoke the reconciliation menu. The Special Functions Menu is for performing unique task. | ||||||||
| Deleted: | ||||||||
| < < | ||||||||
| Deleted: | ||||||||
| < < | ||||||||
| Deleted: | ||||||||
| < < | ||||||||
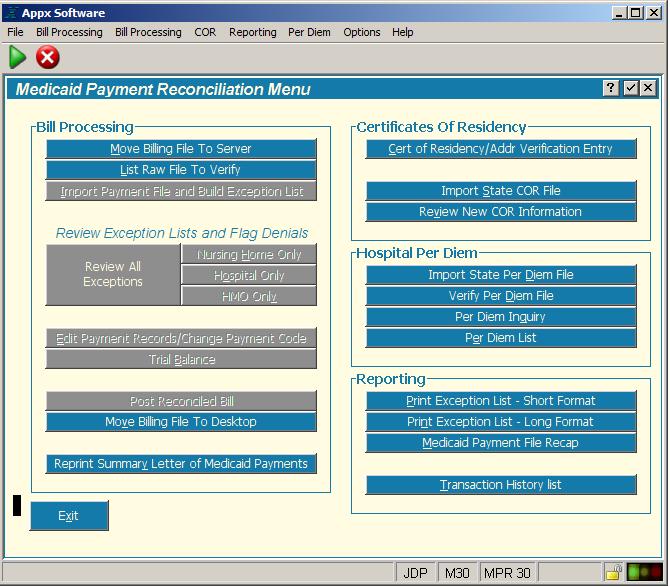
Medicaid Payment Reconciliation Menu | ||||||||
| Line: 153 to 145 | ||||||||
Medicaid Payment Reconciliation Menu | ||||||||
| Added: | ||||||||
| > > | Figure: Reconciliation Menu | |||||||
 | ||||||||
| Added: | ||||||||
| > > | ||||||||
Certificate of ResidencyThe Certificate Of Residency section is where you maintain Certificate of Residency (COR) records. As each client record in the monthly bill is read by the MPR system, it is checked against the COR file. If a matching COR record is found and that COR record is flagged as Eligible (EL) then this billing record will not be listed as an exception. Instead the billing record will be passed and will not appear on the exception list. | ||||||||
| Line: 161 to 157 | ||||||||
Notice updating or adding COR records is not part of the reconciliation process. You can, and should, maintain your COR file periodically throughout the month. Having a robust COR file will save you a lot of time each month reconciling the bill.
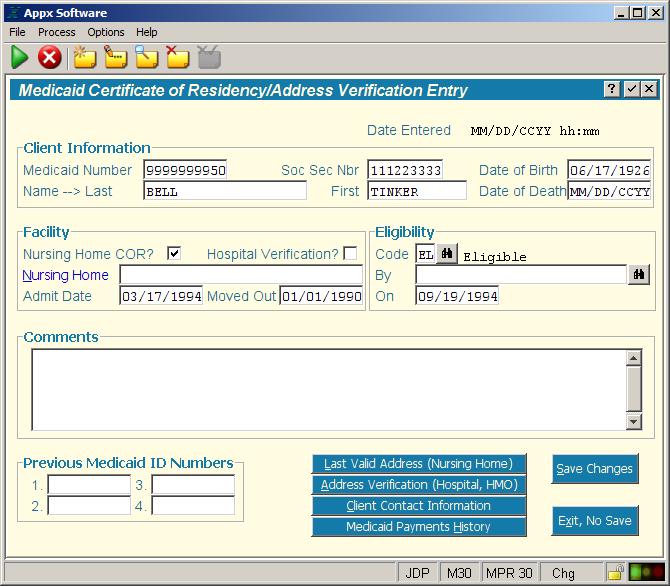
Cert of Residency/Addr Verification Entry | ||||||||
| Added: | ||||||||
| > > | Figure: Certificate of Residency Screen | |||||||
 | ||||||||
| Added: | ||||||||
| > > | ||||||||
| You can add or change COR record information on this screen. The COR file can be updated with live records from the bill. This might be the easiest and fastest way to keep your COR file up to date. While processing the bill you can have the MPR system create a COR record for you. Most of the information in the COR record is populated with the data from the billing record. All you need to do is mark the eligibility status. The MPR system will not alter the eligibility status automatically from the billing record. | ||||||||
| Line: 175 to 174 | ||||||||
| This process lists all the newly imported COR records from the State. Each COR must be reviewed for eligibility. The COR file will be updated with the incoming record if the COR is accepted. This process is tied to the Import State COR File which is currently not being used. | ||||||||
| Deleted: | ||||||||
| < < | ||||||||
| Line: 208 to 202 | ||||||||
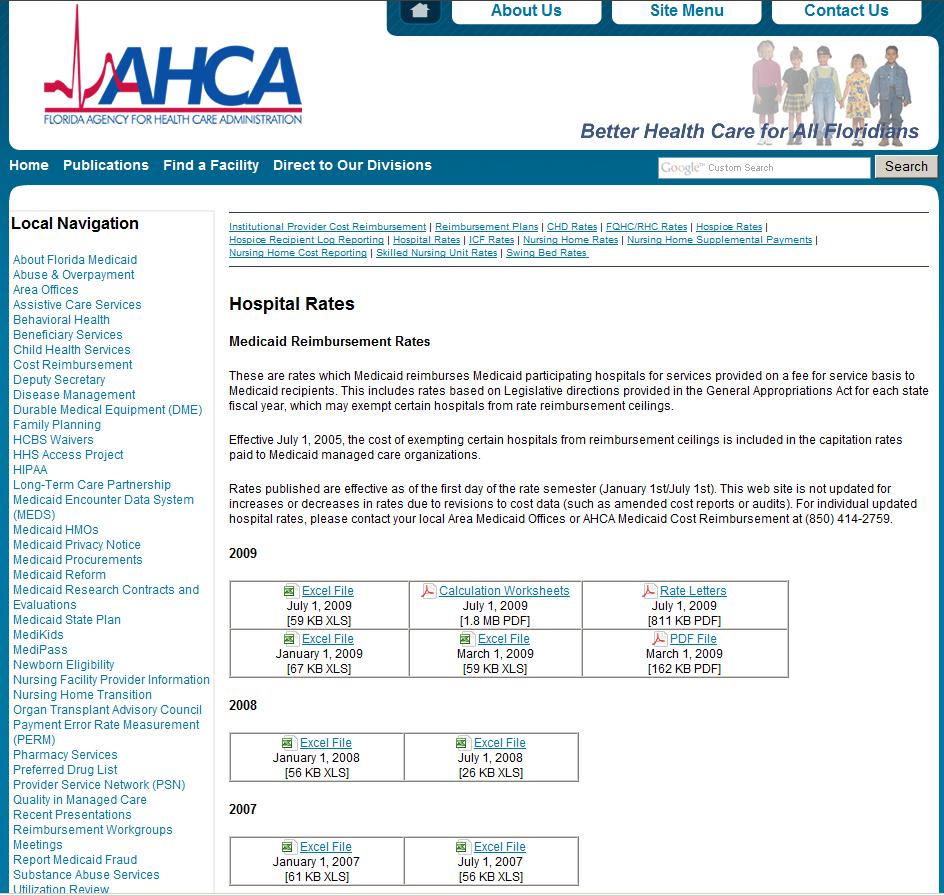
| http://www.fdhc.state.fl.us/Medicaid/cost_reim/hospital_rates.shtml | ||||||||
| Added: | ||||||||
| > > | Figure: AHCA Web Site for Downloading Per Diem | |||||||
 | ||||||||
| Added: | ||||||||
| > > | ||||||||
| Per Diem files are under the heading Hospital Rates on this web site. The file you download includes all the providers within Florida. There are not specific files for each county as with the bill. The file will download as a spreadsheet (xls, Excel). Open this file with Excel and save it as a tab delimited text file to the /Download directory. Name the file using the standard MMMYYx format. For example, JAN05H. Use H to identify this file as a hospital per diem file. | ||||||||
| Line: 248 to 245 | ||||||||
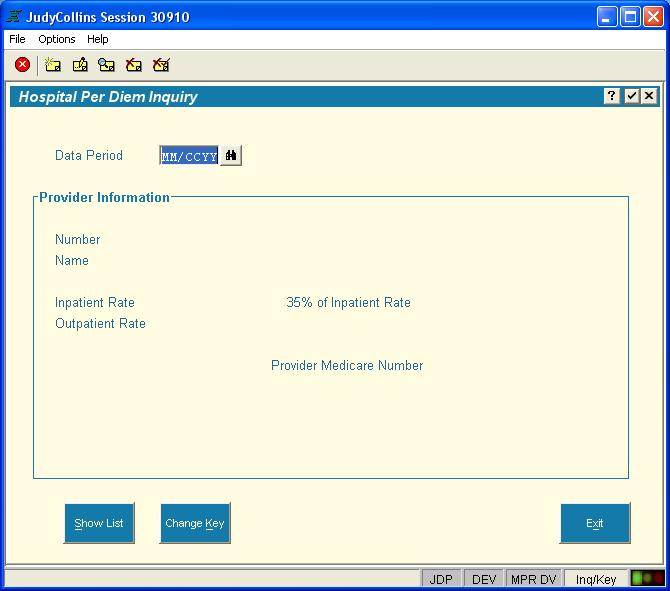
| If you wish to view the per diem information that has been calculated and is currently residing in your system you can click this button then specify the semester you wish to look at. | ||||||||
| Added: | ||||||||
| > > | Figure: Per Diem Inquiry Screen | |||||||
 | ||||||||
| Added: | ||||||||
| > > | ||||||||
Per Diem ListThis function will list the per diem data that is stored in your system. Enter the Data Period you wish to print and click Create List. Leave the Data Period blank to get a listing of the entire Per Diem file. After clicking Create List, the standard Appx Print Disposition screen will appear. Enter any specific instructions for the printed output and continue. | ||||||||
| Line: 350 to 341 | ||||||||
|
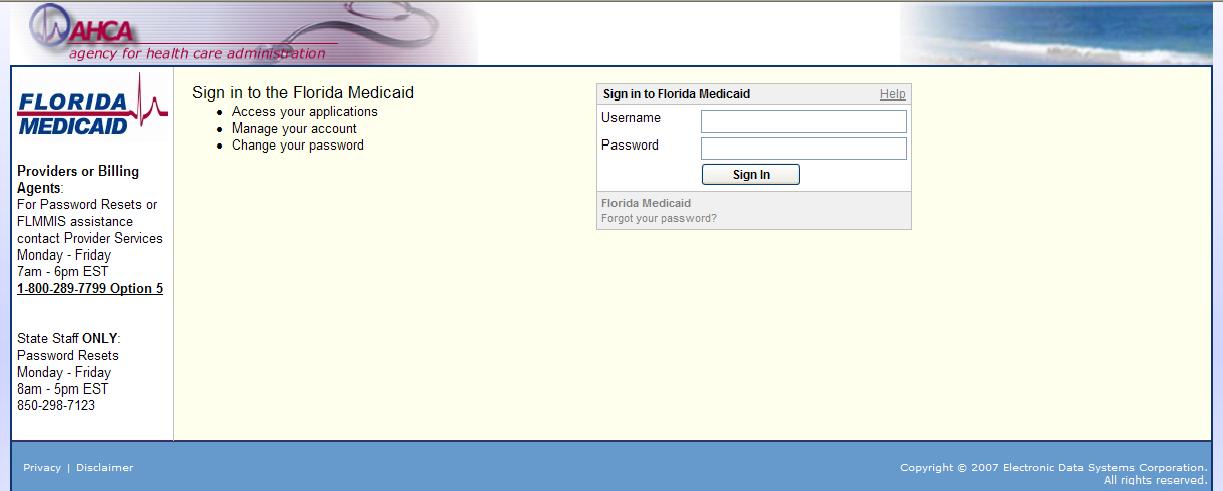
When you have a username and password, go to https://home.flmmis.com | ||||||||
| Added: | ||||||||
| > > | Figure: AHCA Login Screen | |||||||
 | ||||||||
| Added: | ||||||||
| > > | ||||||||
| Enter your username and password and click Sign In. These fields are case sensitive. | ||||||||
| Line: 372 to 366 | ||||||||
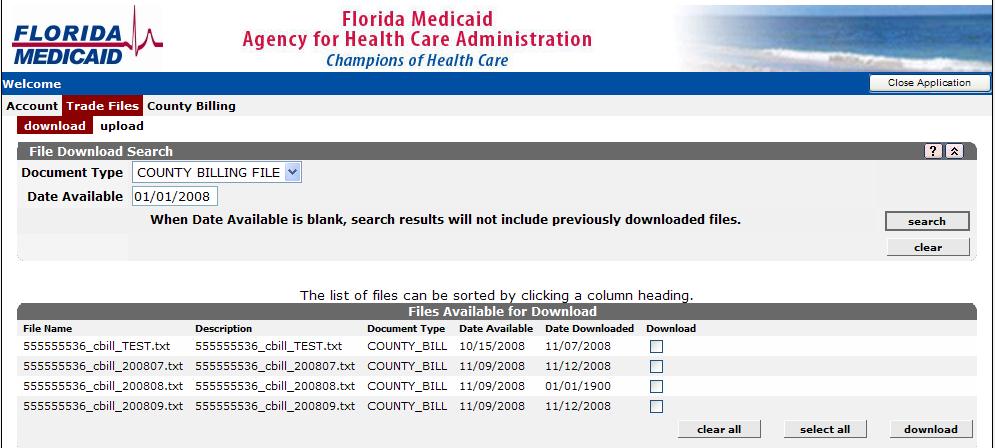
| Click on the “search” button after fields are entered. | ||||||||
| Added: | ||||||||
| > > | Figure: AHCA Web Site for Selecting Monthy File (Bill) | |||||||
 | ||||||||
| Added: | ||||||||
| > > | ||||||||
|
The above illustrates the results of a search for 01/01/2008 (test data). Bills that are available for download are listed. The File Name, Description, the Document Type, Actual Date Available, and the Date this file was previously Downloaded, if applicable, is shown. Use this list to select the file you wish to download and click the “download” button in the lower right corner. Do not download more than one file at a time. | ||||||||
| Line: 494 to 491 | ||||||||
| The file you selected for uploading will still be in the Upload directory on your computer after the transfer. If you need to send this file again, simply repeat the upload process. It is a good idea to keep these files because they can be used to recreate your history files if necessary. | ||||||||
| Deleted: | ||||||||
| < < | ||||||||
| Deleted: | ||||||||
| < < | ||||||||
| Deleted: | ||||||||
| < < | ||||||||
Special Functions Menu | ||||||||
| Line: 511 to 501 | ||||||||
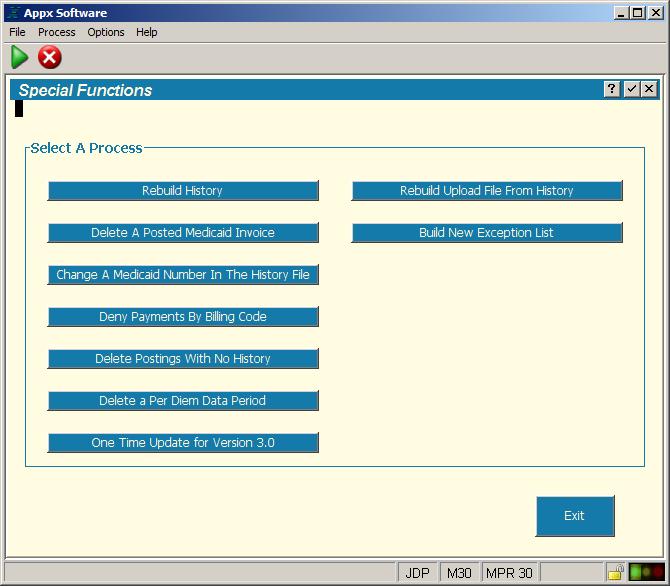
| The Special Functions menu contains processes to assist you in maintaining your system or to perform batch data processing. | ||||||||
| Added: | ||||||||
| > > | Figure: Special Function Menu | |||||||
 | ||||||||
| Added: | ||||||||
| > > | ||||||||
Rebuild HistoryThis function will rebuild the history file from the reconciled billing files in the Upload directory. | ||||||||
| Line: 551 to 545 | ||||||||
| The Exit button will take you back to the MPR main menu. | ||||||||
| Deleted: | ||||||||
| < < | ||||||||
| Line: 674 to 658 | ||||||||
| The service date specified is after the “Moved Out” date on the COR for this client. | ||||||||
| Deleted: | ||||||||
| < < | ||||||||
| Deleted: | ||||||||
| < < | ||||||||
| Deleted: | ||||||||
| < < | ||||||||
| ||||||||
View topic | History: r18 < r17 < r16 < r15 | More topic actions...
Ideas, requests, problems regarding TWiki? Send feedback