Difference: Appx550FeaturesSysAdmin (6 vs. 7)
Revision 72020-04-28 - JeanNeron
| Line: 1 to 1 | |||||||||||||||||||||||
|---|---|---|---|---|---|---|---|---|---|---|---|---|---|---|---|---|---|---|---|---|---|---|---|
APPX 5.5.0 Features - System AdministrationThis page describes the new features in Application DesignNew Environment VariablesSome new environment variables have been added in this release: | |||||||||||||||||||||||
| Changed: | |||||||||||||||||||||||
| < < | APPX_SCREEN_ROWS - Sets the default number of rows for use when adding a new Input. APPX_SCREEN_COLS - Sets the default number of columns for use when adding a new Input. APPX_DATASVC_LOG - Sets the path & file name of the debug log for the new Data API APPX_EXPERIMENTAL_PROCESS_DESIGN - Activates a prototype Input editor in Application Design APPX_KEEP_FMS1 - Changes the default FMS type back to 1 instead of 9 APPX_EMAIL_LOG - Sets the path & file name of the debug log for the new Email API APPX_DOC_ON_ADD - Causes APPX to display the new HTML documentation screen automatically when adding objects. | ||||||||||||||||||||||
| > > | APPX_SCREEN_ROWS - Sets the default number of rows for use when adding a new Input. APPX_SCREEN_COLS - Sets the default number of columns for use when adding a new Input. APPX_DATASVC_LOG - Sets the path & file name of the debug log for the new Data API APPX_EXPERIMENTAL_PROCESS_DESIGN - Activates a prototype Input editor in Application Design APPX_KEEP_FMS1 - Changes the default FMS type back to 1 instead of 9 APPX_EMAIL_LOG - Sets the path & file name of the debug log for the new Email API APPX_DOC_ON_ADD - Causes APPX to display the new HTML documentation screen automatically when adding objects. APPX_USE_OLD_ITEM_EDIT - Causes APPX to use the old Item editor | ||||||||||||||||||||||
See the Environment Variable wizard at https://www.appx.com/wizardNew files created with FMS type 9 automaticallyWhen a new file is added to an application, it will default to a FMS type 9 (large file format) automatically. This eliminates the possiblity of hitting the 4G file limit on a file. To set the default back to FMS type 1, set the environment variable APPX_KEEP_FMS1 to any non blank value.Inactive flag on User FileAn 'Inactive' flag has been added to the User file: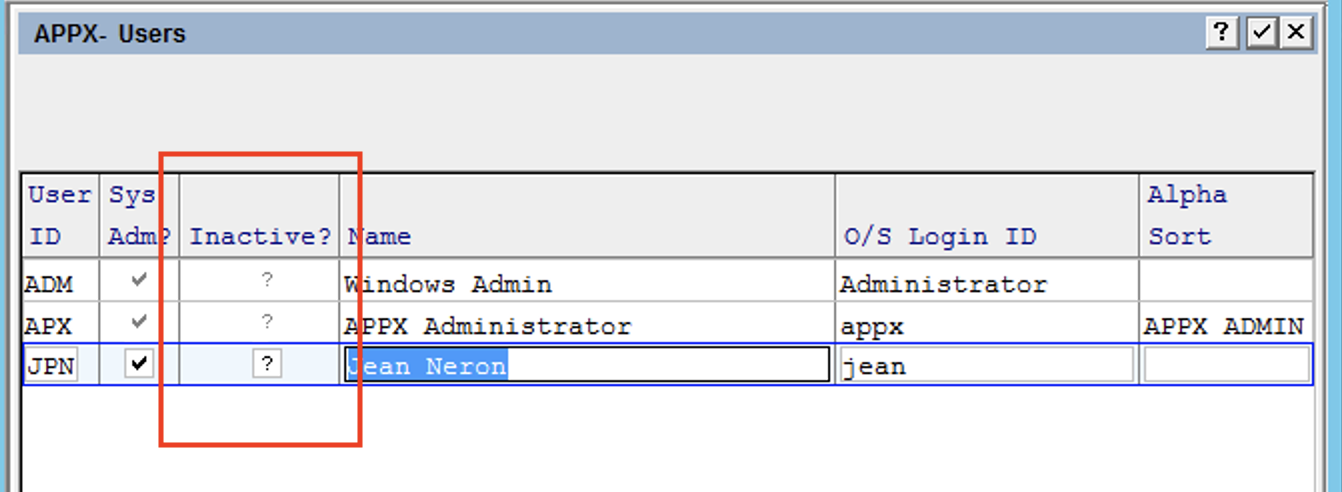 A blank or N value means the user can log in. If this field is checked, then the user will receive an 'Invalid User or Password' error when they try to log in.
Design File ManagementDesign File Management has been enhanced to allow you to leave out the Application, Version or both. Anytime you are prompted for an Application / Version, you can:
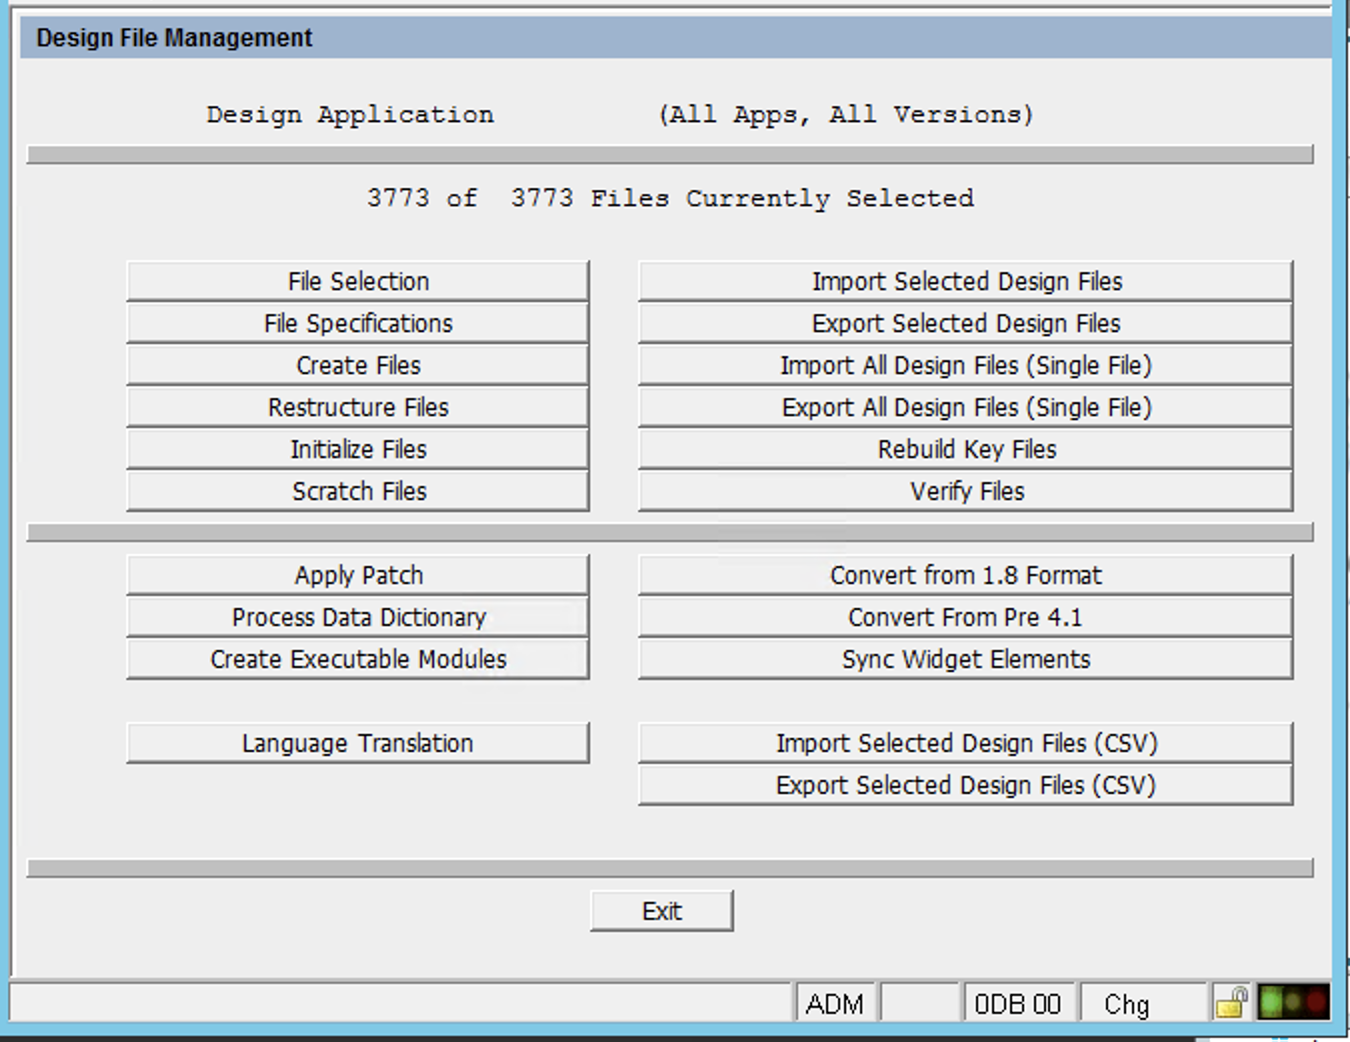 When multiple Applications are selected, some options are not allowed:
Data file managementData File Management has been enhanced to allow you to leave out the Application, Database or both. Anytime you are prompted for an Application / Database, you can:
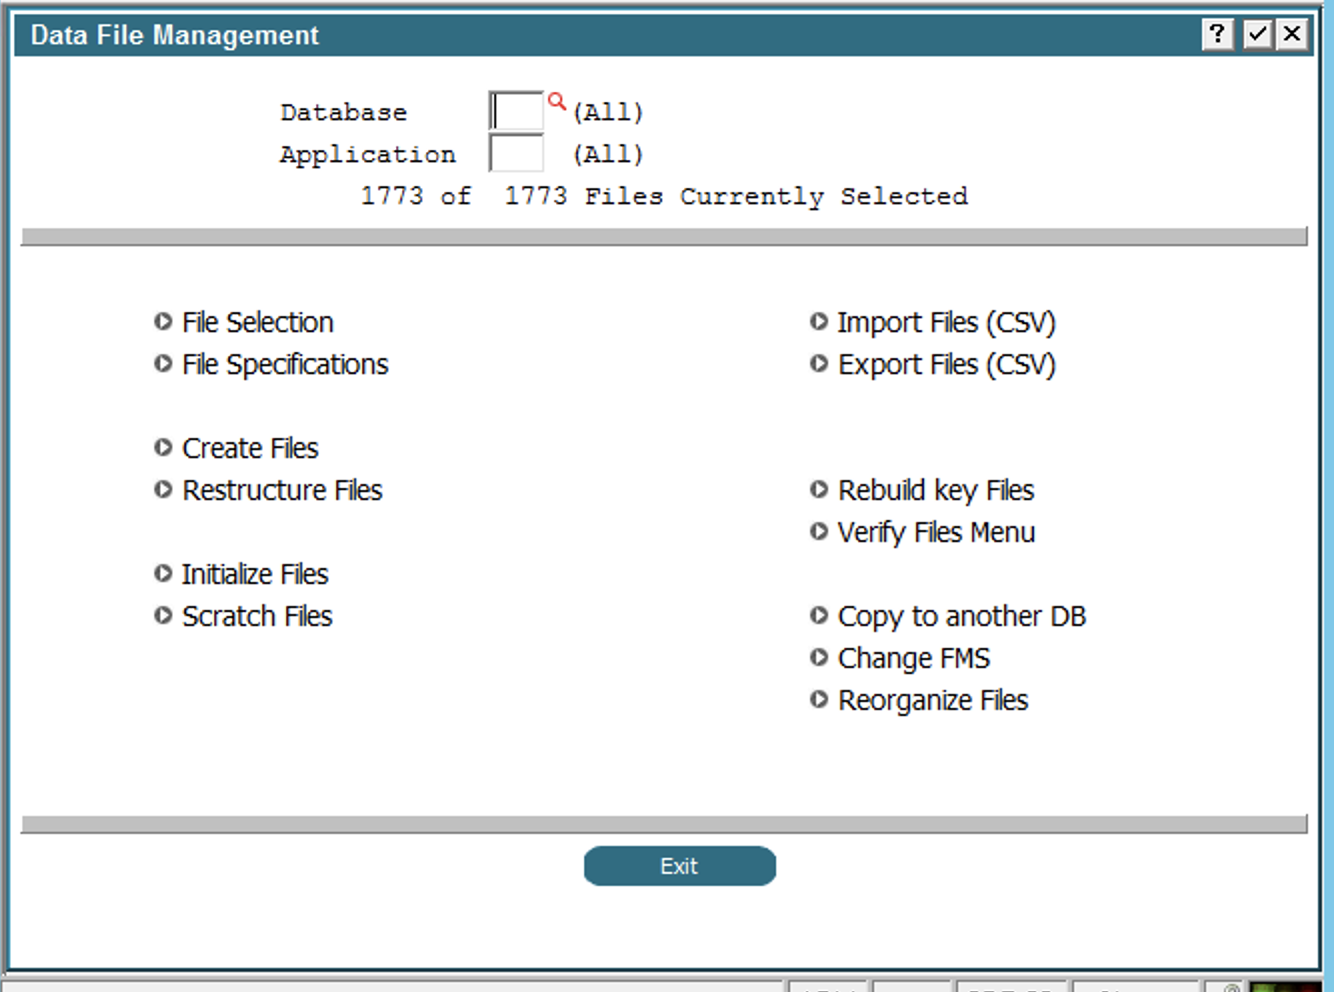 In addition, some new features have been added:
File Selection EnhancedSince you can now select mutiple Databases, Applications, and Versions in Data/Design File Management, we also enhanced the File Selection capability. The 'Go To' has more fields: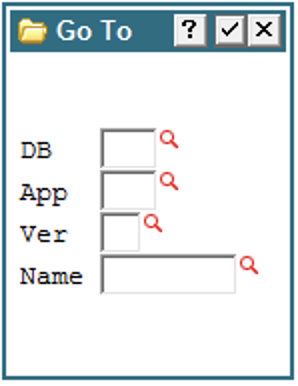 The key to the list of files is Database/Application/Version and Name. This allows you to go to a specific key. Design Files do not have a Database, so you would leave that blank, but fill in the App/Ver/Name. Data files have a Database, so you would have to fill in all key parts.
The 'Select' button also has some additional fields:
The key to the list of files is Database/Application/Version and Name. This allows you to go to a specific key. Design Files do not have a Database, so you would leave that blank, but fill in the App/Ver/Name. Data files have a Database, so you would have to fill in all key parts.
The 'Select' button also has some additional fields:
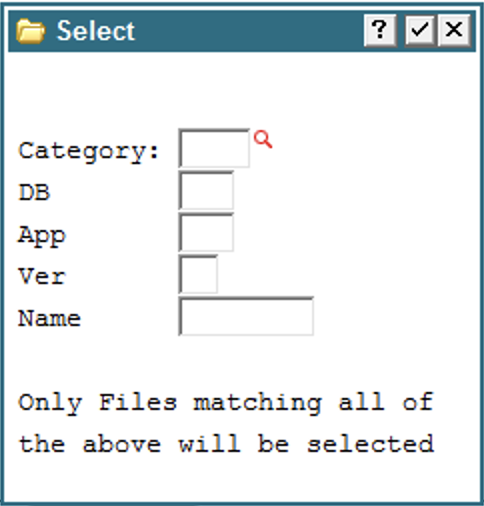 'Category' is only applicable to Data files. Category refers to the Category you entered in the Additional Attributes of the file in the Data Dictionary. The SCAN icon will show you a list of all the Categories found in the selected files. All fields are ANDed together to find matches. For example, if you only entered 'CUSTOMER' as a file name, then all files named 'CUSTOMER' would be selected. If you also entered a Database, then only files named 'CUSTOMER' in the specified database would be selected, regardless of Application. Or if you initially chose a particular Application, all Databases, then you could use this to select 'CUSTOMER' in all Databases.
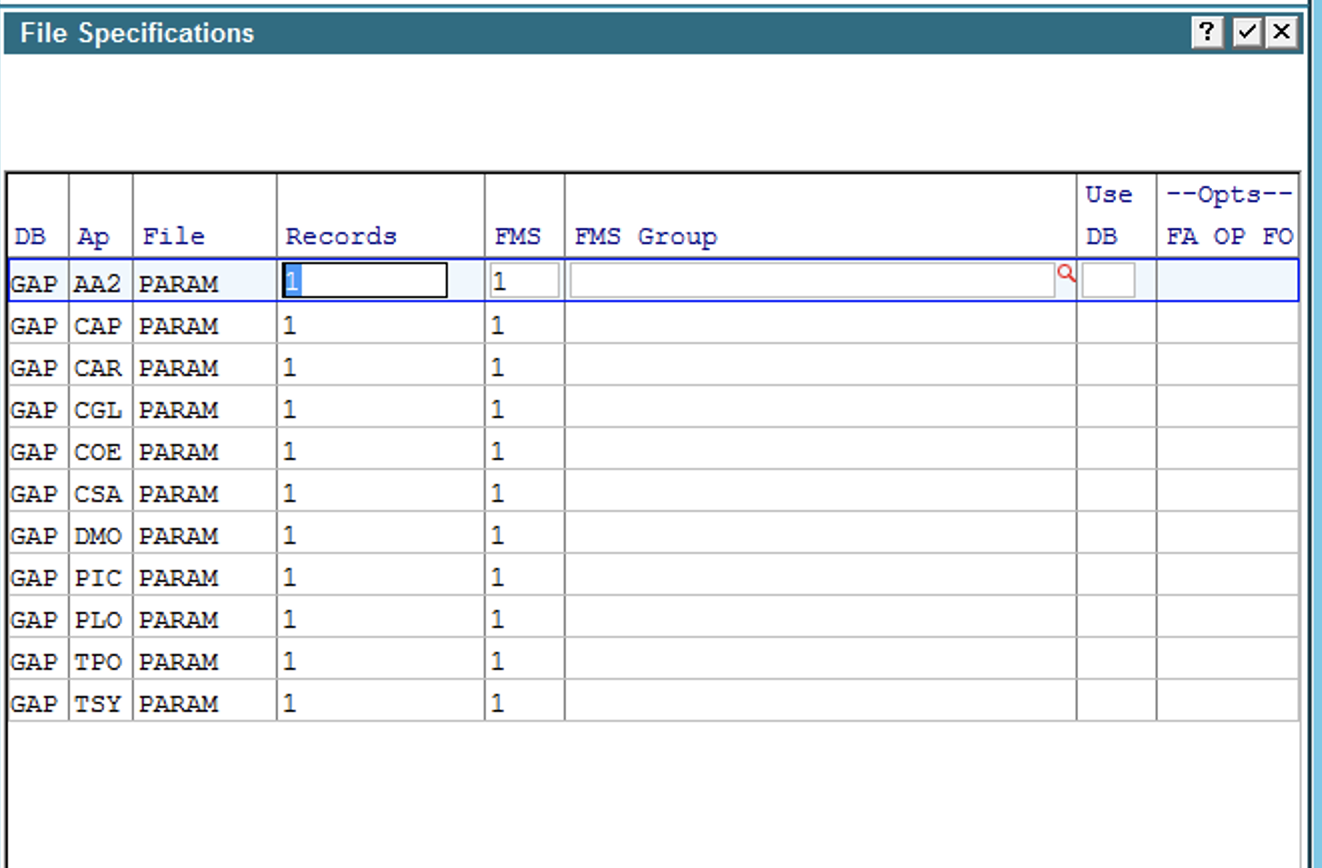
You will be positioned to the first selected file, and a count of the selected files is displayed.
This example shows all PARAM files in all Applications for Database GAP:
'Category' is only applicable to Data files. Category refers to the Category you entered in the Additional Attributes of the file in the Data Dictionary. The SCAN icon will show you a list of all the Categories found in the selected files. All fields are ANDed together to find matches. For example, if you only entered 'CUSTOMER' as a file name, then all files named 'CUSTOMER' would be selected. If you also entered a Database, then only files named 'CUSTOMER' in the specified database would be selected, regardless of Application. Or if you initially chose a particular Application, all Databases, then you could use this to select 'CUSTOMER' in all Databases.
You will be positioned to the first selected file, and a count of the selected files is displayed.
This example shows all PARAM files in all Applications for Database GAP:
Monitor Application Shows User StackThe Monitor application (System Administration -> System Setup -> Monitor Appx Sessions) has been enhanced to show the stack, ie, the parents/grandparents/etc of the current process. This can be helpful when the Monitor shows that the user is in a SCAN process, or PRINT ON SCREEN. By looking at the stack, you can see what actual process they are running. To see the stack, simply double click on a user on the Monitor display: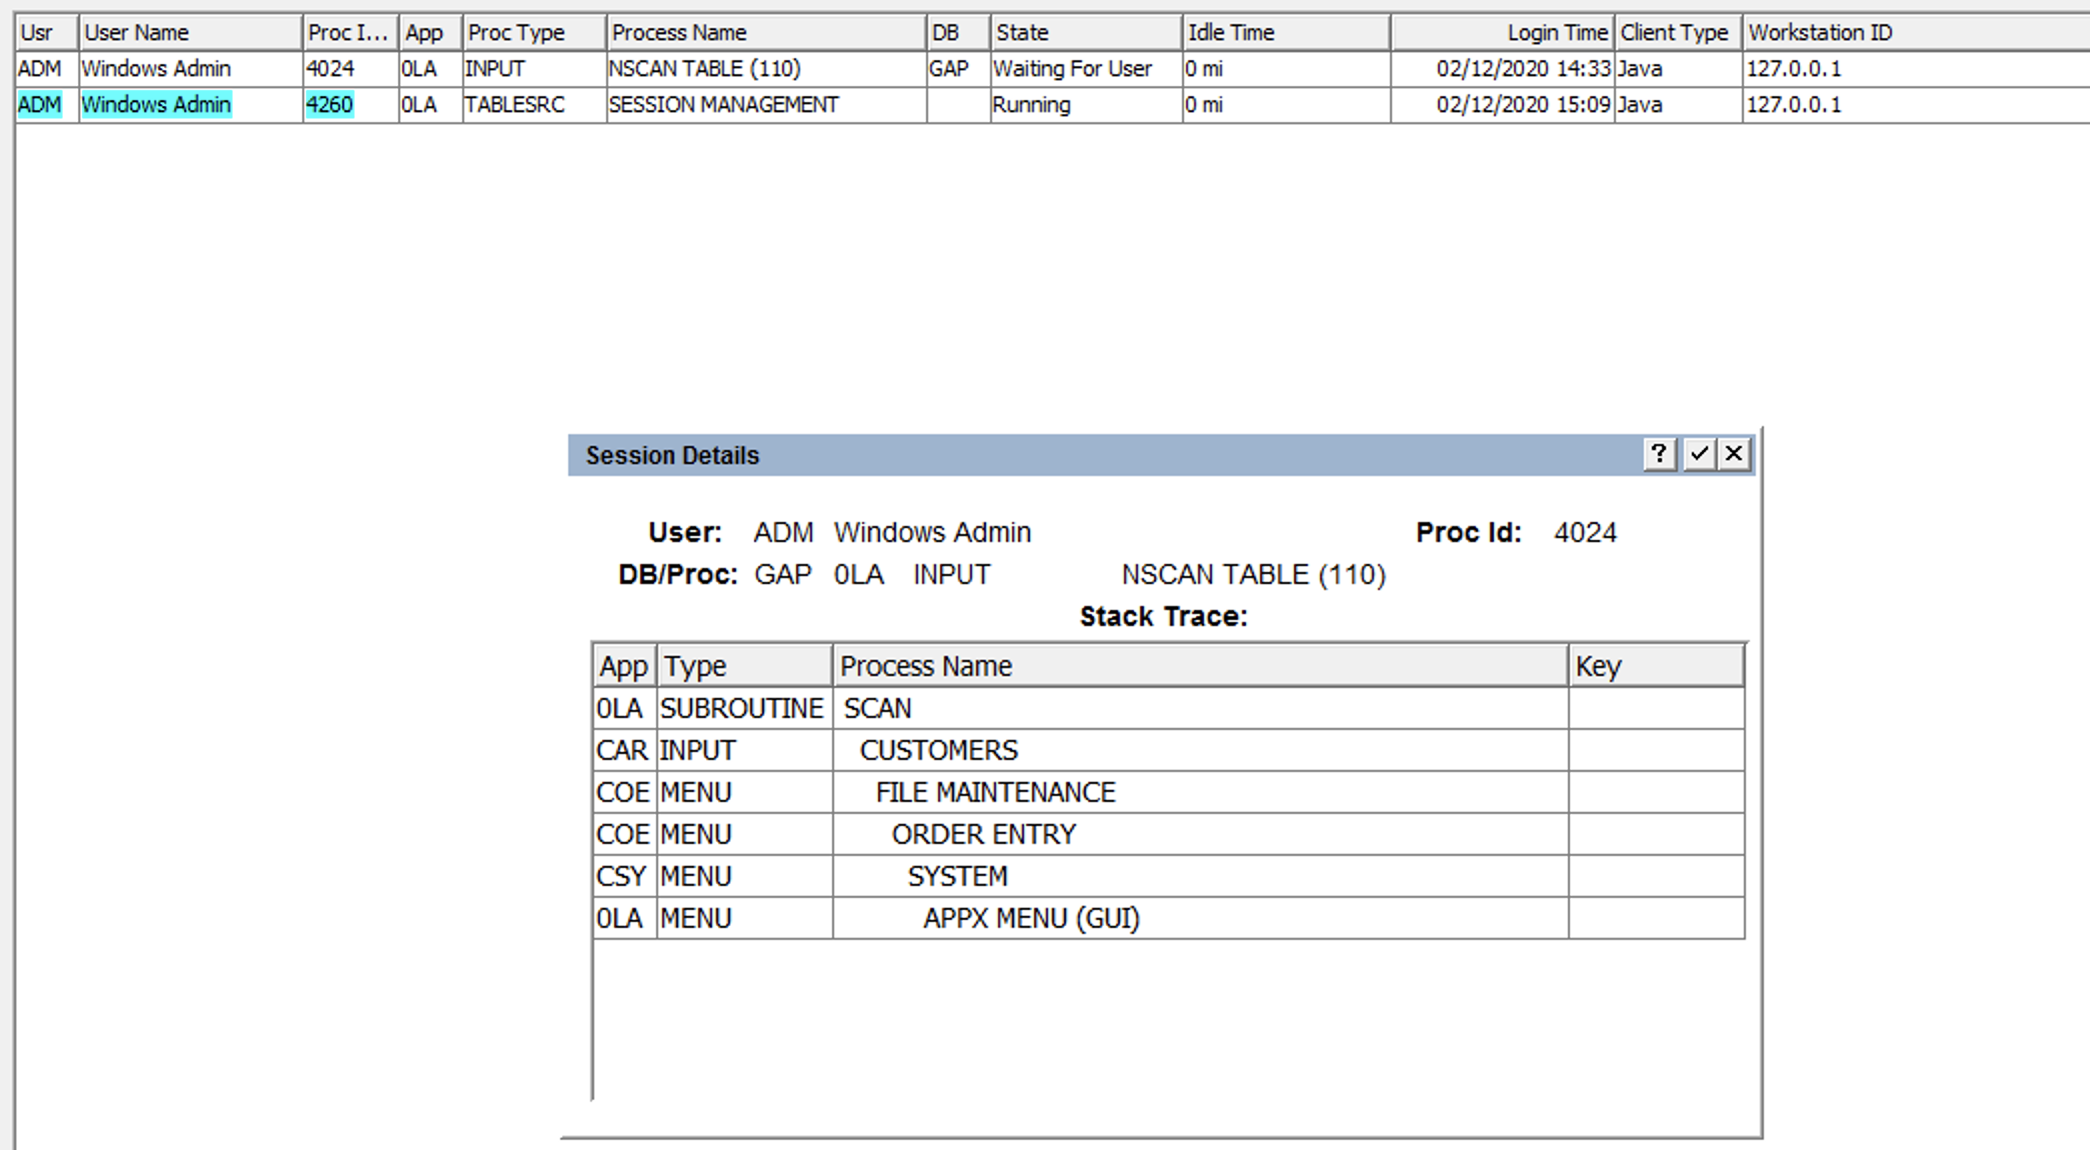 In this example, the main Monitor display just shows that the user is running 'NSCAN TABLE (110)', but by double clicking their row, we can see that they are running the CUSTOMERS input in the Order Entry application, which gives us a much better idea of what they are doing.
Note that the Monitor display also now shows the type of client (Java or HTML).
In this example, the main Monitor display just shows that the user is running 'NSCAN TABLE (110)', but by double clicking their row, we can see that they are running the CUSTOMERS input in the Order Entry application, which gives us a much better idea of what they are doing.
Note that the Monitor display also now shows the type of client (Java or HTML).
Email Distribution ListsThis release includes the ability to Email a report directly from APPX (requires the 'mutt' email client). Reports can be emailed directly to email addresses, or you can set up distribution lists and use those. Email Distribution lists can be found under System Administration -> Configuration -> Email Distribution. To add a new list, click the 'Add' button: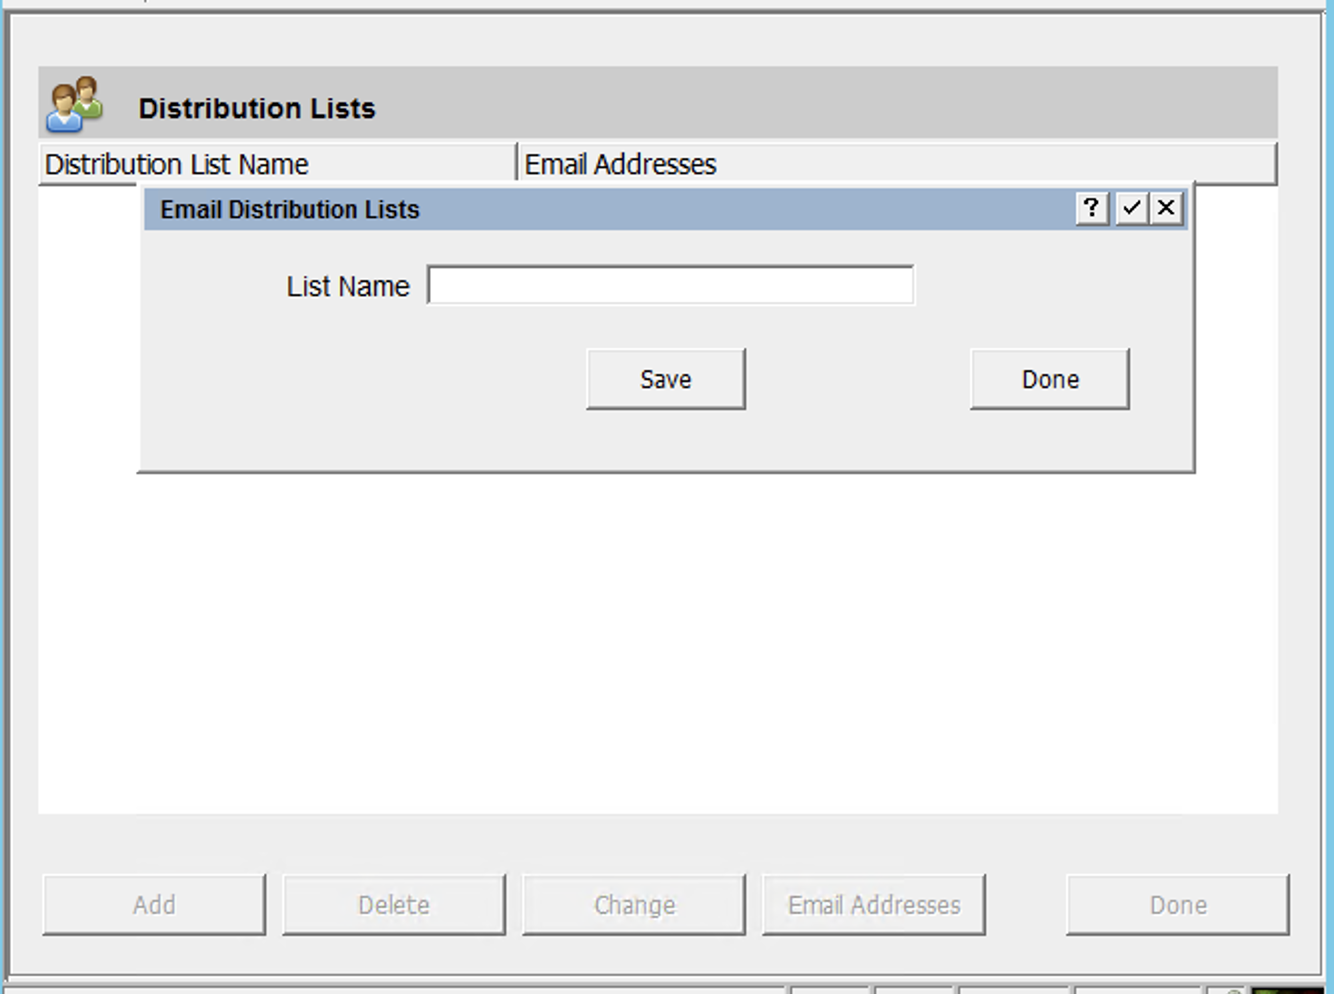 Once you enter a list name and click 'Save', you will see the list of individual email addresses:
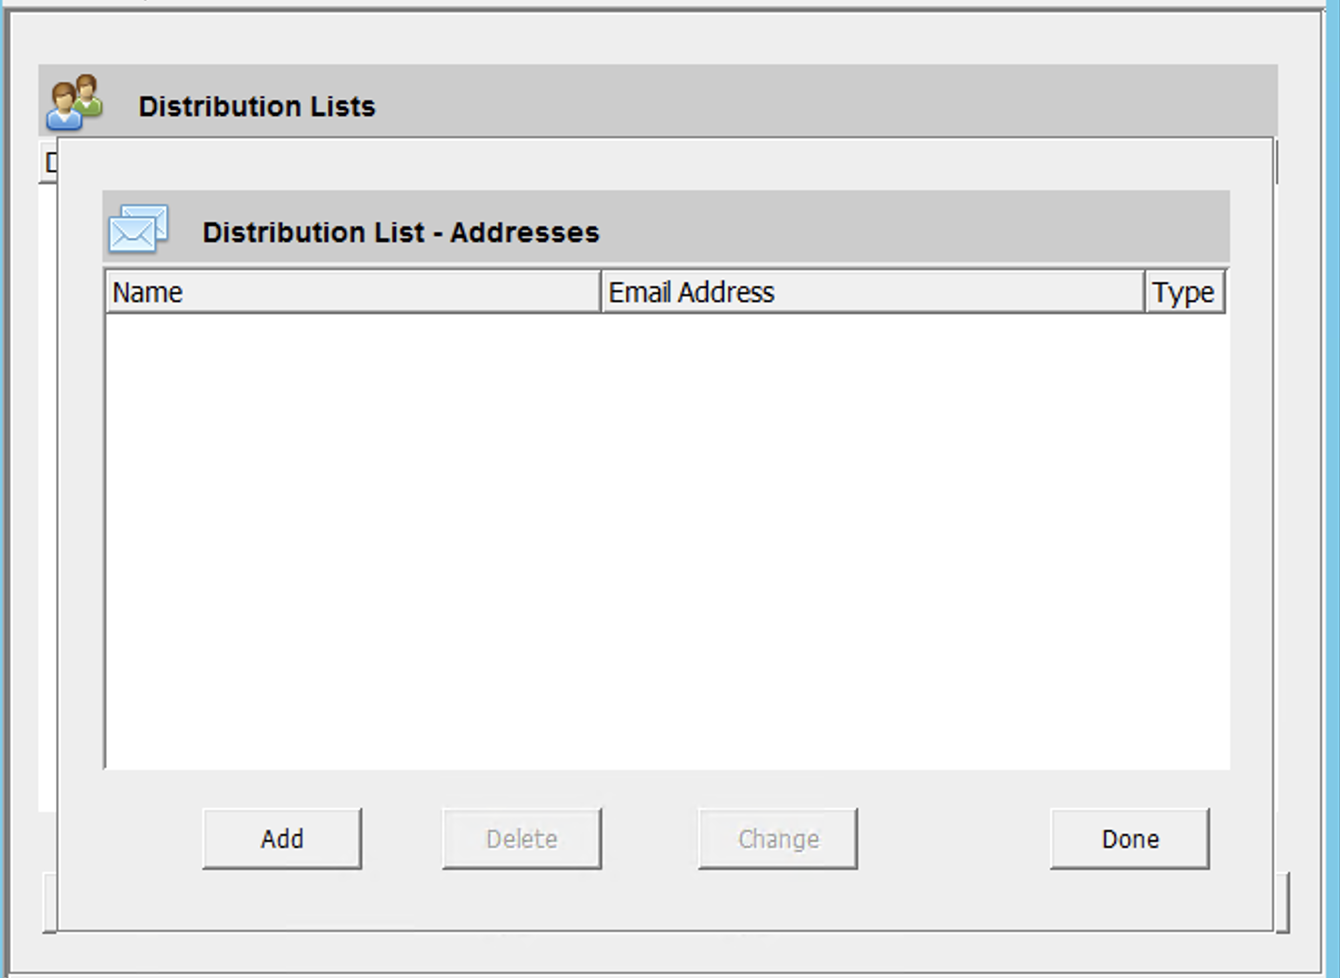 This will be initially blank, so click 'Add' to add the first email address:
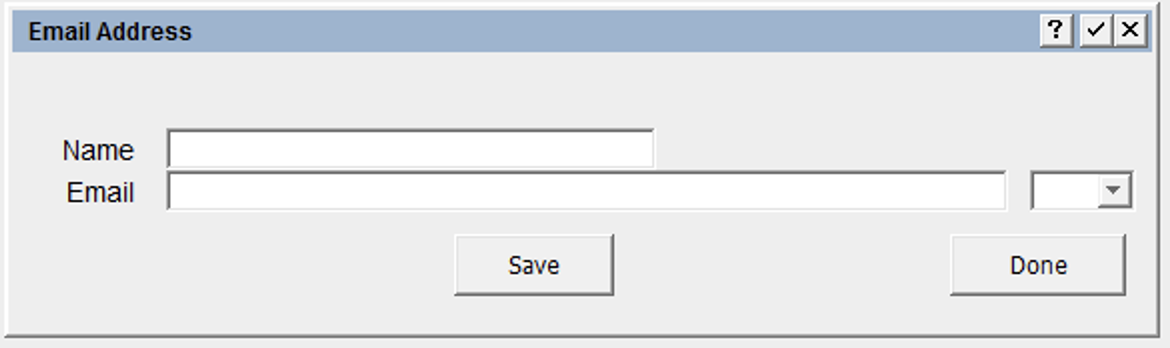 The 'Name' is optional, and if filled in, should be the recipients name. The drop down list allows you to choose if they are 'To', 'CC', or 'BCC'. Add as many email addresses as needed.
To delete or change an existing email address, select the address and then click Delete or Change.
To delete or change an entire distribution list, exit the list of email addresses, select the distribution list and then click Delete or Change as required.
These distribution lists will be then be available for users to choose on the new Print Disposition screen.
--
The 'Name' is optional, and if filled in, should be the recipients name. The drop down list allows you to choose if they are 'To', 'CC', or 'BCC'. Add as many email addresses as needed.
To delete or change an existing email address, select the address and then click Delete or Change.
To delete or change an entire distribution list, exit the list of email addresses, select the distribution list and then click Delete or Change as required.
These distribution lists will be then be available for users to choose on the new Print Disposition screen.
-- Comments
| |||||||||||||||||||||||
View topic | History: r7 < r6 < r5 < r4 | More topic actions...
Ideas, requests, problems regarding TWiki? Send feedback