Difference: 530DataExchangeFileFieldSource (1 vs. 2)
Revision 22013-12-31 - JeanNeron

Revision 12013-10-02 - JeanNeron
| Line: 1 to 1 | |||||||||
|---|---|---|---|---|---|---|---|---|---|
| Added: | |||||||||
| > > |
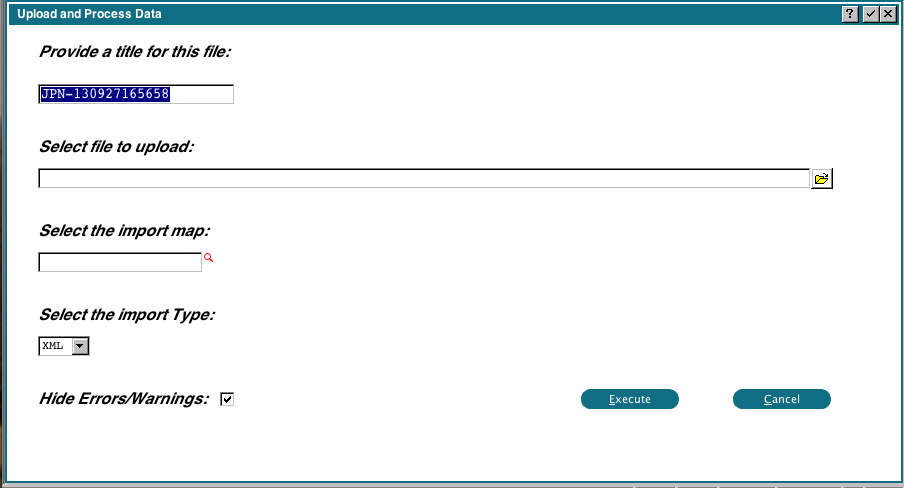
Define File/Field map from Source FileThis page describes how to map incoming data to Appx files/Fields using an existing XML file as a guide. _Overview:In order to use this option, you need a sample of the import file to work with. You can upload the file and then use it as a guide to create your File/Field Mapping. Once the mapping is complete, you can optionally import the data.UsageWhen you run 'Define File/Field Map from Source File', you will see the following display: The title will default to your user initials, plus the current date/time. You can change this if you wish. You can drag and drop an XML file, or use the file chooser. If you are going to base your new mapping on an existing mapping, you can enter the import map name. Currently 0DX only supports XML, you cannot change that. The 'Hide Errors/Warnings' flag normally suppresses any problems with the source file. If you are having problems importing a file, you can uncheck this flag to see if there are any formatting problems with the incoming data.
Once you click 'Execute' the tags and data will be extracted from the XML file, and you will be able to refer to them as you create your mapping. When this is complete, you will see the following display:
The title will default to your user initials, plus the current date/time. You can change this if you wish. You can drag and drop an XML file, or use the file chooser. If you are going to base your new mapping on an existing mapping, you can enter the import map name. Currently 0DX only supports XML, you cannot change that. The 'Hide Errors/Warnings' flag normally suppresses any problems with the source file. If you are having problems importing a file, you can uncheck this flag to see if there are any formatting problems with the incoming data.
Once you click 'Execute' the tags and data will be extracted from the XML file, and you will be able to refer to them as you create your mapping. When this is complete, you will see the following display:
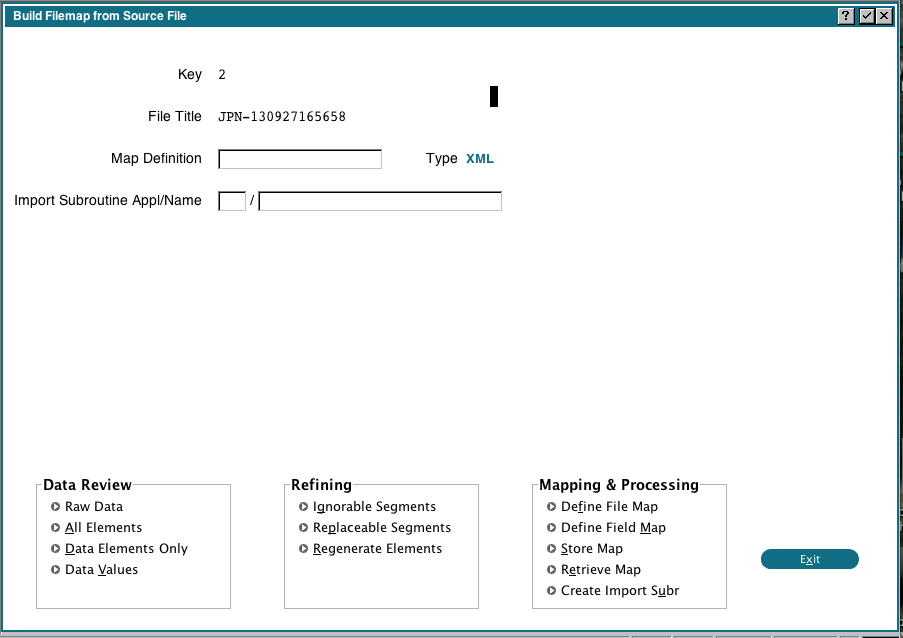
 If you entered a Map name in the first step, that mapping will be loaded for you and the name will be shown here. At this point, all the elements and data have been extracted and are stored in some internal files in the 0DX application. We can use those to help us map the files and fields.
Data ReviewThe Data Review options allow us to examine the extracted data.Raw DataThe 'Raw Data' option displays all the extracted identifiers and the associated data: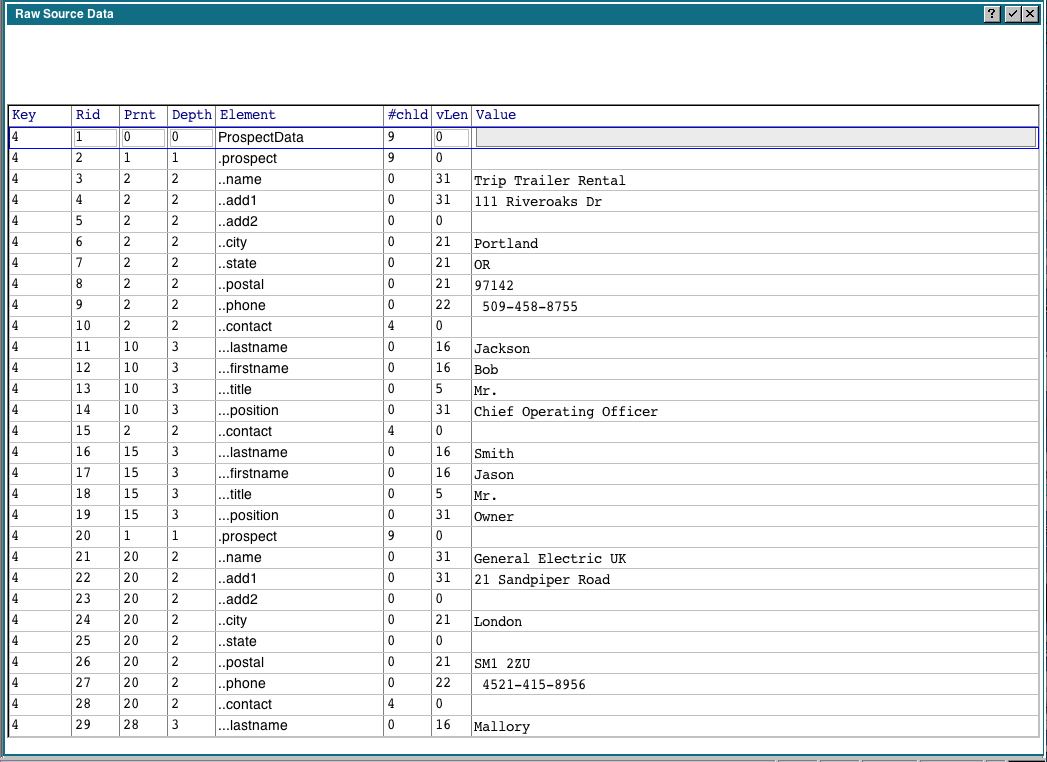 The columns have the following meanings:
All Elements/Data ElementsThe 'All Elements' and 'Data Elements only' display the same information, the only difference is the 'Data Elements only' will only show you the elements that contain data: The columns have the following meanings:
Data ValuesYou can click the 'Data Values' button for any selected row, and you will get a display of all the actual data values for each occurence of the element: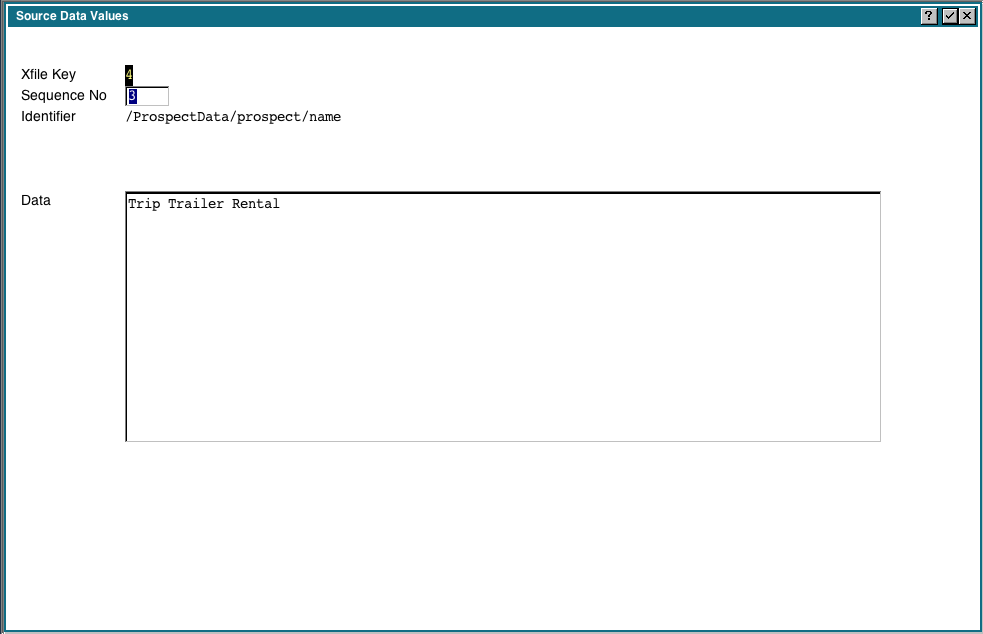 The 'Data Values' option shows us the same information as above, but not constrained to any element, ie, we can scroll thru all the extracted data.
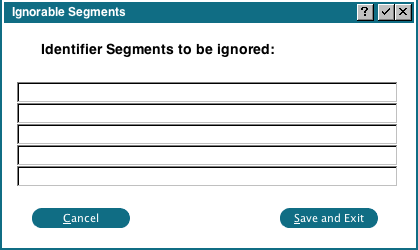
RefiningThe 'Refining' section allows us to fine tune the extraction of identifiers from the XML file.Ignorable SegmentsIn the 'Ignorable Segments' popup we can specify segments that are to be ignored (removed) when extracting the identifiers. For example, if 'ProspectData' was the top level identifier and is prefixed on all identifiers, we can remove it by entering 'ProspectData' as a segment to be ignored.
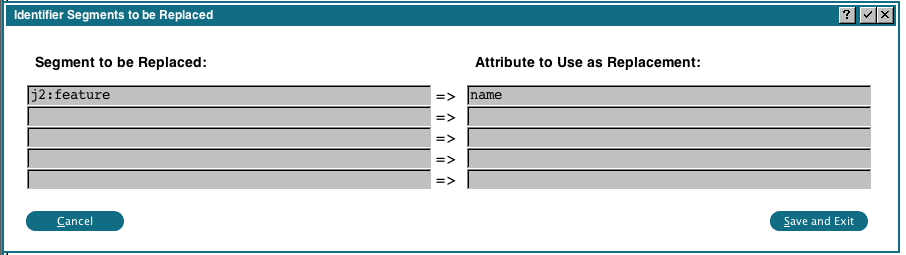
Replaceable Segments'Replaceable Segments' are used for a very particular situation. Consider the following XML fragment:<j2:feature name="SourceName"> <j2:value>136</j2:value> </j2:feature> <j2:feature name="FileSystemProperties"> <j2:features> <j2:feature name="Path"> <j2:value>/usr/local/appx/archive/110928/136</j2:value> </j2:feature> <j2:feature name="LastModified"> <j2:value>2011-09-28T20:19:52-04:00</j2:value> </j2:feature> </j2:features>
Notice that the Segments all have the same name (j2:feature), and the identifier is really encoded in the attribute (name="..."). In this case, we can use the Replaceable Segments to move the attribute to the segment, which will allow us to map the segment to an Appx field:
 Now our segment names will become "SourceName", "FileSystemProperties", "Path", "LastModified" instead of "j2:feature"
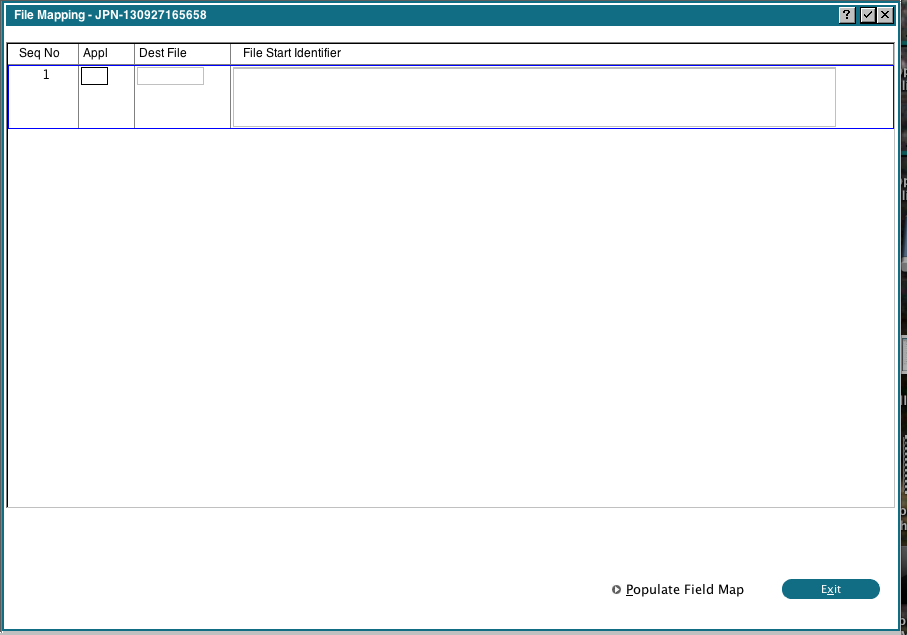
Regenerate ElementsWhenever you change the Ignorable or Replaceable segments, you must run 'Regenerate Elements' to reprocess the XML file using your new rules.Mapping and ProcessingThis is where we can enter or modify the mapping rules. A 'File Map' indicates when a new record should be written to the Appx file, and a 'Field Map' indicates how the incoming data should be moved to an Appx field.Define File MapWhen you run 'Define File Map' you will see the following display: If you provided a map when you loaded the source file, then any existing File Mappings will be shown. The columns have the following meaning:
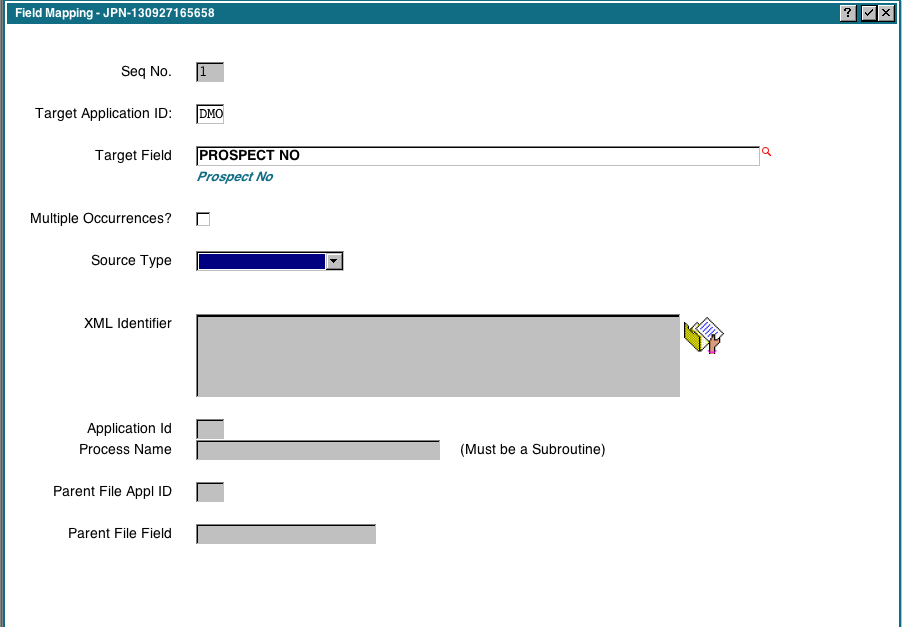
Define Field MapWhen you run 'Define Field Map' you will see the following display: This is where we define how each Appx field should be populated. If you ran the 'Populate Field Map' option in the previous step, then this display will be populated with all the fields in the selected file(s). If you did not do that, you have to manually add each field we are importing.
For each field choose an appropriate 'Source Type'. if you leave the 'Source Type' blank they will be assigned the default values as per the Data Dictionary.
The valid source types are:
This is where we define how each Appx field should be populated. If you ran the 'Populate Field Map' option in the previous step, then this display will be populated with all the fields in the selected file(s). If you did not do that, you have to manually add each field we are importing.
For each field choose an appropriate 'Source Type'. if you leave the 'Source Type' blank they will be assigned the default values as per the Data Dictionary.
The valid source types are:
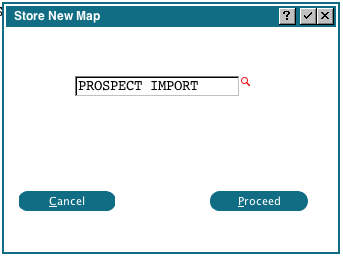
Store MapThis option allows you to save the current mapping. If you enter the name of an existing mapping, it will be overwritten with the new mapping.
Retrieve MapThis option allows you to load an existing mapping. After loading it, you can refine it using the 'Define File Map' and 'Define Field Map' options, then save it under a new name or replace the original, using the 'Store Map' option.
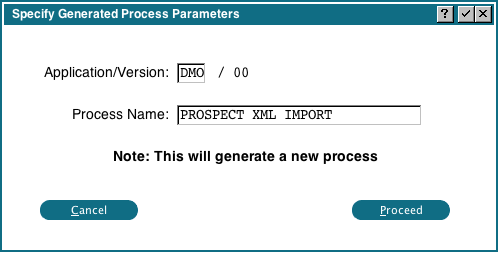
Create Import SubrThis option will create a subroutine that does the work of importing the XML data into our Appx files: Fill in any Application and Process Name you want. When you click 'Proceed', the subroutine will be written and compiled. If any errors occur during the compile, you can view the subroutine in Application Design. You can also further customize the subroutine, however, you will lose those changes if you 'Create Import Subr' again.
Comments:Read what other users have said about this page or add your own comments.-- JeanNeron - 2013-10-02
| ||||||||
View topic | History: r3 < r2 < r1 | More topic actions...
Ideas, requests, problems regarding TWiki? Send feedback