| |
| META TOPICPARENT |
name="Main.530DataExchange" |
Define File/Field Map |
| |
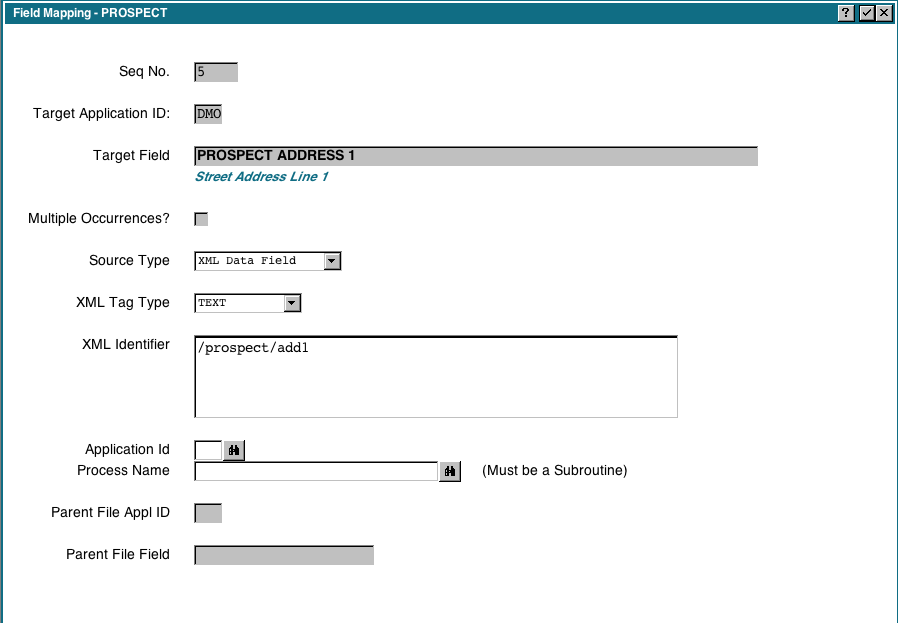
The 'Details' button will allow you to change the specifics of a field mapping: |
|
<
< |  |
>
> | |
| |
The valid source types are: |
|
<
< |
- XML Data Field. When we choose this type, the XML Identifier, Application Id and Proces Name fields will become available for input. The Application Id and Process Name allow us to specify a subroutine that we want to run when this field is imported (optional). The subroutine will be invoked DETACHED and will be passed 2 fields. You should RECEIVE 2 fields, the first field is the data extracted from the XML file and the second field is the XML identifier. You can change the first field, and the resulting data will be written to the Appx file.
|
>
> |
- XML Data Field. When we choose this type, the XML Identifier, Application Id and Proces Name fields will become available for input. The Application Id and Process Name allow us to specify a subroutine that we want to run when this field is imported (optional). The subroutine will be invoked DETACHED and will be passed 4 fields. You should RECEIVE three type 'FIELD' and one type 'RECORD'. The first field is the data extracted from the XML file, the second field is the XML identifier, the third field is the Element Type (TEXT, ELEMENT, END ELEMENT, etc) and the last field is the contents of the record buffer. This allows you to refer to other fields in the record if you need them. Remember that only the fields that have been processed will have a value. You can change the first field, and the resulting data will be written to the Appx file. You can also change fields in the record buffer, however if a subsequent mapping assigns a value to a field you changed, your change will be lost.
|
| |
- Parent APPX File. We use this when we want the Appx field to be filled in from another (Parent) Appx File. For example, when importing the Contacts, we want the CONTACT PROSPECT NO field to be filled in from PROSPECT NO. When we choose this type the Parent File Id and Parent File Field fields will become available for input.
- Sequence Number. Use this to automatically assign a sequential sequence number to the Appx field. Note that the sequence number starts at zero every time you run the import step, so normally you would not use this to generate unique keys in an existing Appx file that uses a sequence number key.
- Date/Time Stamp. The current date/time will be set in the field.
|